

Background
I wrote about finding fast computers for music production but what if you have a fast computer that still doesn’t feel very fast? In this post, I’ll cover some tools and strategies that are useful for performance tuning when you have a fast computer but are experiencing less-than-expected performance.
Initial sanity checks on your system
Before proceeding into performance tuning, you should probably first validate the performance of your computer. Install and run Geekbench and make sure your single core is at least 1000 and multicore 5000+. This is the bare minimum for running Ableton and realistically you probably want double those numbers (2000+ single, 10,000+ multicore) for buttery smooth Ableton performance. You can learn more about this in Identifying the best music production computers.
If your computer parts are not matching the expected Geekbench performance you should diagnose whether your computer is broken or otherwise unstable. There are plenty of excellent resources on this on the web so I won’t cover it but a short checklist of things I do are:
- Is the computer running too hot? Use Task Manager or CoreTemp to check.
- Is the RAM failing? Use MemTest86 – if there are *any* errors your RAM should be replaced.
- Is the disk slow or failing? Use CrystalDiskMark to test it.
- Is the system unstable? Use Aida64 to check its stability.
As a second sanity check, you may want to check whether you selected some parts in your computer build that are bottlenecking your performance. The Bottleneck calculator tool is targeted to people building gaming PCs but is a good sanity check on the RAM and processor you selected for your computer. In truth, all we’re doing in performance tuning is identifying bottlenecks so if there’s one in the actual build of the system, you should fix that before doing work you will need to repeat.
After verifying your computer is reasonably fast in Geekbench, it’s time to look at what’s killing your performance outside of the raw power of your computer.
LatencyMon
LatencyMon is the most useful tool I have found for easily and quickly identifying system-wide issues impacting the performance of Windows computers for music production. The following screenshot shows LatencyMon after you open it up.
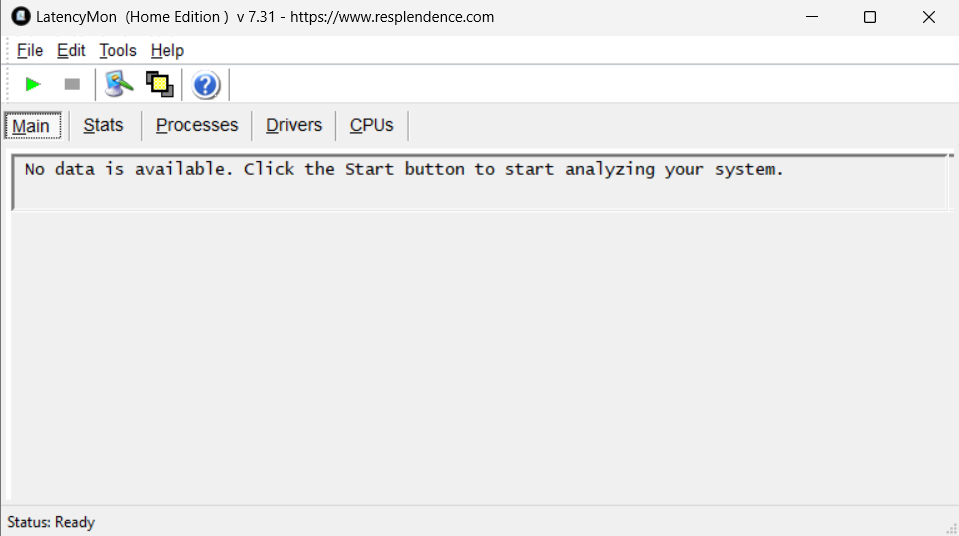
Before you open Ableton, click the green triangle (Play) button to begin recording system data for analysis. When you click this, the LatencyMon software will observe your computer focusing in on the bottlenecks impacting realtime audio performance.
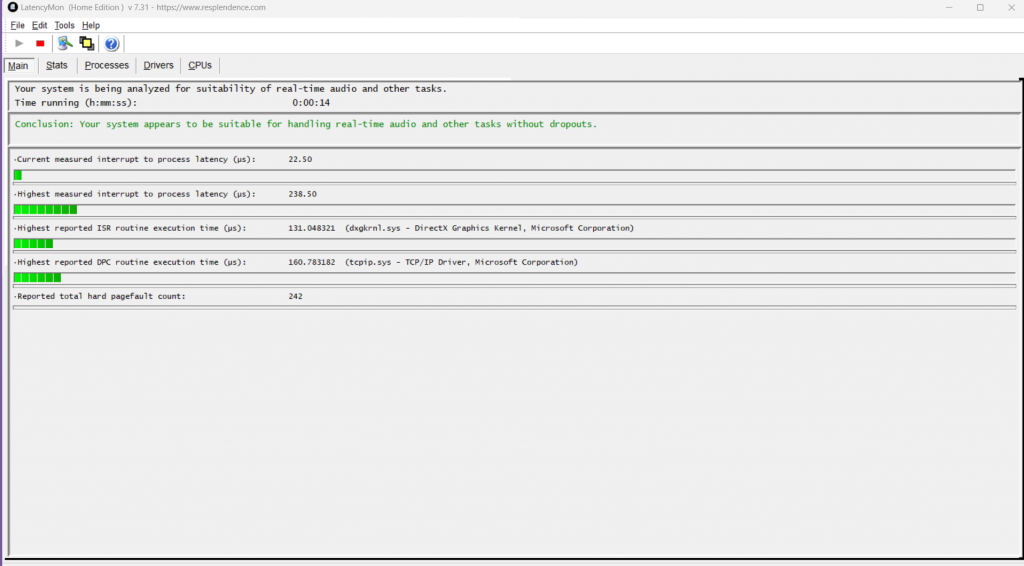
Now, open a project and work on it just as you normally would.
After a few minutes of working on a project click the red sqwuare button in LatencyMon (stop) and look at the profiling data that it has recorded. At this point, LatencyMon may report that your system is not ready for Real-time processing at this point due to page faults.
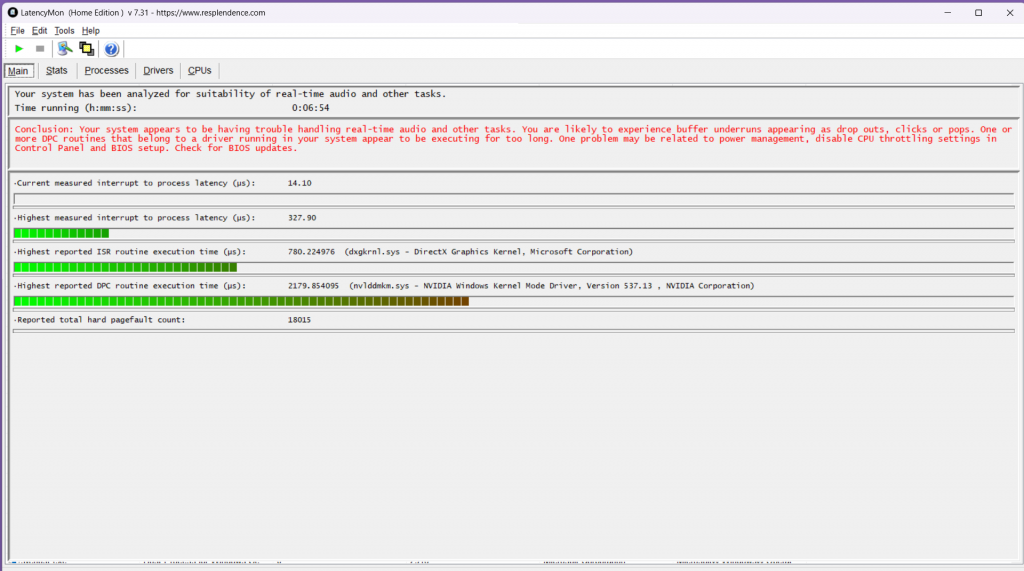
You can drill down into the details of what is causing the issues by clicking on the various tabs. The stats tab will highlight instances where a problematic process is preventing realtime applications from operating smoothly. For example, you can see here where a process is blocking Ableton from properly functioning.

I like to imagine LatencyMon as a fussy coach pointing at a player on a sports team who is hungover dogging through practice. In this case, LatencyMon is yelling at the naive Windows security app that is holding up the entire computer by blocking everybody else from accessing the disk and RAM. It\’s done this over 3000 times while Ableton was trying its best to smoothly playback audio.
What to do when you find processes to blame
Typically you will find 3 types of performance issues:
- Applications and processes causing latency
- Drivers causing latency
- Scarce resources causing latency
If the issue is being caused by a process or application, you can close / kill the process through Windows Startup or manually killing / closing the application or process with task manager.
If there is a driver causing latency, you can disable or update the driver.
If there is a resource scarcity issue, you can selectively upgrade the component in your computer with a faster component (e.g. upgrade RAM, CPU, or disk) or can improve the performance of the component through the BIOS or other tuning approaches (overclocking, XMP, XTU). The following examples are optimizations that I made when seeing issues in LatencyMon:
- DirectX was blocking – this indicated the GPU was blocking Ableton so I upgraded my driver and disabled applications using the GPU
- DirectX still was blocking – this was indicative of the DirectX audio causing latency on the audio pipeline. I switched from a WDM audio driver to ASIO
- bzserv.exe was blocking – this meant that the BackBlaze service was hoarding disk and memory resources while I was using Ableton so I disabled the BackBlaze service and set it to turn on and off only when I wanted it to run.
- There were dozens of instances of dropbox.exe causing pagefaults – this meant that Dropbox was abusing all of my system bringing it to a screeching halt. I uninstalled DropBox and now rely on using their web interface for manual backups to avoid it causing nonstop system-wide performance issues.
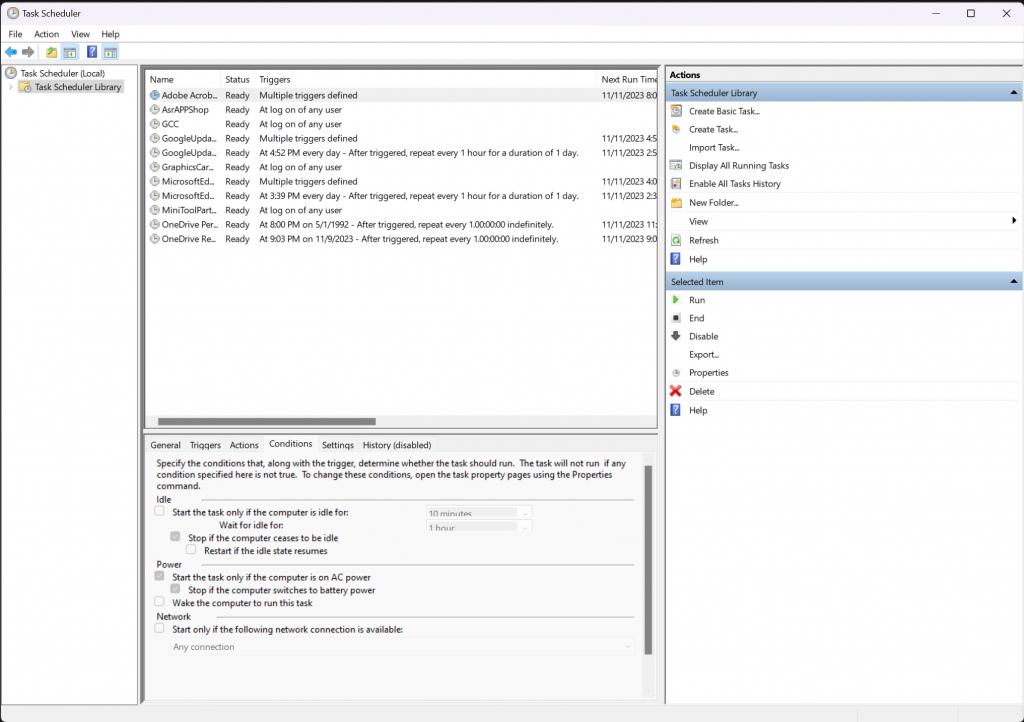
The Windows Task Scheduler can start services when the system is idle and stop them when the system ceases to be idle. This is a helpful tool for preventing greedy apps such as DropBox and BackBlaze from ruining your realtime performance.
Windows Performance Analyzer
In order to further analyze what happens in different types of projects in Ableton, you can do additional profiling in Windows with a tool called Windows Performance Analyzer that takes the output from another tool, Windows Performance Recorder – it’s installed from the “ADK”. These tools are effectively the performance tab of Task Manager on steroids: measuring over time what aspects of your system are in use and by how much.
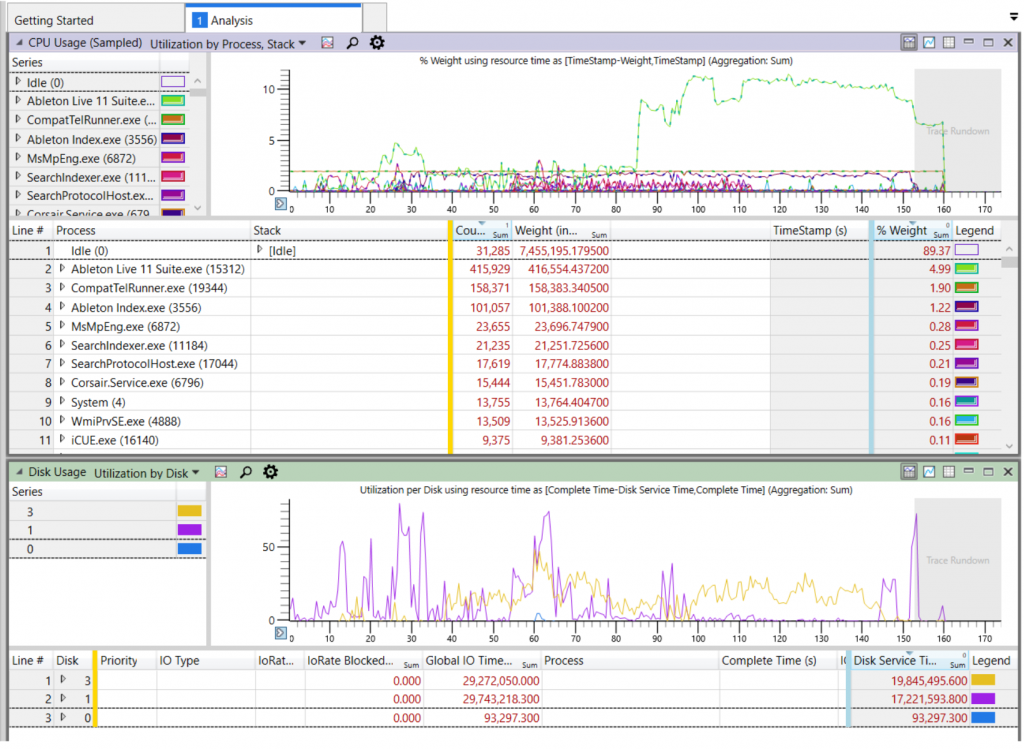
Time is on the x-axis and the utilization is on the y. Looking at the bottom graph, you can see where I loaded Ableton (10 seconds) and when the graph reaches 30 seconds, you can see where I loaded the project – big disk utilization on the bottom chart. Note that the purple graph is for the disk with my Ableton resource files (VSTs, samples, etc) and the yellow graph is my OS drive.
Returning to the top graph, around 55 seconds you can see where I clicked play on the project – big CPU utilization. You can see the shift from reading resources in the bottom graph move to system/OS resources around the time playback begins and the disk operations move away from my RAID-0 drive to the OS.
Here’s another example that I tried to make more I/O intensive by putting my project on a USB drive.
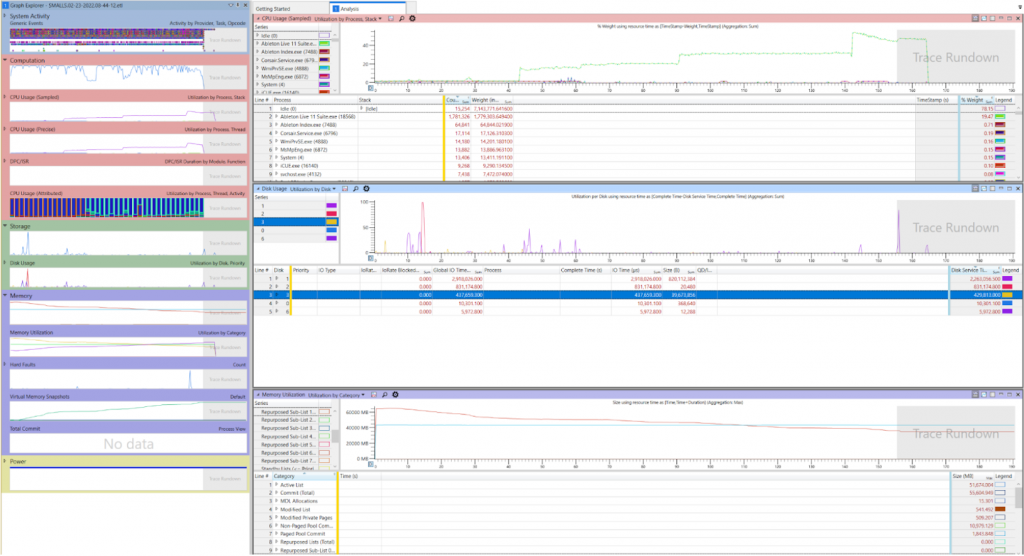
What I found was that initial loads were slower (e.g. the time to open the project) but after the initial loading, everything went to RAM and we would experience similar performance to our other more CPU intensive where the bottleneck was on the CPU.
Windows Performance Tricks for DAWs
Now that you have verified that there are no systematic issues with your computer causing performance to degrade, you can try a few additional tunings to improve audio playback.
Adjusting the input and output buffers
Your DAW provides a calculation of the hardware latency (how long the hardware is taking) in the preferences as “Overall latency” which you can think of as base latency because this excludes the latency caused by audio devices in your Ableton set in this example:
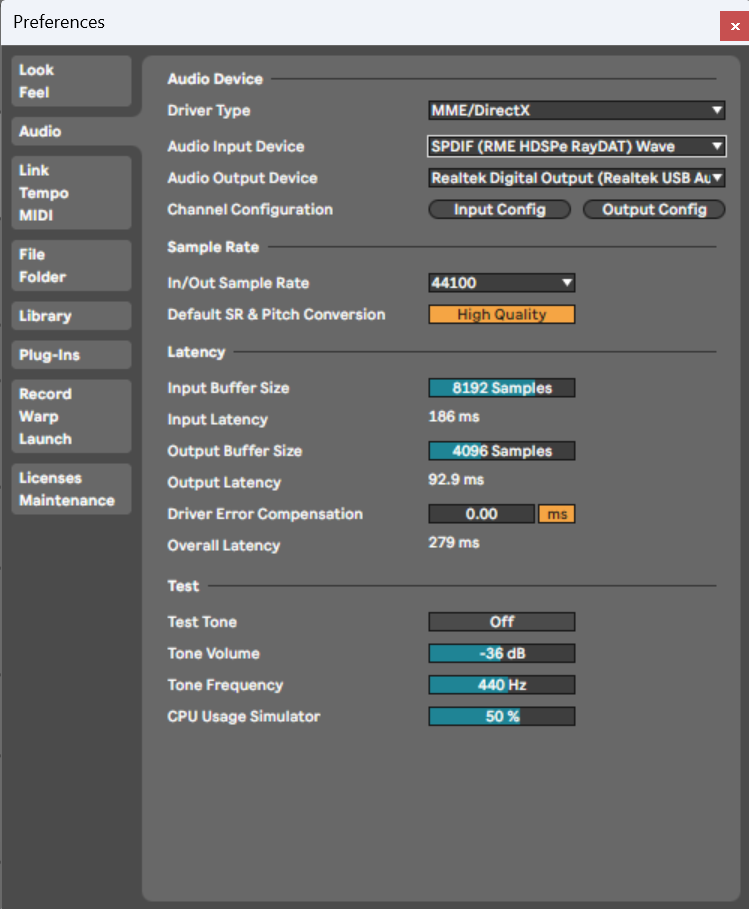
You can reduce the latency value that Ableton provides by altering the input and output buffer sizes. Lower buffer sizes will translate to lower (shorter) latency but become more sensitive to CPU load. Higher buffer sizes will cause longer latency – e.g. delays in time from midi input to audio output – but will be more resilient to CPU load.
In general, you should start by experimenting with different audio devices and latencies in order to tune the latency of your DAW seeking a balance between low latency and reliable playback. When you are using ASIO drivers, the buffer sizes are controlled in the Hardware Setup menu of the driver panel:
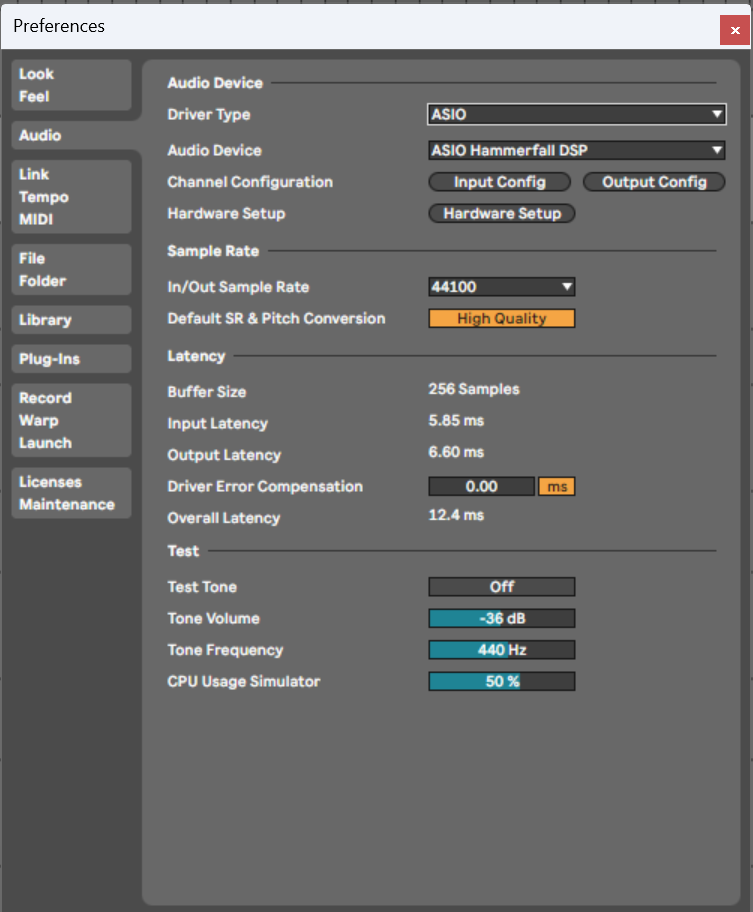
The way that the latency is presented in the window that pops up will depend on the audio driver for your soundcard.
Try different audio frameworks
To guide your evaluation of different devices, you should take into consideration the audio framework being used by your DAW. These are assigned in the Ableton Live preferences menu under Audio > Driver Type. Windows offers support for multiple audio pipelines, principally the Windows Driver Model (WDM) and the Audio Stream Input/Output (ASIO). The performance of ASIO is almost always going to be lower latency than WDM. Within WDM there are WASAPI, DX, and WAVE – WASAPI is newer than DX is newer than WAVE and choosing the newest available framework will generally result in better performance.
You will notice a change in the latency when switching driver types and can tune from here by starting with the lowest latency driver provided and tweaking the buffers.
Try generalized ASIO frameworks
Asio4All is a wrapper for WDM that provides an ASIO facade. Using ASIO4All sometimes will improve the performance of audio and can also allow you to bridge together multiple audio interfaces in Windows in cases where you have something like a synthesizer that has a built-in audio interface provided via USB.
Image-line provides a specialized version of ASIO4all when you install FL Studio. This driver is usually better than the generic ASIO4All driver and becomes available after you install FL Studio.
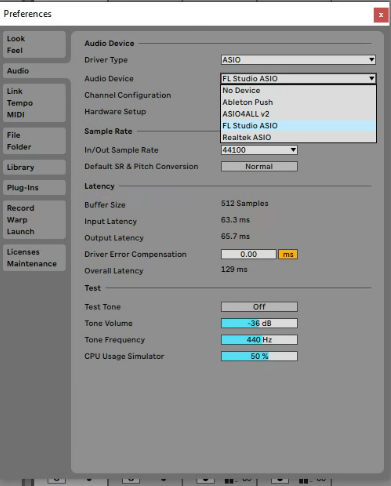
If ASIO4All is not working well for you, Install ImageLine FL Studio and try their ASIO driver. I have found the FL Studio ASIO driver to be very useful when tuning the common Realtek audio interfaces (RTL*).
Conclusions and further tuning system performance
Sometimes changing the power plan for Windows can make modest improvements in your system performance. You can find the power plan in the Power, Sleep, and Battery settings of Windows. The available power plans usually will include a “Performance” plan that can perform better than an Eco, Power Saver, or Balanced power plan.
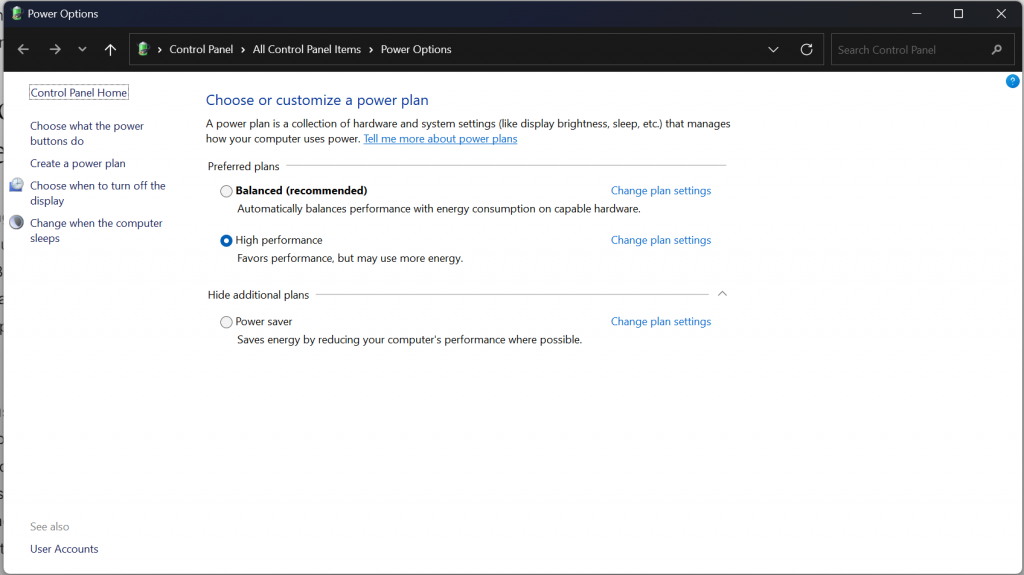
I have occasionally found that the balanced power plan exceeds the capabilities of the performance plan so be sure to try turning back in case this is happening for you as well. The way that power plans work is setting the upper and lower thresholds of the CPU performance which can affect heat, which affects throttling and performance of your CPU. There is also an “Ultimate Performance” power plan that you can experiment with if you’re feeling bold.
A final option for pushing your system to run faster is to push the settings for your computer beyond their specified threshold with overclocking. I’m not an advocate for overclocking because it can cause system instability which I find to be worse for music production than latency and can send you down a rabbit hole of upgrades and system-level changes to account for the additional heat or other potential causes for instability.
All things considered, you’re probably better off trying to upgrade the bottleneck components of your system instead of overclocking.
That said, I’ll provide an outline of the things you can try, proceed at your own risk. The following changes are typical in overclocking a computer:
- Enable XMP or EXPO settings for your memory in the system BIOS
- Use Ryzen Master or Intel Xtreme Tuning Utility to tweak your CPU
If after you have exhausted all of these options you’re still not getting the results you want for how you produce music, you are probably going to have to consider upgrades for your computer, which I have discussed in my selecting the best computers for music production post. I hope you’ve found this helpful!
Additional Resources and References
Benchmarking
ASIO
Ableton