

Background
Oftentimes when getting feedback on music that you’re working on, you will upload it to a streaming service like Soundcloud and share it for feedback. When you’re first doing this you’ll probably encounter the problem where relative to other tracks, your track sounds weak and quiet.
Because our ears tend to hear louder things as “better” this can make it difficult to get reasonable feedback other than, “hey your track is really quiet, come back with a louder track” and then you have to wait until there’s another opportunity to get feedback after making it louder for the person giving you feeedback.
To go through the entire process of getting a clean mix and get it mastered is overkill just for feedback. This is especially true when it’s an early point in the development of a track. To solve this, producers tend to quickly master their tracks using tricks that get things louder without having to make considerable changes to the overall track – this is just getting it 80% there and takes only a little time instead of the considerable time it can take to mix down the track to stems, gain stage, and then master.
Loudness is a somewhat complicated thing because it is something that is perceived and measured in various ways. True peak is a measure of the highest point of loudness reached and we have different measures of true peak. There’s also loudness units full scale (LUFS) or root means squared (RMS) which takes an average of loudness over time windows and corresponds more closely to perceived loudness. Many DAWs do not include an RMS / LUFS meter so you can use the freely available YouLean to get a basic idea of the LUFS in your track while you produce. Most meters in a DAW will present the loudness as true peak so you will just see the loudest moment in a channel on the mixing meters.
In this post, I’ll share a few ways to get things louder quickly without destructively processing your entire track creating work you have to undo later to resolve feedback.
Method 1: Normalize on Export
Normalizing your track will uniformly stretch the loudness of your track so that the loudest part of the track reaches the limit of the export format. If you’re writing your track quietly (e.g. you are not clipping on master by exceeding the volume limit threshold) this will bring up all of the track so that when you upload it for sharing, it will be reasonably loud.
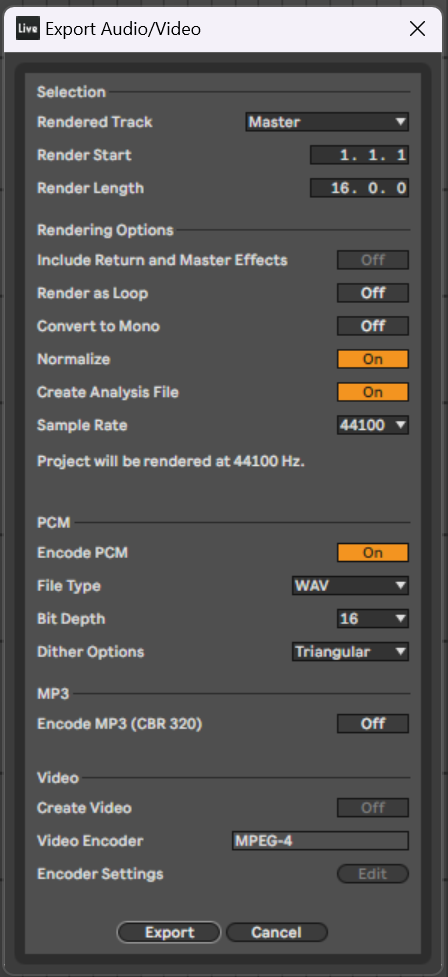
In Ableton, when you export your master, you can check the Normalize option to accomplish this. Many DAWs will enable normalization by default to make exports sound better.
Method 2: Use a compressor / limiter
If your track is already clipping above the loudest point for audio files, you will need to do more to make it loud than simply stretching the entire volume range louder because normalizing will not affect anything or could even reduce the volume of the track to prevent clipping. A compressor is a tool that lets you make things louder by reducing the loud parts when they exceed a loudness threshold so that the overall loudness (LUFS) increases by bringing up the quieter parts.
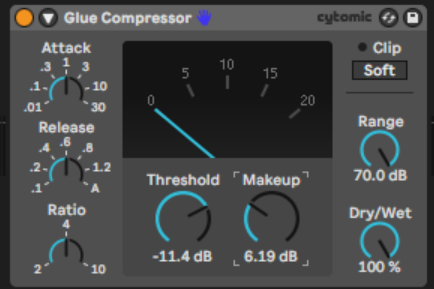
A compressor changes the dynamic range (e.g. compresses or expands) of sounds so that sounds are either more dynamic (larger distance between loudest and quietest) or less dynamic (smaller distance between loudest and quetest aka “squashed”). The ratio is how quickly the compressor changes the sound when a threshold is reached. After you compress a sound, you will gain the sound afterwards (makeup gain) so that the volume is similar to the original sound that went into the compressor. The following image shows the Ableton Glue compressor with makeup gain and a threshold.
A limiter is a compressor with an infinite ratio, meaning the limiter will completely reduce the volume when it exceeds a threshold. Limiters typically gain the volume of sounds coming into the limiter so that the overall perceived loudness (LUFS) is increased as things are compressed: things that are made louder and limited have a higher perceived loudness because they stay louder longer. For quick masters, producers oftentimes use the Pro-L limiter from FabFilter with lots of gain (6-12dB) and the transparent limiting style.
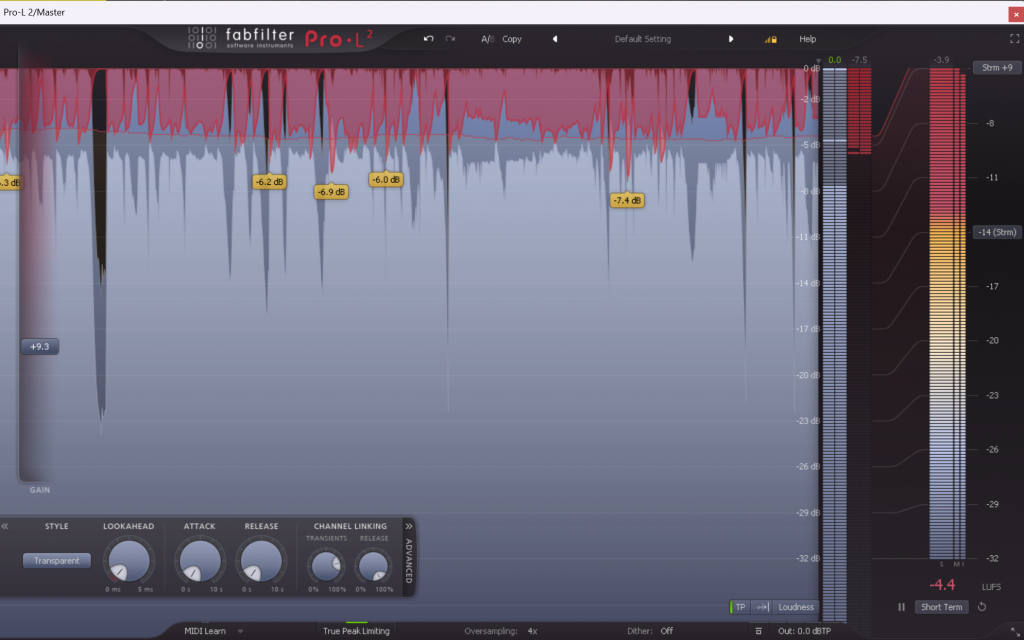
Note that Pro-L2 also includes a metering plugin that you can use to see the LUFS using the FabFilter algorithm while you play with the limiter settings.
Clipping
Sometimes when you’re using a limiter, you can hear the effects of the limiter happening – the character of this happening is some sound consistently causing all of the track to become quiet all of a sudden.
A clipper is a tool that removes (clips) the sounds that exceed a limit without reducing the overall volume of the sounds that do not exceed the threshold.
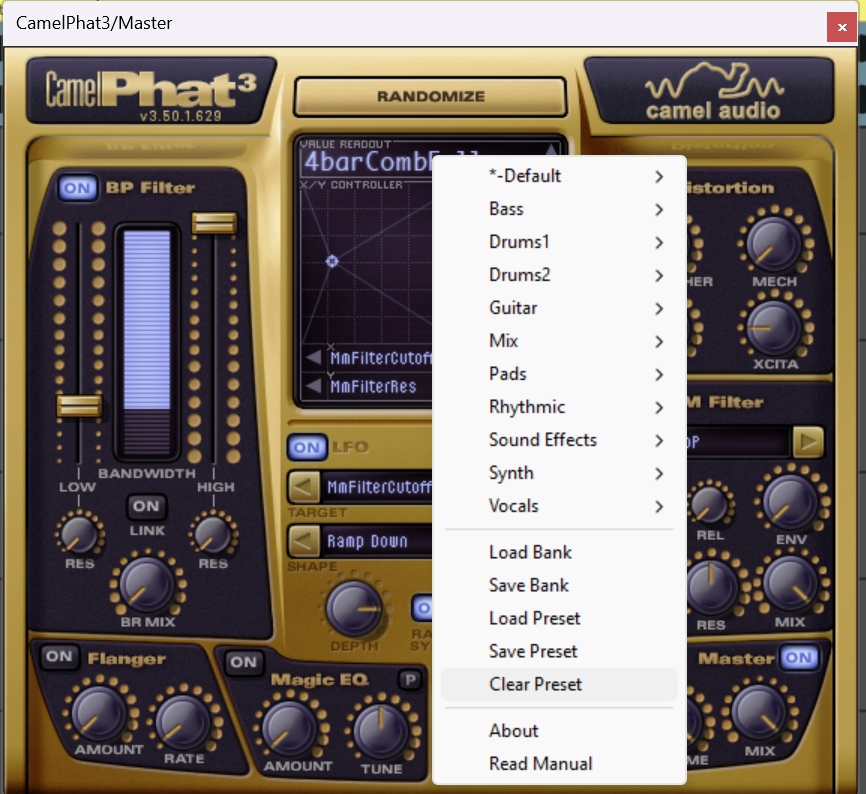
The CamelPhat3 Plug-in is free (abandonware?) and can be used as a clipper by toggling the Clear Preset setting and putting it at the end of your mastering chain.
If you’re just getting started, CamelPhat is a great go-to for quickly getting your track loud and ready for feedback and would be the first tool I’d recommend trying. Hat tip to Mr. Bill for this trick.
Conclusions
This is not a comprehensive guide on how to properly get your tracks appropriately loud but should be helpful for preventing you from getting the “hey your track is too quiet” feedback as you’re getting started. Try using the tools available in your DAW to experiment with what sounds best and learn to measure your loudness with a LUFS meter to get the gist of measuring the impact of changes while mastering. It’s tough to get used to but “use your ears” while you work to do what sounds best and learn to listen for loudness and trade-offs between different methods of making things loud. There’s no magic settings on any given tool that will instantly make things loud and correct, you have to learn to use the appropriate tool at the appropriate time.
Really great advice that I was given is to learn to master using just an EQ and a compressor. Keeping things simple while you learn instead of getting complicated will allow you to focus on listening and less on obsessing over the tools. Happy producing, keep going!