

Welcome to my final post on Ableton Live basics. So far we’ve covered:
- Part 1 – An introduction to Ableton Live and basic operation of the DAW with MIDI
- Part 2 – Working with audio in Ableton Live
- Part 3 – Intro to some of the MIDI and Audio Devices
- Part 4 – Mixing with Ableton Live Intro Devices
By this point, you should be familiar with finding your way around in the Ableton DAW and we just have a few odds and ends left over in the spectrum of devices available in Ableton Live Intro. In this post, I’ll be covering:
- Using the remaining MIDI devices included in Ableton Live Intro: Velocity, and random
- Synthesis of sounds with Drift and Vital
- Using the remaining Audio devices included in Ableton Live Intro: Phaser-flanger, redux, erosion, saturator, chorus-ensemble, utility
We’ll start by taking the track from Part 4 and will be working on creating a build for the drop. Next, we’ll use Vital and Drift to build some sounds for the drop, and will enhance the drop with audio devices. Finally, we’ll add some finishing touches using the remaining audio devices and you’ll have a nice path to start working on your own to producing music with Ableton Live.
Creating the build
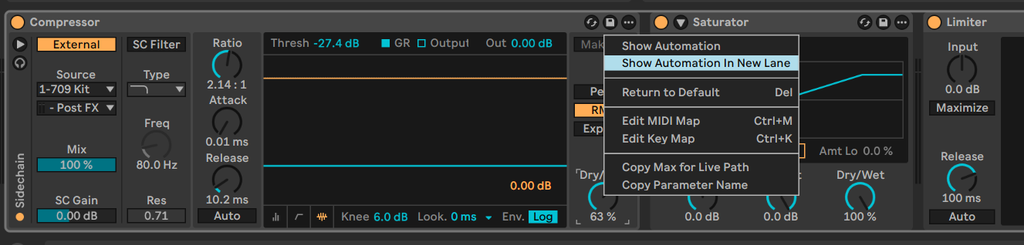
Before we get started, let’s take a moment and fix some things that I don’t like in the track presently. First off, the sidechain in the introductory section of the track is too much, let’s use the dry/wet in the compressor to gradually bring it in. Right click the dry/wet knob on the compressor in the NotDrums group and show automation in a new iane:

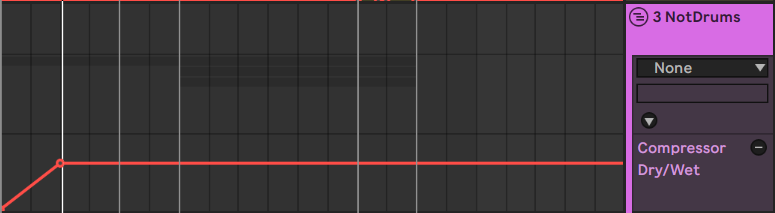
Next, create an automation marker at the end of bar 8 and slowly automate the dry/wet on the sidechain compression to gradually sneak in:

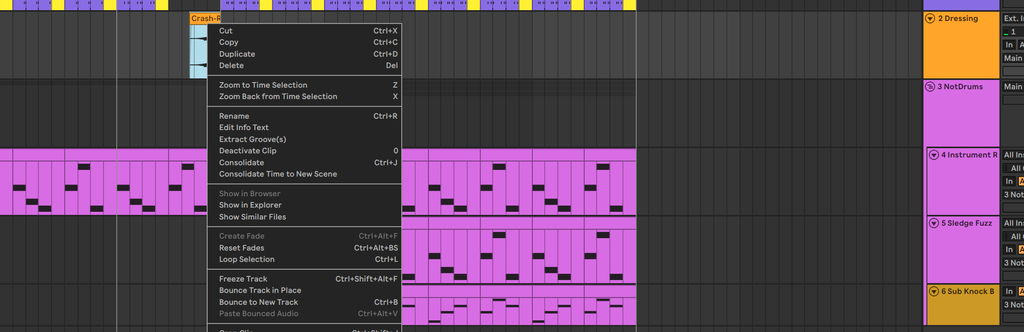
Next, let’s free put the crash that is taking up one of our precious limit of tracks in Ableton Live Intro. First, highlight the section of the track with the crash, right click it, and bounce it in place:

We’re doing this to bounce the fade out that is used in the crash into the sample itself. Now the fade parts on the sample are incorporated into the sample:
Before:

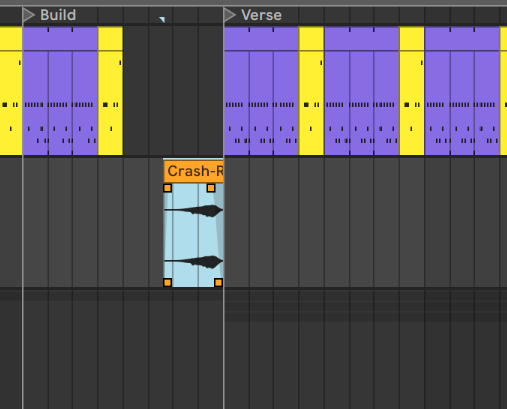
After:

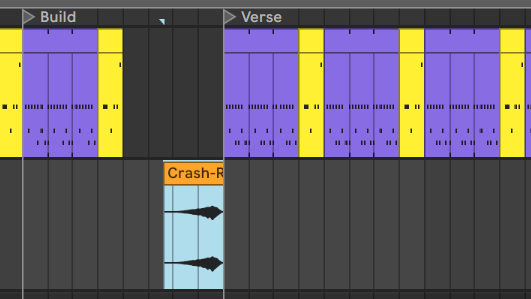
With the fades incorporated, we can take the sample and put it into the drum rack by opening the drum rack in track 1 and dragging the sample onto an unused slot:

Now we can just add the crash in the drum rack midi track by inserting a midi clip:

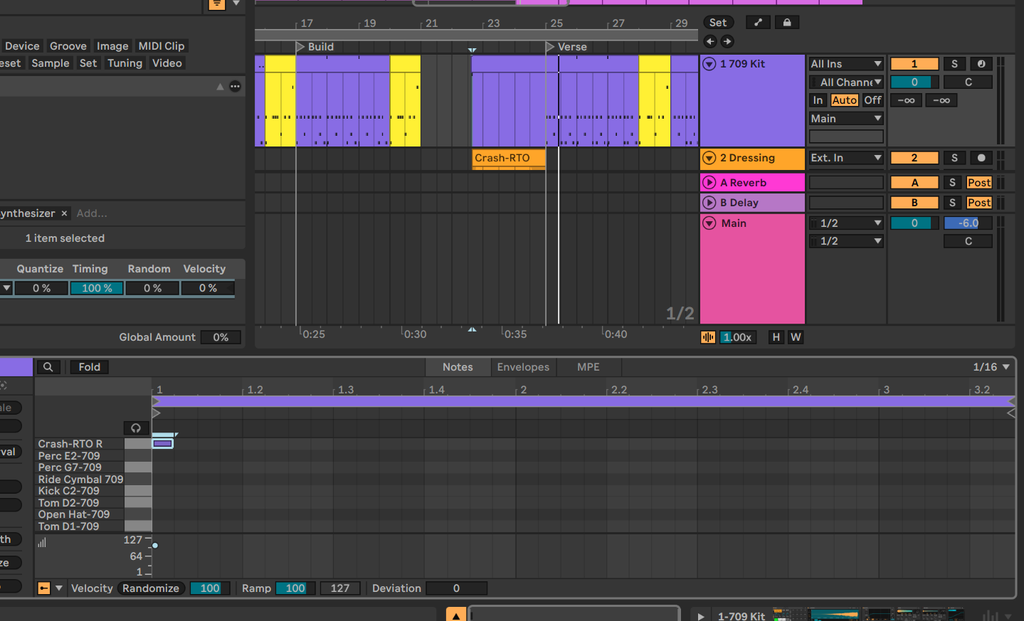
Now we can remove the unused “dressing” track so we can later have an additional midi track for sounds used in the drop later on.
Next, we’re going to add a random velocity variation to the sub knock sound by adding a velocity device between the arpeggiator and the sub knock instrument. I find that out high 127, low 1, and random 64 gives a nice variation on the bass notes:


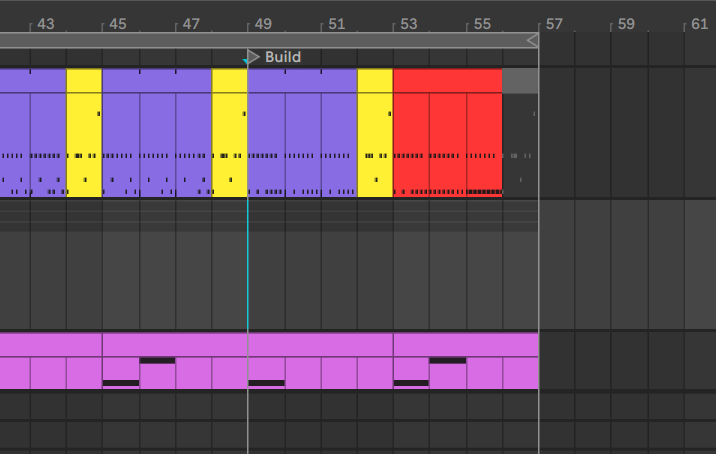
I did a little housekeeping, changing the colors on the various NotDrums sounds and added a set marker after bar 48 to indicate that this is where we’ll be setting up our build:

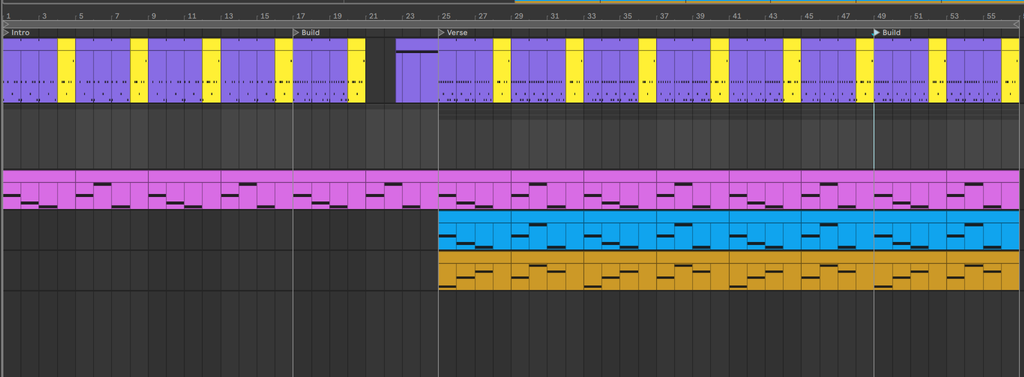
I replaced the snares with kicks to give the impression that something different will start happening in the clip on Bar 49:

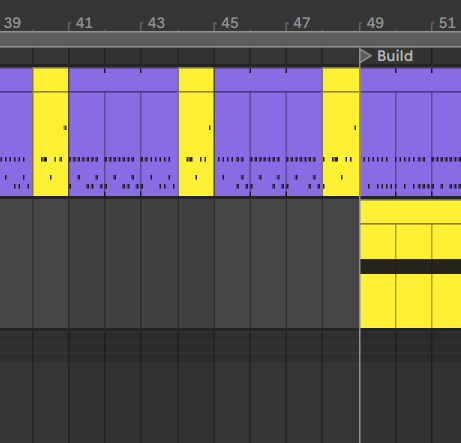

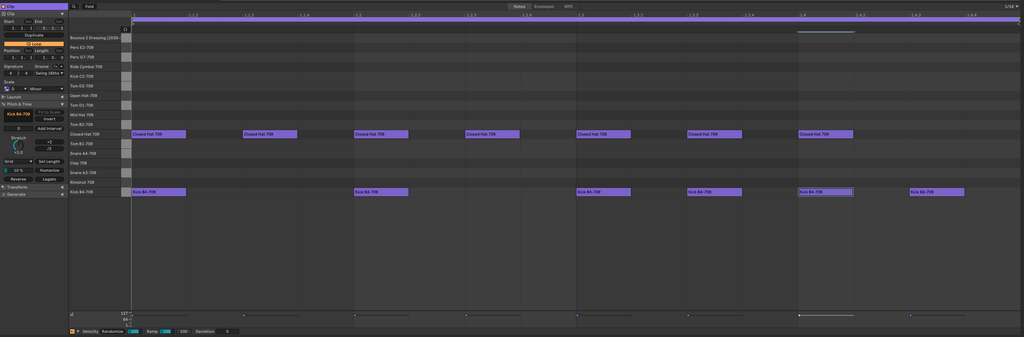
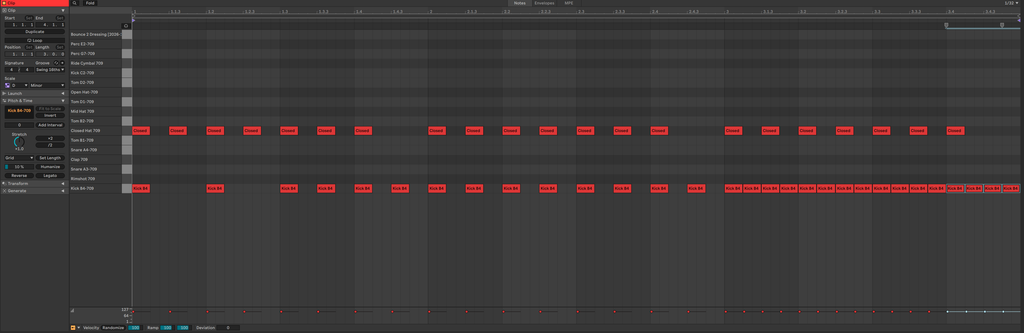
Then I copied the midi to bar 53 and then joined the clip (Ctrl+J) so we can double-time the drums to create a build into what will be the drop. I changed the clip to be red to make it easier to find in the composition:

And then updated the midi to be:

It feels like there should be a turn around sound that happens after the build up, so I grabbed some toms from the Singularity pack that we got before, highlighted them in the browser:

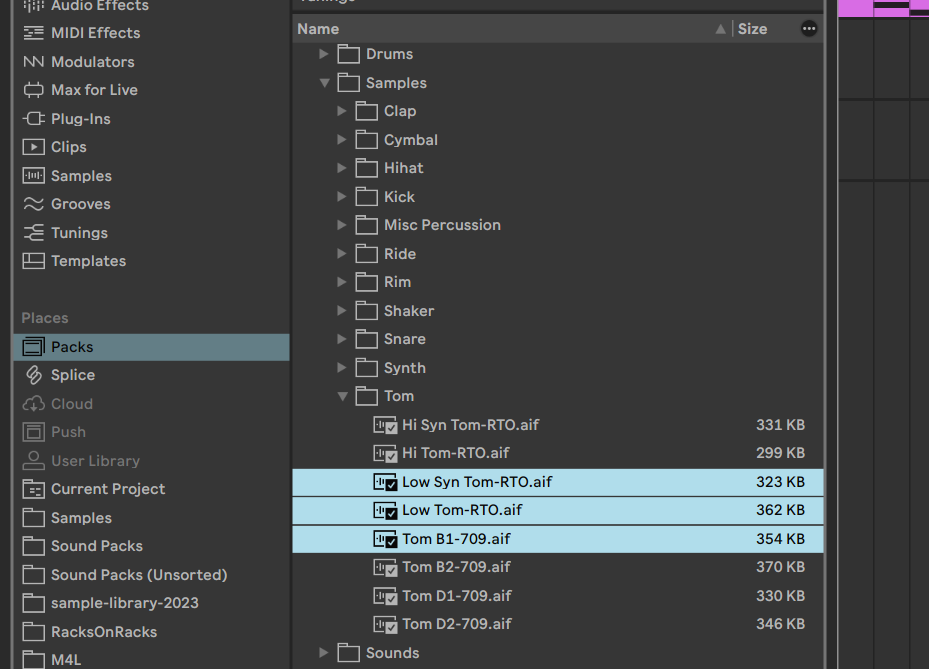
And then dragged the toms into the kit after the crash sound that we flattened and added to the kit:


Now we can add a final flourish of midi with the tom sounds and crash before the drop:

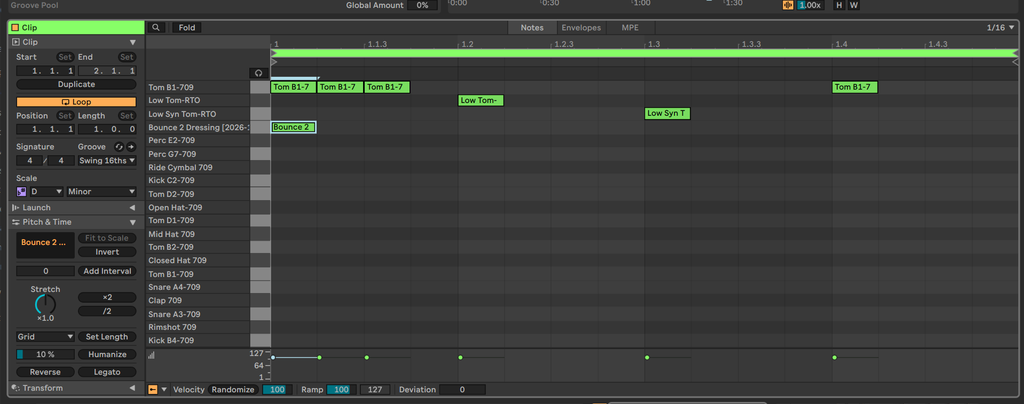
It feels like we still need something cool to happen to emphasize the transition between the verse section and the drop section, so let’s synthesize a riser using drift. First, add drift to an empty channel below the drums (control+shift+t).

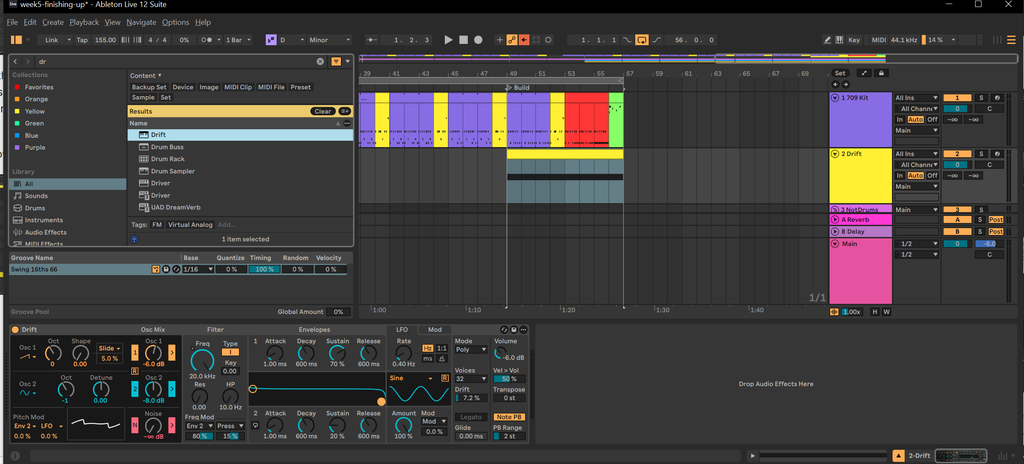
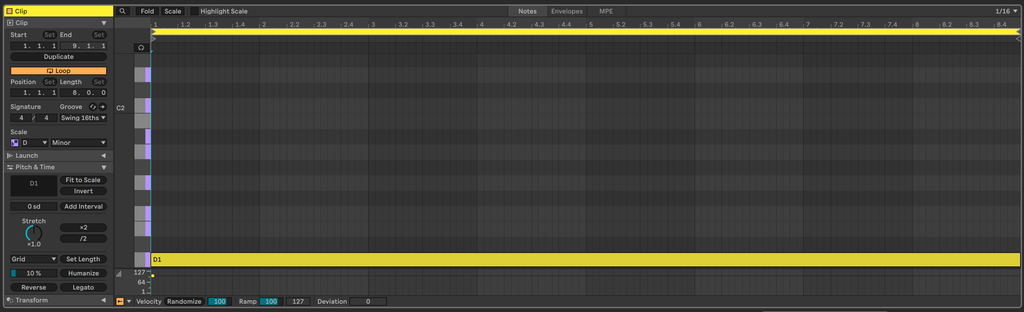
Next, add a one node MIDI track to the channel that just plays a low D.

In the clip, add a MIDI pitch bend envelope (clicking envelopes on the top of the clip) that ramps the pitch up over the course of the clip:

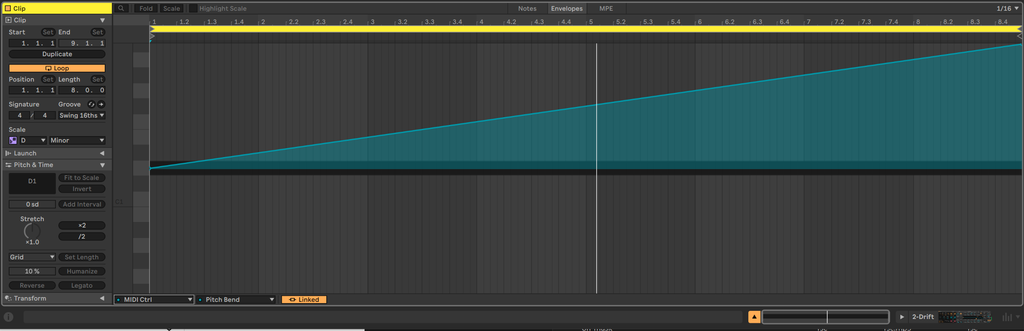
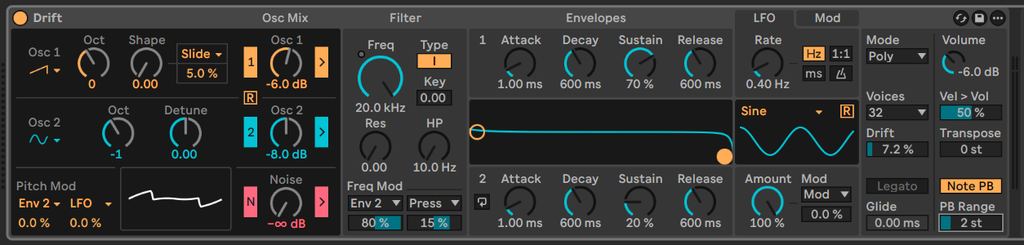
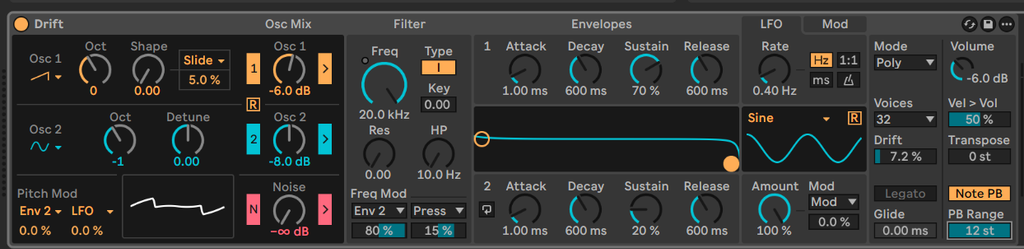
Next, return to the Drift device and update the pitch bend range (on the bottom right) from 2 to 12, set the voicing to MONO:

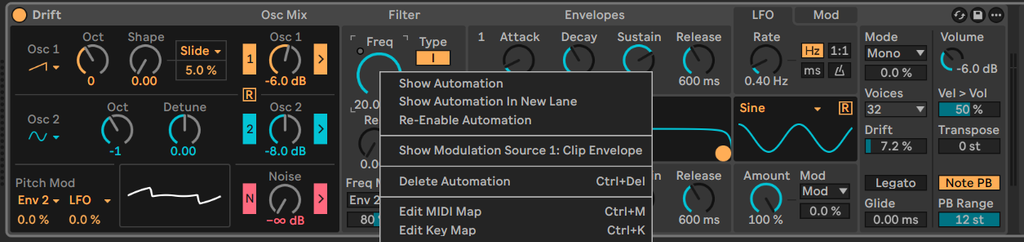
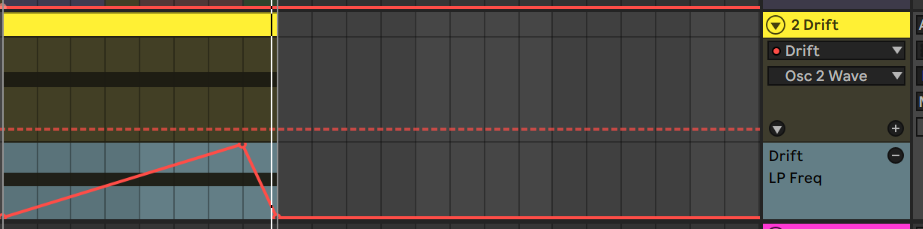
Finally, we’ll right click on the filter frequency (Freq) and add an automation that opens up the filter at the beginning of the clip and closes it when the toms come in:


We can now adjust the filter resonance to bring more attention to where the low filter cutoff is happening – .46 is a noticeable setting, if you want a really vowelly sound you can set it really high like 1.01:

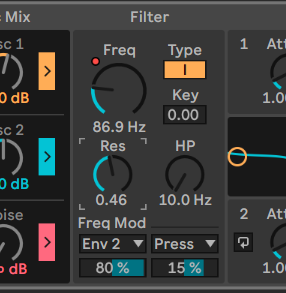
I like it somewhere in between, around .75. At this point, you can try changing the shapes of the oscillators, I like the square shape on OSC1:

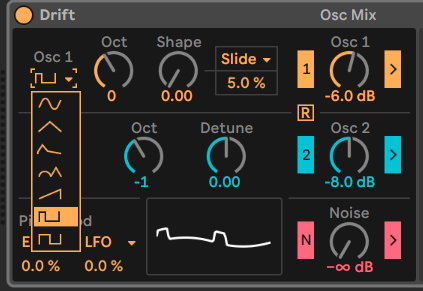
Although it’s more of an intermediate topic, it would make sense to throw this device into a group and map the parameters for making a variety of riser sounds. There are a bunch of juicy riser sounds you can get out of drift! I’ll try and keep it simple for now though, probably a topic for another post later on.
To cut the low sounds out while the riser is happening, you can also automate the high pass to follow the low pass:

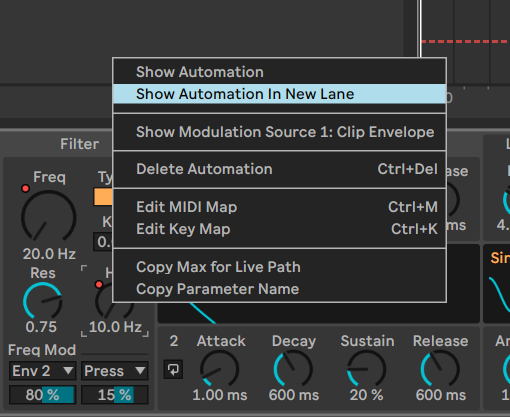

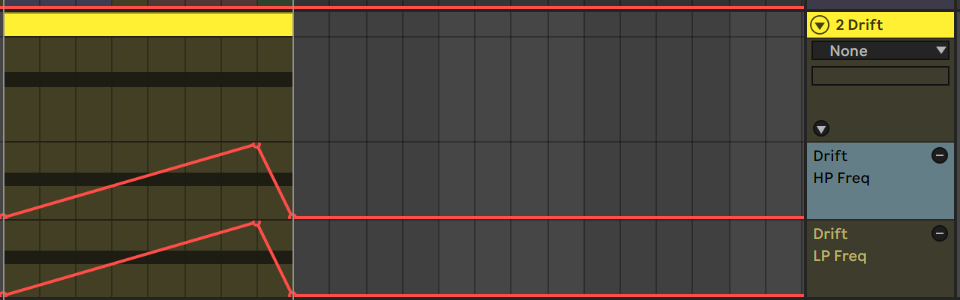
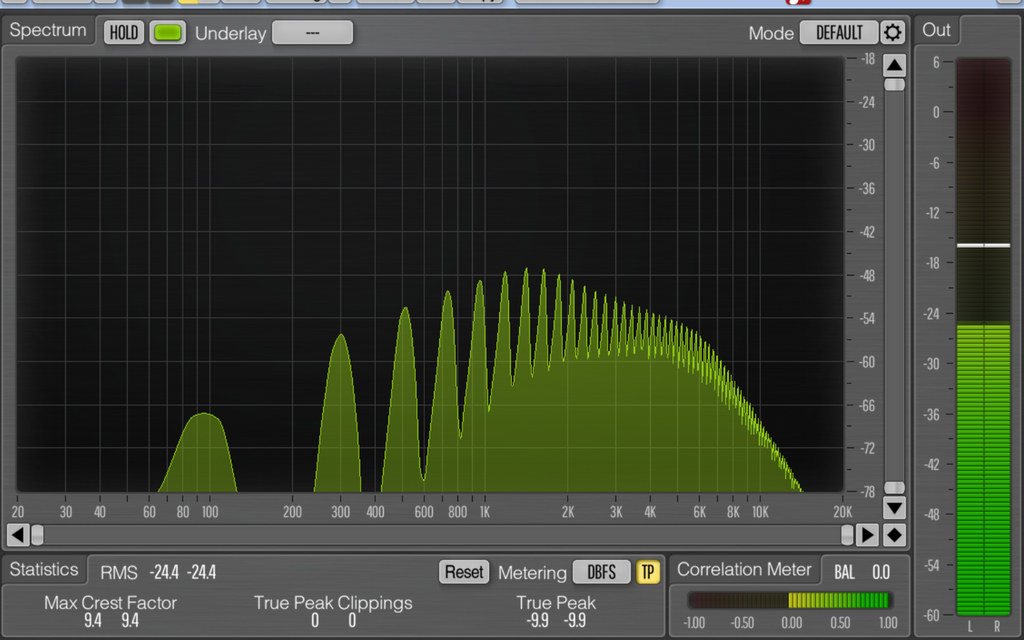
This will prevent the riser sound’s frequencies outside of where the filter is moving from cluttering the mix. You can see the difference by looking in SPAN:
No High-pass:

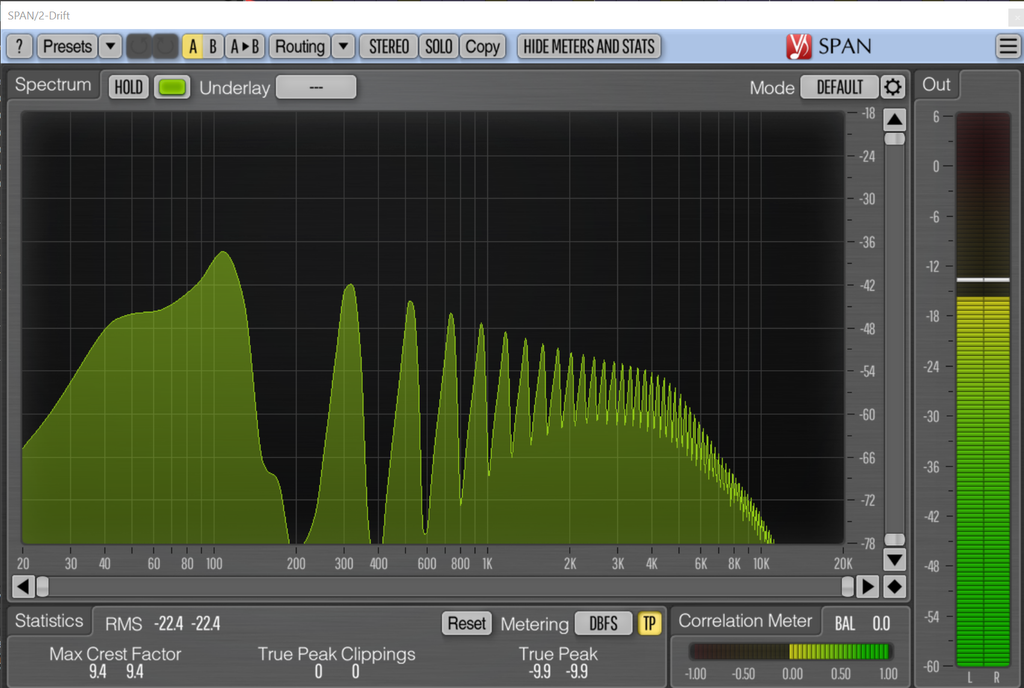
With High-pass:

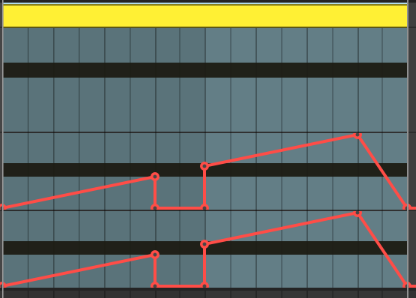
It may also make sense to use the filters to cut out the section of the riser that happens when the other drum sounds cut out on the fourth bar of the buildup:

Now that we have a nice build creating tension, it feels right to add a drop section afterwards!
Drop Theory and Creative Strategies
Before writing the drop, it can be helpful to have some background on some creative strategies and ideation for building the drop. Drops in songs are more compelling when they have the following aspects:
- Contrast – Using pitch, note duration and tonal differences to have sections stand out from the other song sections in the drop.
- Call and response – Having one voice be the call of one part, and another voice being the response or answer to the part.
- Riffing – This is when repeated phrases (rhythmic and melodic) with variations that happen over time.
- Motion – Using rhythmic variation or pitch bends, filters, and effects to make the listener move in a manner that follows the sound.
- Tension and release – The build before a drop gives tension, you can release the tension in the drop to create room for a breakdown or other section after the drop is done.
Similarly to how we looked at song structure using the arrangement exercise in Week 3 you can also look for inspiration in other songs for ideas on how people structure their drops.
Let’s listen to a section from Neverland (Memba Remix):
This section starting from the build to the drop has a distinct call and response structure:


I’ve highlighted the build in yellow, then the call in red and response in purple. You hear the build, then the drop hits with one big pitch dive sound (red) followed by the plucky response. There is clear contrast between the call (low, fuzzy, long sound) and the response (short, plucky, high sound). These call and response sections alternate in clear lanes with the musician riffing on variations of the sounds through the drop.
Let’s look at another example, Yheti – Simulation:
Again, I’ve put the build sound in yellow, I’ve added the turn around sound in green, then highlighted the call and response riffs in red and purple.


You hear the bass call sound that is about 6 wubs, then another 7 wubs that are the answer to the call. The sections riff with different variations on the sounds and that is the drop. There is less contrast in this example than in the Memba remix example but you can hear that there are a lot of ways to build these call and response sections and vary them with effects and different motions from pitch automation and filtering.
A final example, Cool Customer – In your face:
Build sound in yellow, I’ve added the turn around sounds in green, then highlighted the call and response riffs in red and purple.


In this example from Cool Customer, the call is a long sustain bass note, then the response is a set of five shorter bass notes. The producer in this case chooses to sprinkle turn around sounds in between the riffing variations to create additional space and contrast between the drop sections and makes minimal use of pitch bends except for in the transition section between the build and the drop. The rhythmic variation in the bass notes is where the contrast in this drop comes from.
In all of these drop examples, you’ll note that the drop begins with a long sustained bass note followed by different notes. Starting from this pattern is a great creative strategy to get you started on building your drop. When you are building your drop, this is one pattern to start from and evolve with riffs, contrast, and motion to create a compelling section that fits in with the rest of your song.
Creating the drop
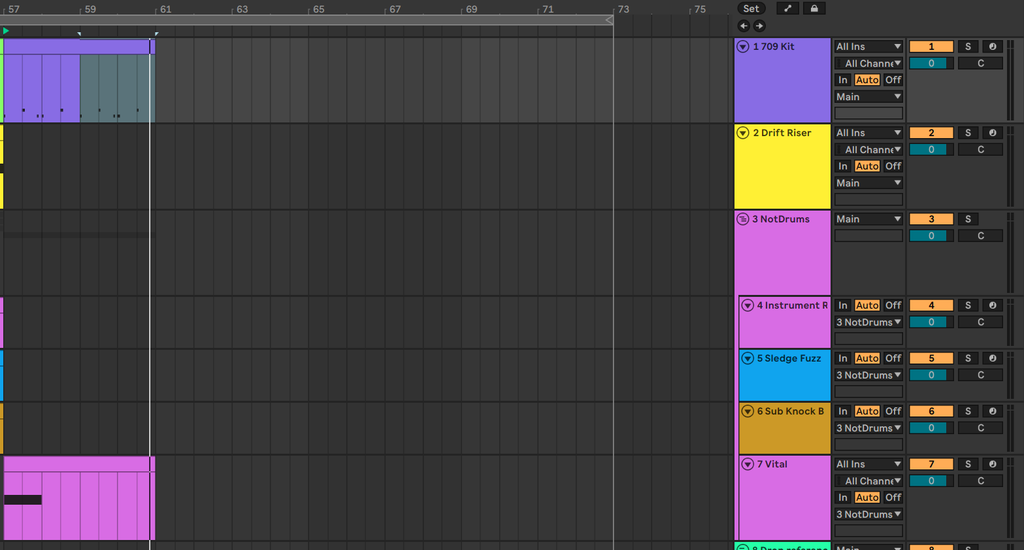
Now with the context of some drop theory in mind, let’s think about how to build the drop for this track. We’ll start out with a sustained bass noise using Vital. Create a new midi track below the existing tracks in the NotDrums group and add Vital:

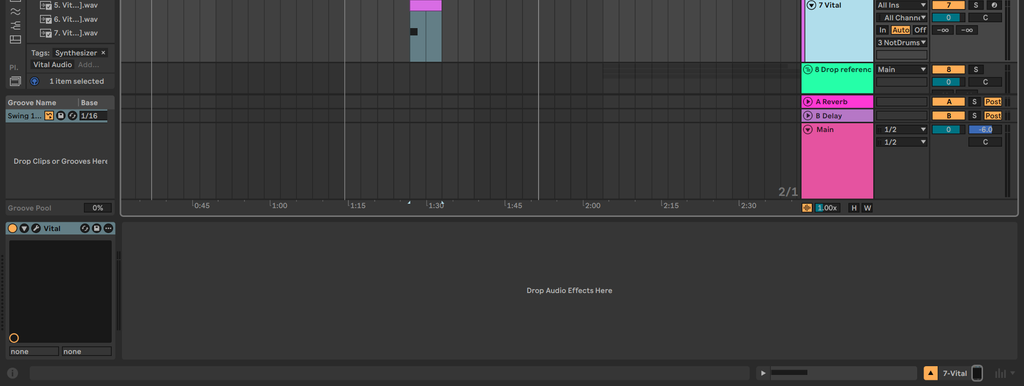
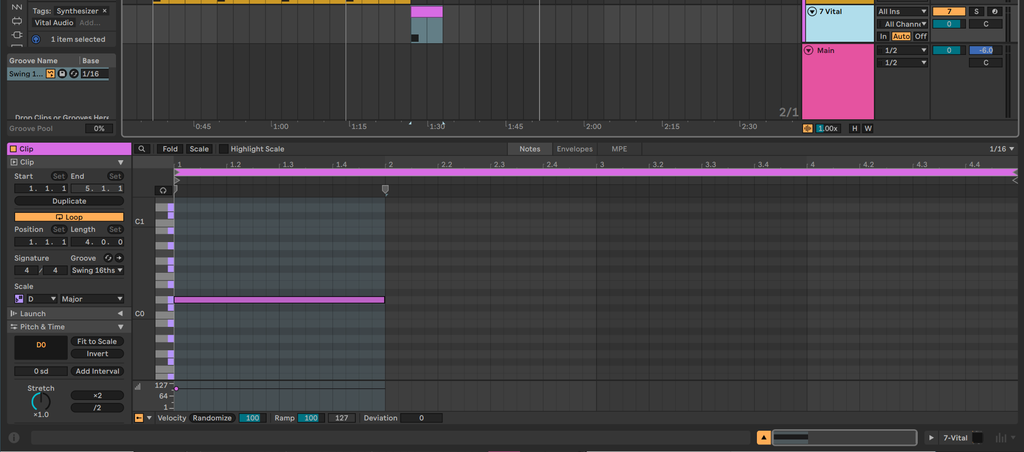
Create a 1-bar sustained MIDI note:

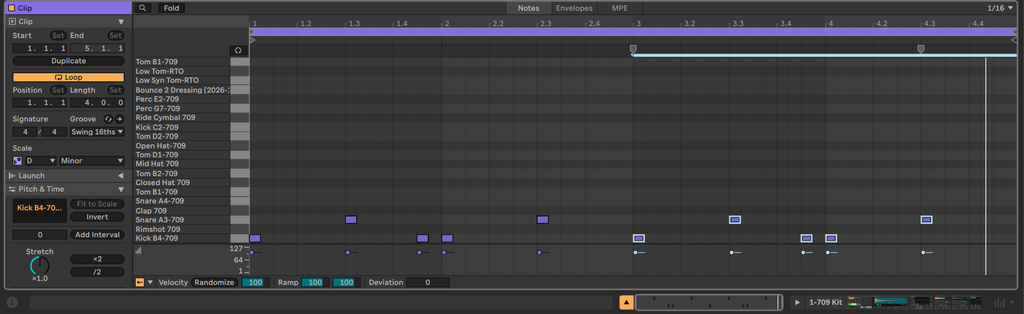
Add some drums to the beat as well so we can work to find our drop drum flow over the bass note:


Now we can start doing some sound design with Vital. The layout of Vital is as follows:

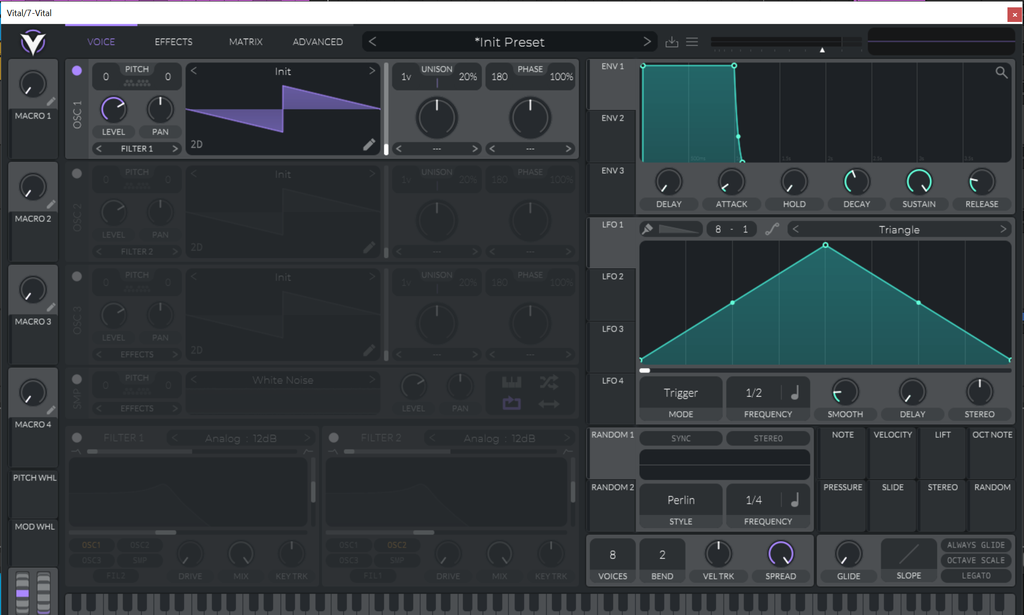
Oscillators are labeled OSC and are what creates the source of the sounds:

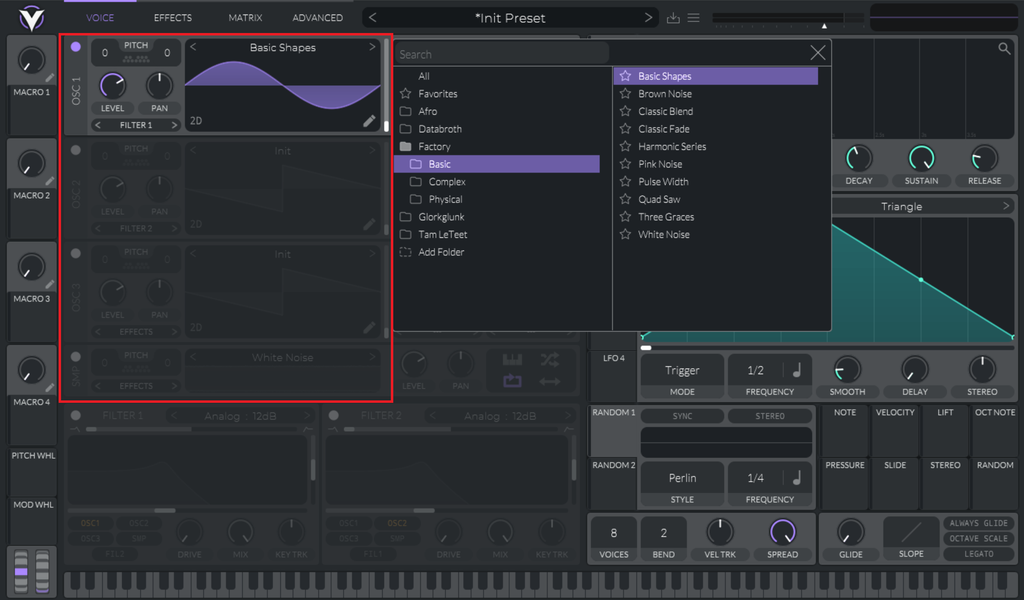
Because it’s a wavetable synthesizer, the oscillators contain a bunch of different “shapes” that you can move through with the wavetable position slider:
A sound design technique that is frequently used in bass synthesis is to modulate or automate the control of the shape to create movement in the sound, we might do this today but for now, just be aware that the control is there.
The menus at the top will open up different sections of the VST – today we’ll definitely be playing with the EFFECTS section – clicking it will show the available effects:

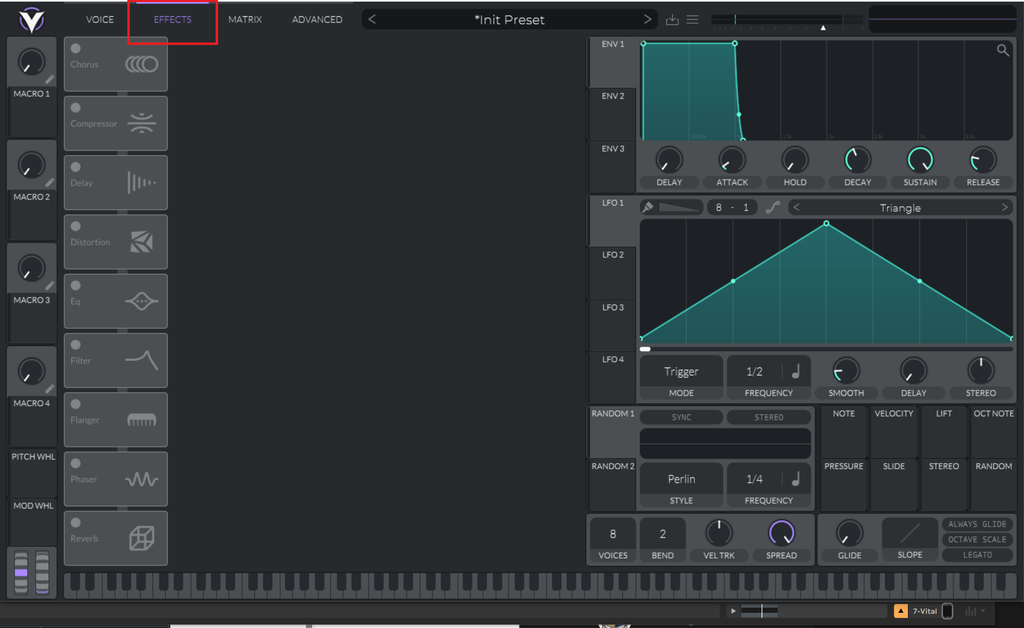
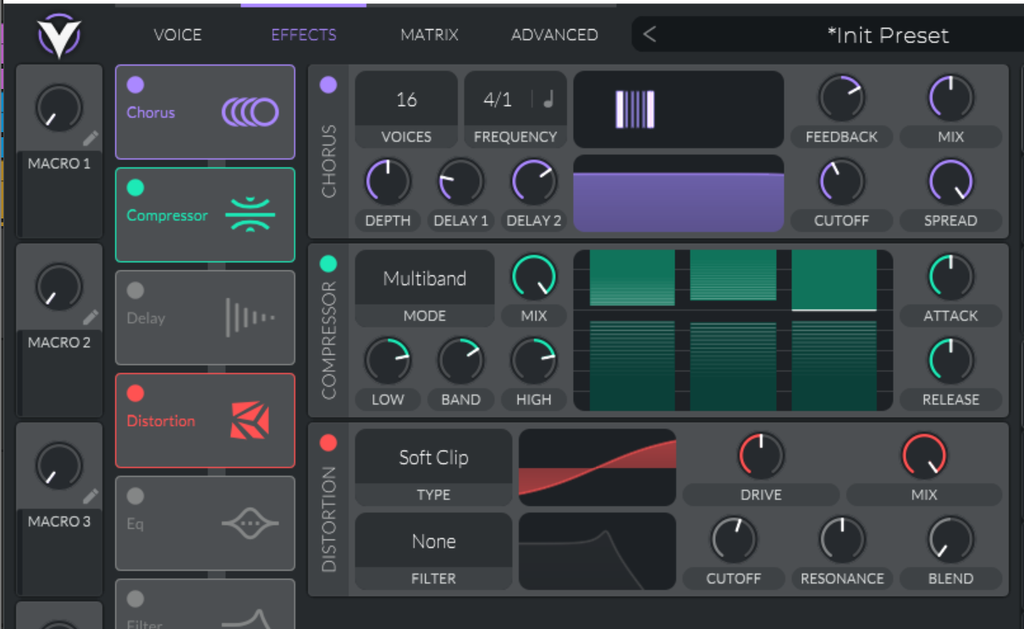
You can toggle on and off the available effects by clicking the circle near the effect name – this will expand the parameters for the effect:

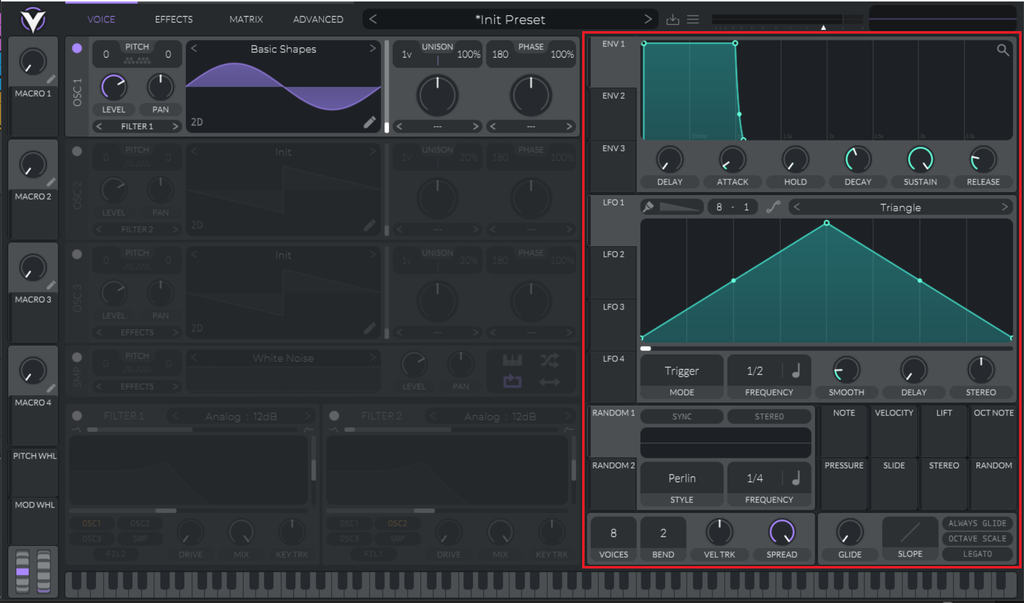
The final thing worth noting is that on the right of the VST is your modulations section – these are movement parameters that you can assign to other sections of the VST to “twist the knobs” automatically for you.

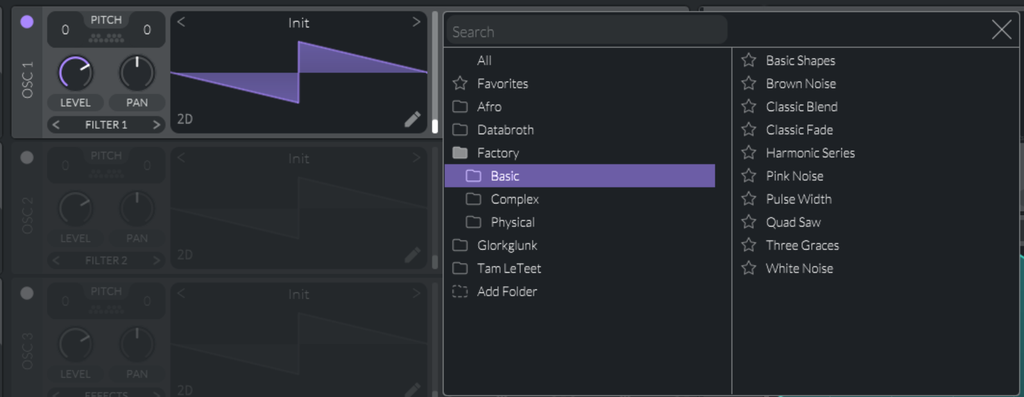
The first thing we’ll do is replace the init (saw) oscillator with a sine wave by selecting the Factory > Basic > Basic Shapes wavetable:

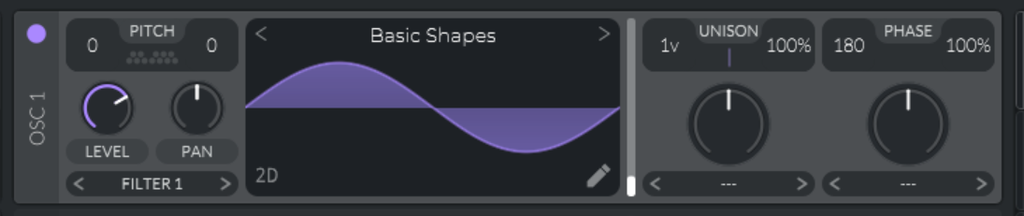
Move the wavetable selector to the bottom so you have the sine shape:

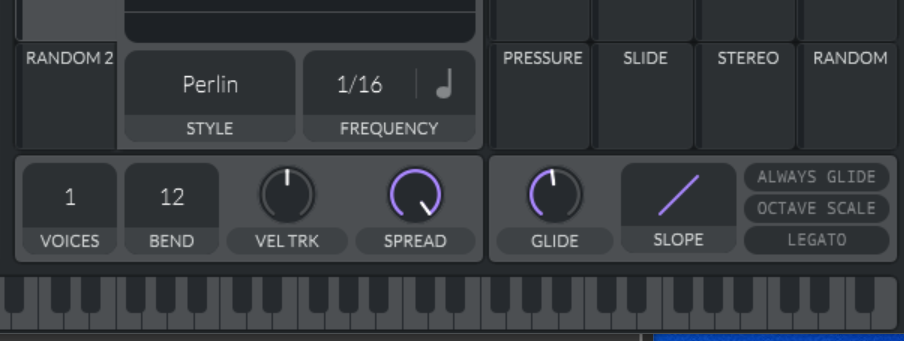
Because this is a bass sound that we want to move / glide, set the voicing to 1 and turn up glide on the bottom right of the VST section:

Add some filter, distortion, reverb, and compression to the effects:

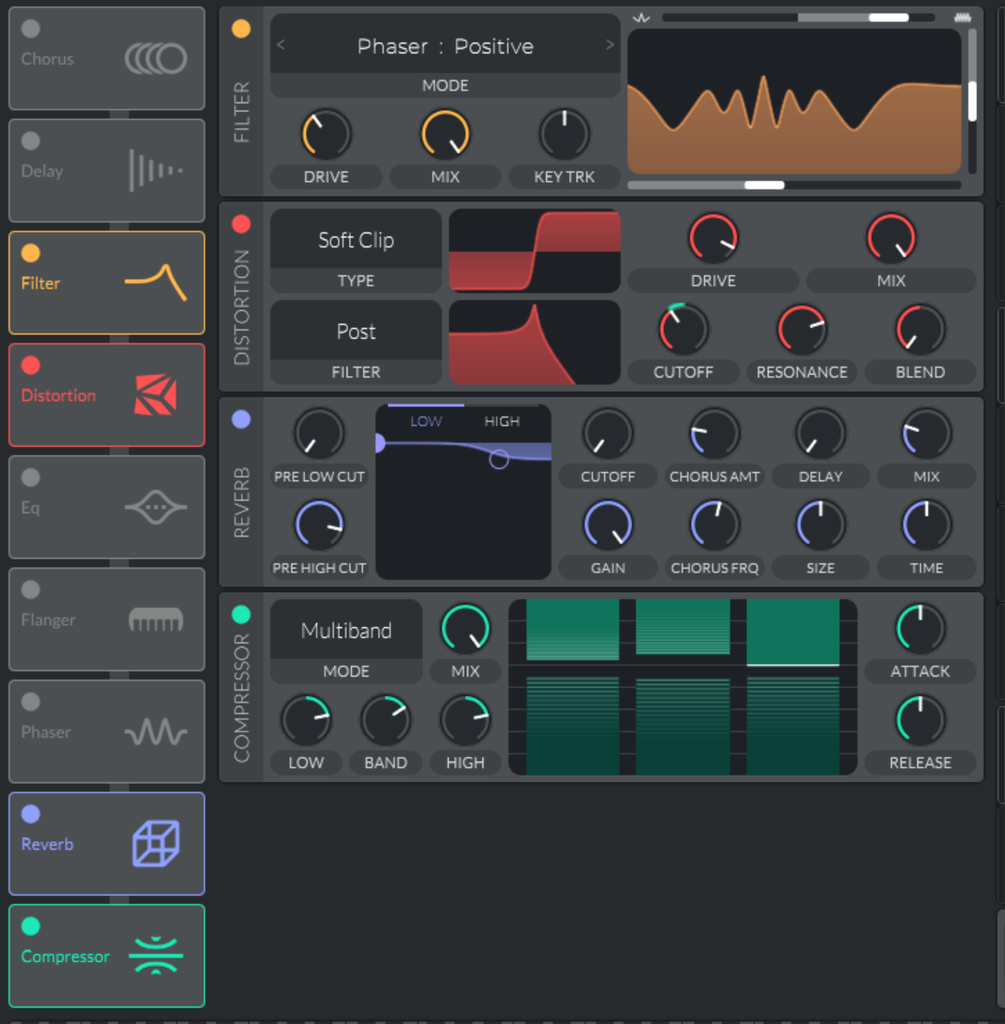
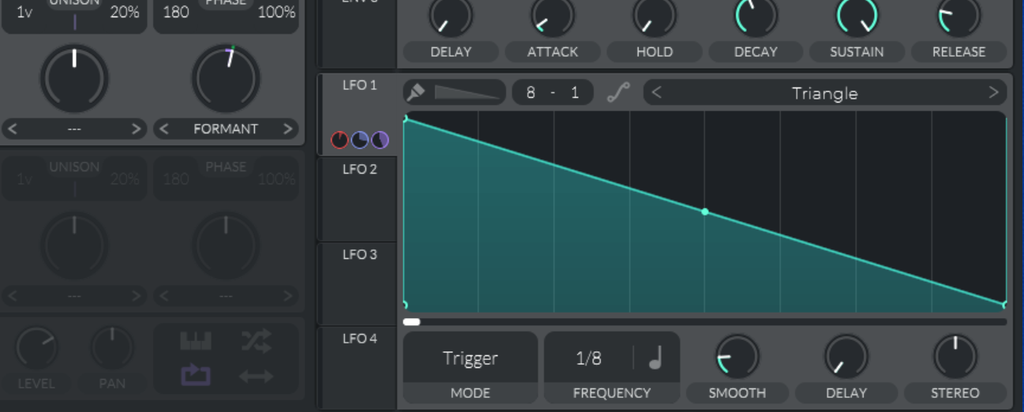
Make sure to turn on the POST filter for the distortion – we’ll modulate this in a second. Change the shape of LFO 1 to a downslope, set the frequency to 1/4 bar, and set it up to modulate the cutoff of the post distortion filter we just enabled:

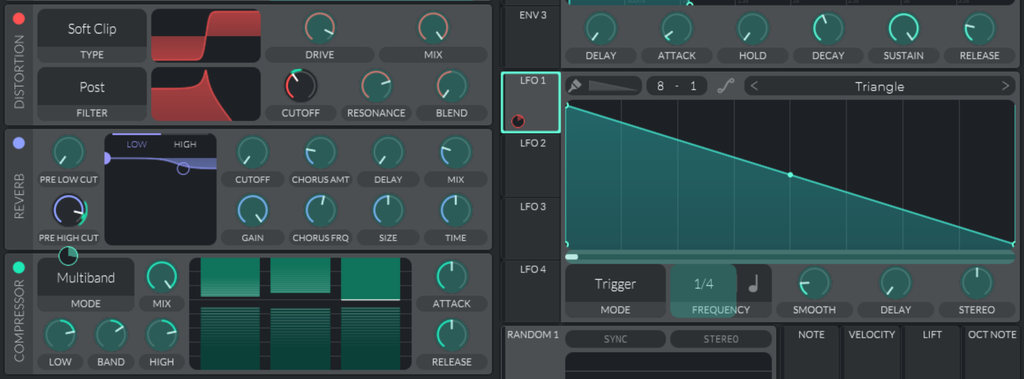
Mouse over the cutoff of the distortion filter and set it to a lower amount:

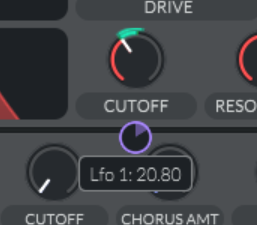
You can experiment with different settings, I like the “ow ow ow ow” sound that you get with a value of around 32.32:

This is the fun part of sound design: finding sweet spots in your patch that sound good across a range of values. Because we’re keeping it simple today, we’ll just set it up manually but in the future, you’ll want to use these sweet spots for Macros in your patches.
Next, enable the second oscillator, set it to the square wave of the basic shapes wavetable, and listen.

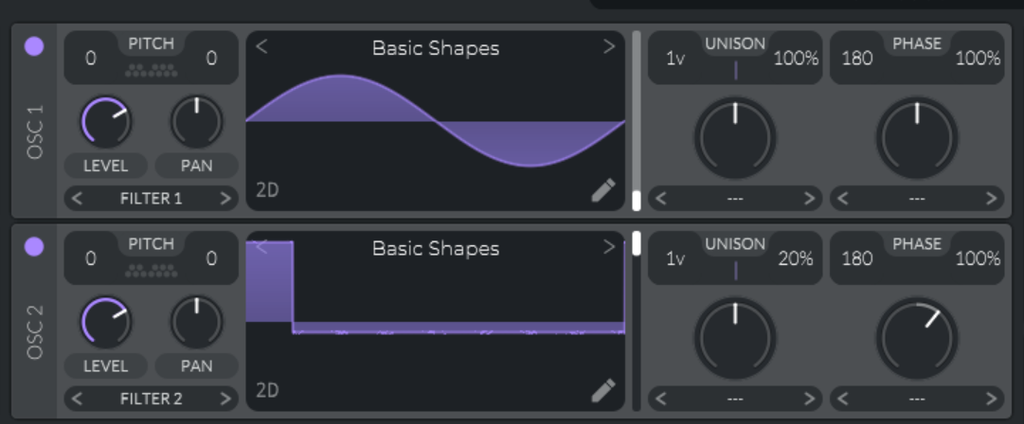
Now the patch generates a formant-rich sound with some rhythm to it. We can lean into this sound more by setting up the phase morphing to formant:

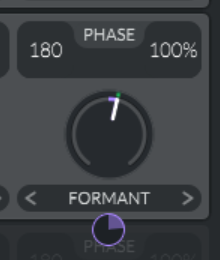
And modulating the knob using LFO 1 again:

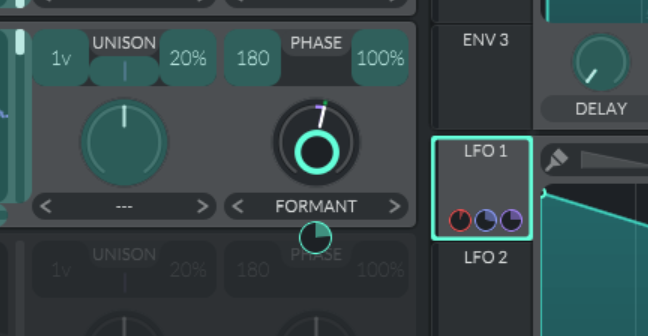
Again, you should adjust the amount that this is happening by mousing over the modulated parameter and adjusting the “pie chart” diagram below the modulation target to be at a point that you like in the sound, I like the sound around 0.260-0.440.
This technique: using the same LFO (modulator) to target multiple parameters is sometimes called single-source patching because the motion of all the things happening in the patch come from one (single) modulation. This is useful because now when you change the modulation frequency, to something like 1/8, all of the things that move, move together still!

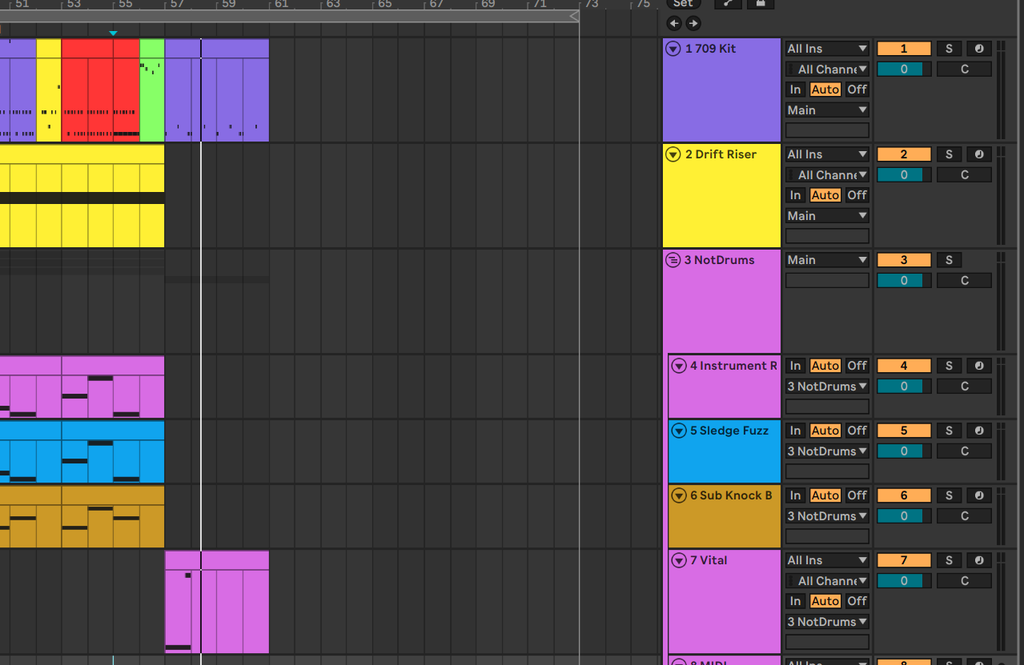
We’re almost done with the call part of the initial phrase, it would sound better if we had the end of the bar glide up a but, so I updated the MIDI in the Vital section to have a note that is an octave above the initial D1 note:


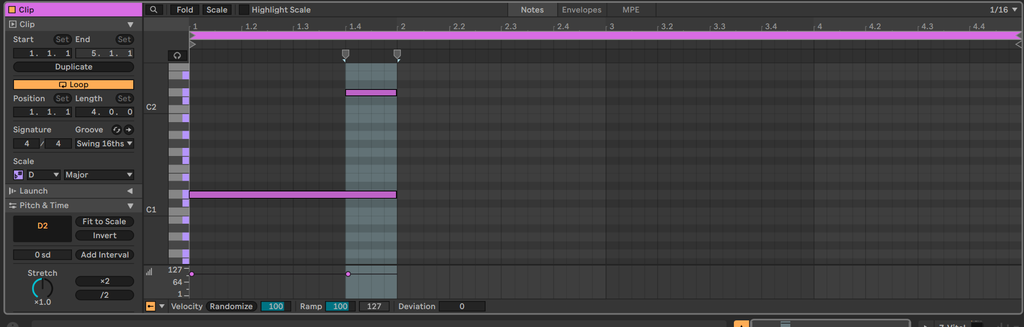
Now the “call phrase” is “asking a question” to be answered by the response. We’ll wait to develop the response and will make some more phrases with the call part. I ended up with the following MIDI that moves the pulsing bass around the scale we’re in:

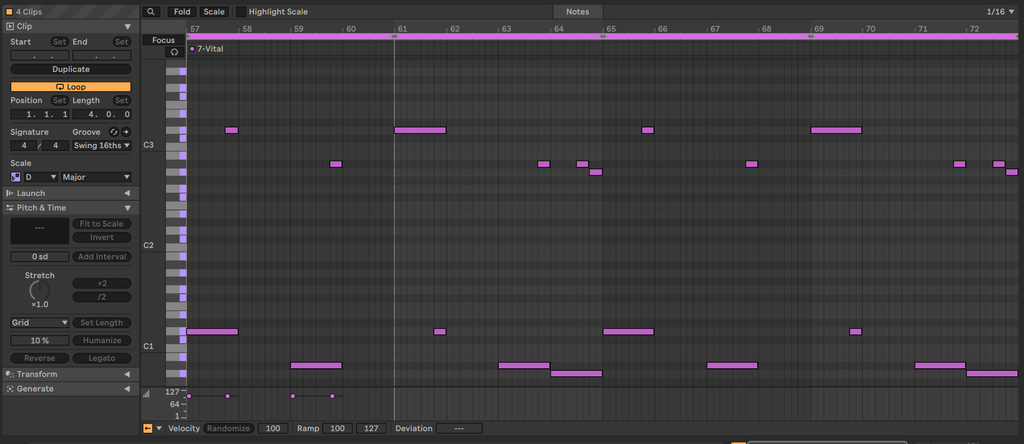
Now we have a skeleton drop section that sounds like this:
The drop rhythmically has space for a response to the call now and I think what we’ll want to do is synthesize a pluck for this.
Add some midi for the new response section that will play along with the call bass sounds:

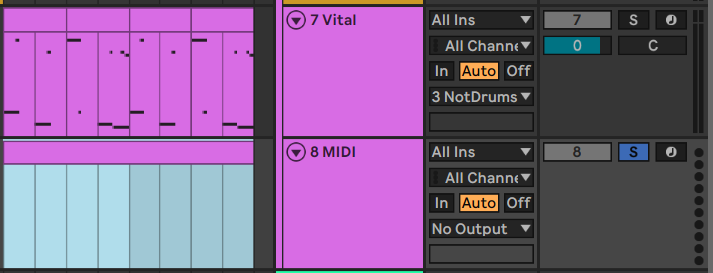
Insert a quarter note for testing our sound during synthesis.

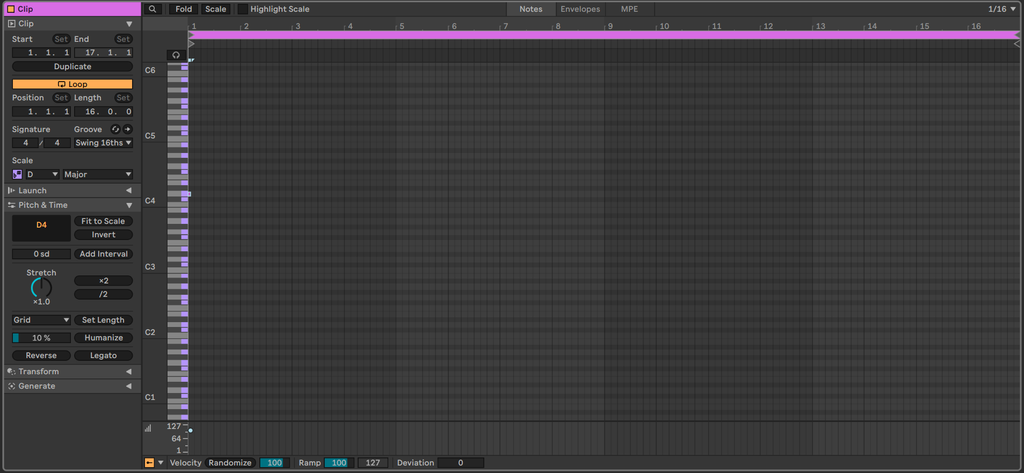
Move the loop marker on the top of the midi down to a quarter bar so the note just continuously and frequently plays:

Now that we have a short note getting triggered in midi, we’ll add Drift, which we’ll use to synthesize the pluck:

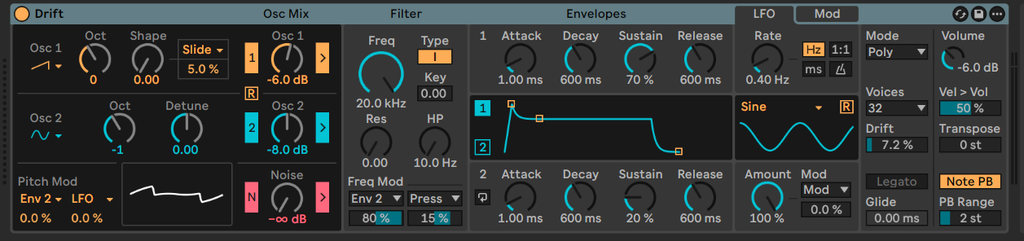
Now when you play back, you’ll hear both sounds in context:
At this point, we can play around with the Drift sound to design something that fits well with the composition (layers of sounds on top / next to one another) of the drop sounds.
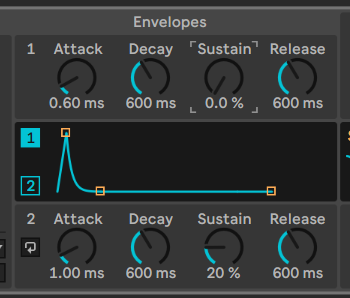
Adjust the attack on Drift so the sound comes in slowly and then take sustain all the way down to zero for a fast pluck:

Next, I played around with the shapes a little bit to hear what synthesis settings on Drift give me some nice contrast to the bass womp. I like the square wave on the second oscillator:

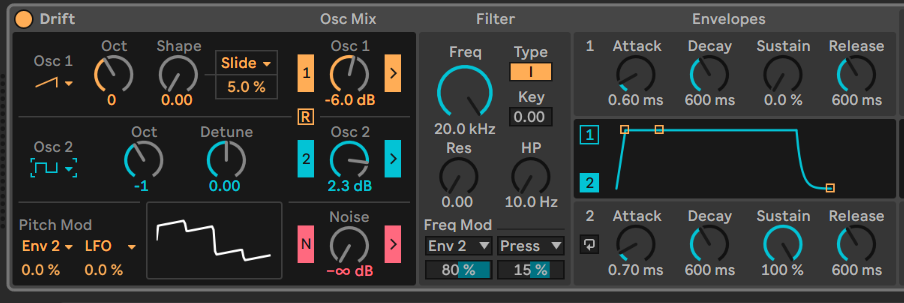
Next, let’s play around with the envelope to see how that affects the sound when it changes:

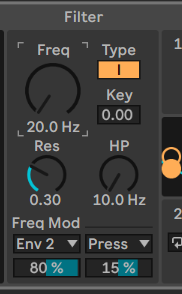
Closing the envelope gives a more percussive sound and opening it makes the sound more buzzy and fuzzy. Toggling the I or II button will change the filter type to 12db (less aggressive filtering) or 24db (more filtering).
I adjusted the filter a little further to be at 1.6 khz, use the high pass, and have some resonance:

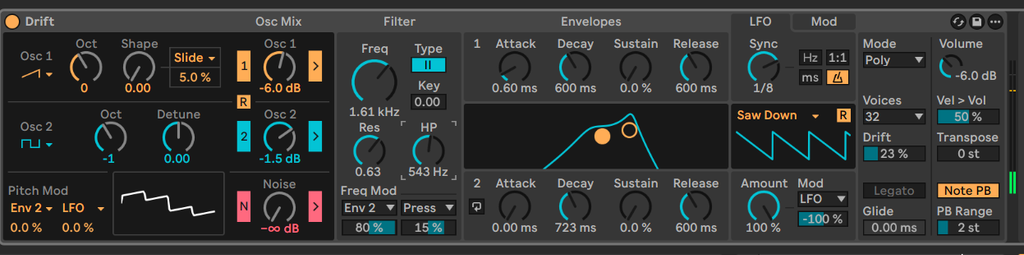
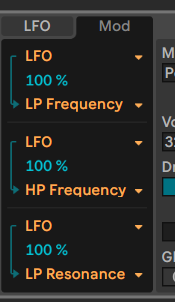
I assigned the LFO to modulate the Lowpass Frequency, the high pass frequency, and resonance. Note the modulation matrix (Mod) tab in Drift is where you set up destinations for the LFO; you can test things out by assigning the modulation to volume.

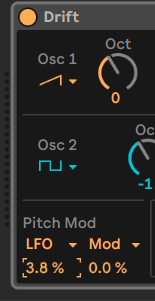
I also found adding some subtle pitch modulation from LFO gives it a little more character to the sound.

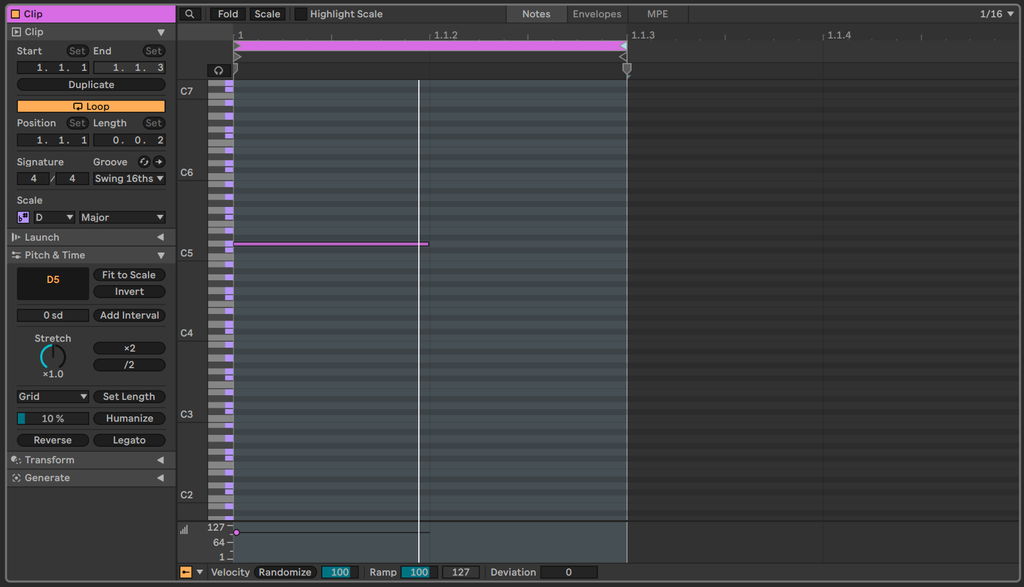
Next, I experimented with double-time on the midi clip by adjusting the loop marker again:

Now we have a quicker composition that we can listen to:
I’m sure you’re getting plenty of ideas for how we can use these two sounds together now to create a compelling drop. Before we do that, let’s explore sound design a little more with Phaser-flanger, redux, erosion, saturator, and chorus-ensemble.
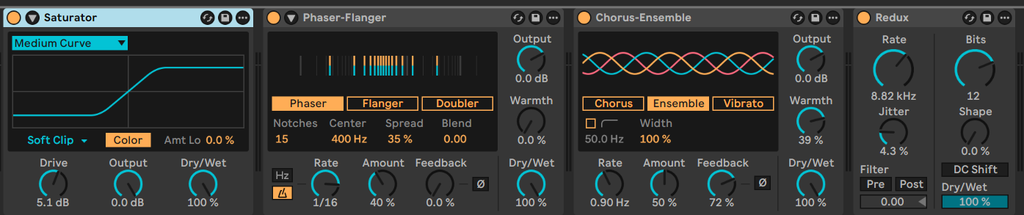
I found a few sweet spots for getting a higher contrast sound with the following effect stack:
- Saturator – medium curve with a little drive
- Phaser-flanger – change rate to sync (metronome icon), amount 40%, 100% wet
- Chorus-ensemble – Rate to .50hz, feedback to 72%
- Redux – Rate 2.5khz, 8 bits, 4.3% jitter

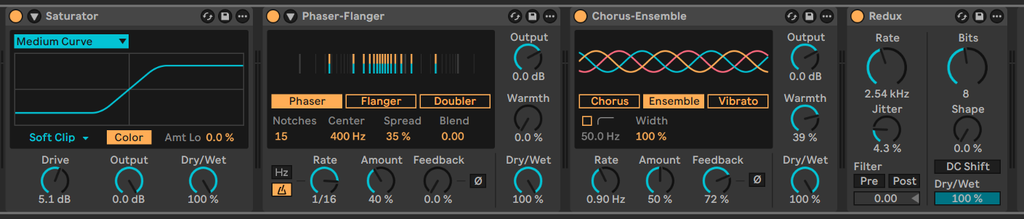
Now with the effects stacked on, the pluck has evolved to a different sound:
OK, now that we have done some sound design, we’ll work on getting a response to the call in the drop. I’ll start off by joining the midi clip together, I like the 8th-note rhythm so we’ll leave it with the shorter notes. The joined midi clip now looks like this:

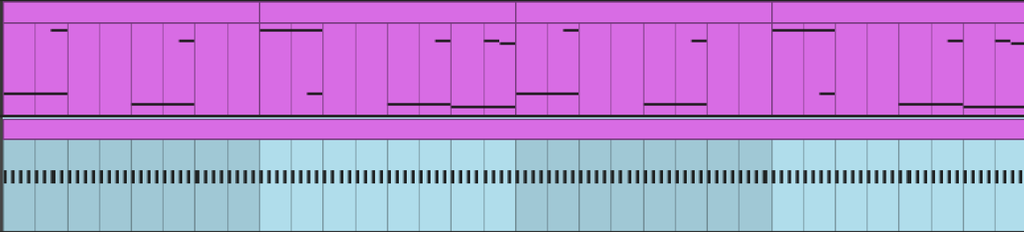

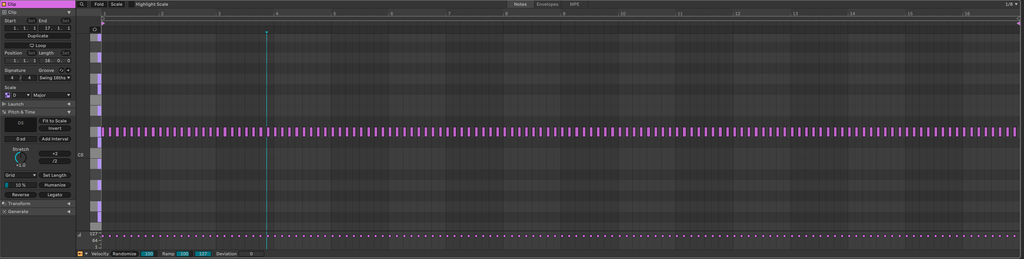
We’ll remove the space that is covered by the down-beat bass notes:

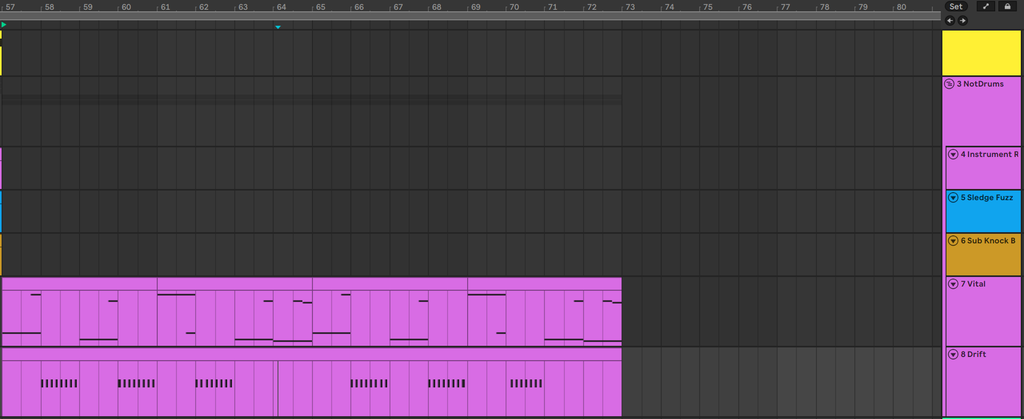

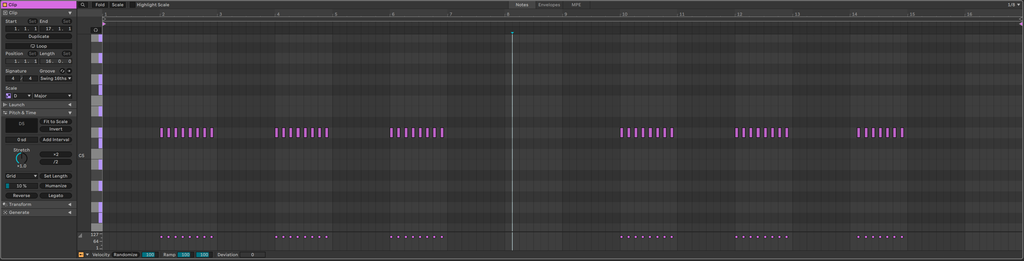
Without changing the notes, the rhythm is in place for contrasting against the longer notes. I experimented a bit and ended up with the following basic response melodies to the bass calls:

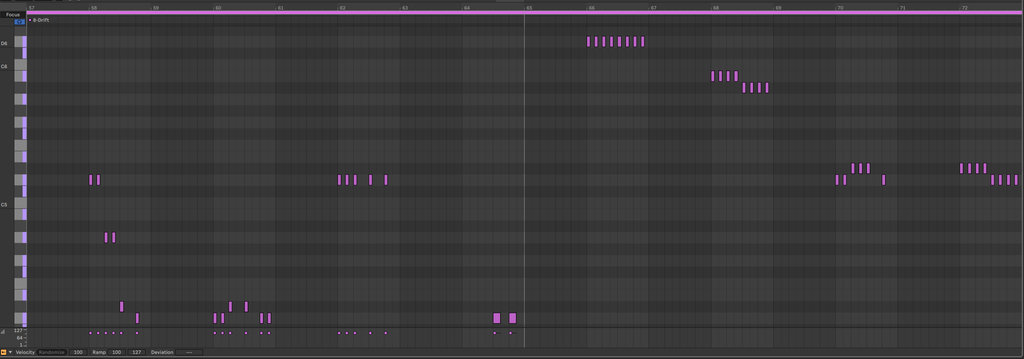
Next, I found that the patch we made earlier was too atonal – sounding too much like noise and not notes – so I made some adjustments to the patch and effects:
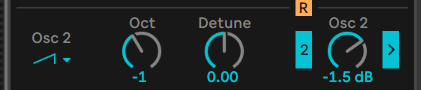
Change the oscillator shape for oscillator 2 to saw:

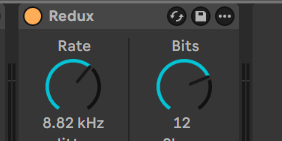
Alter the redux to be less drastic, frequency 8-9khz and 12-bit reduction:

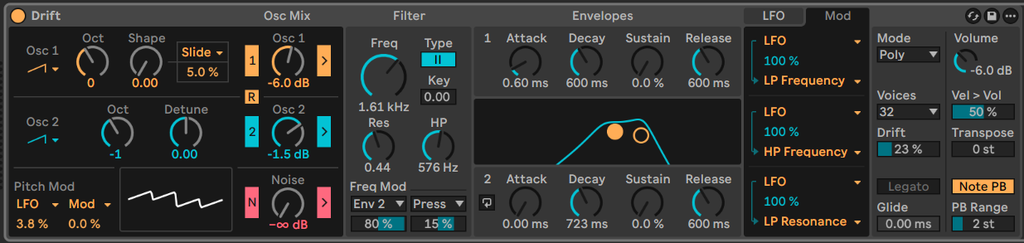
All together the instrument and devices are now:


With the revised drop sounds, our drop section now sounds like this:
It’s not quite a banger yet but this feels like we’re progressing in the right direction. At this point, we should be thinking about making variations of the existing sounds and melodies that we have to develop the track further.
One place to work could be on the drums, I updated the drums so they’re giving stronger section breaks every four bars:
I further worked on the drums and ended up adding a cymbal on every quarter-note which really helps to drive the energy up during the drop:

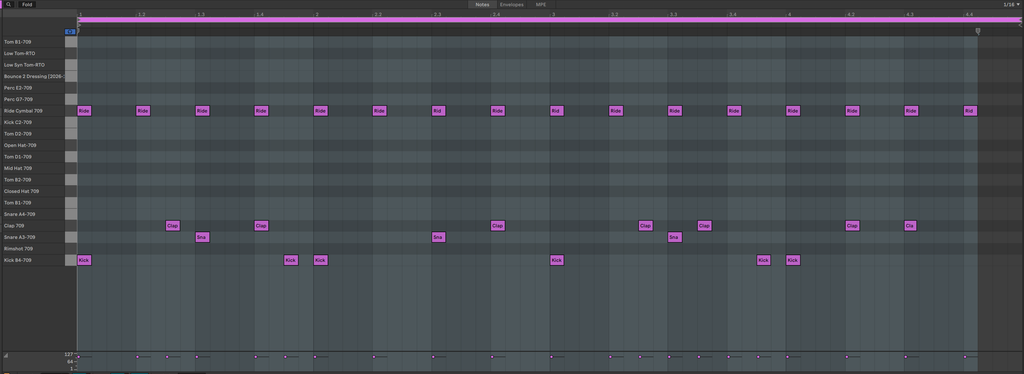
At this point, the drums are sounding a lot better, let’s go ahead and duplicate the 16 bars that we have on the drop and make more variations on the duplicated section. The dark purple clips will make up the second half of the drop.

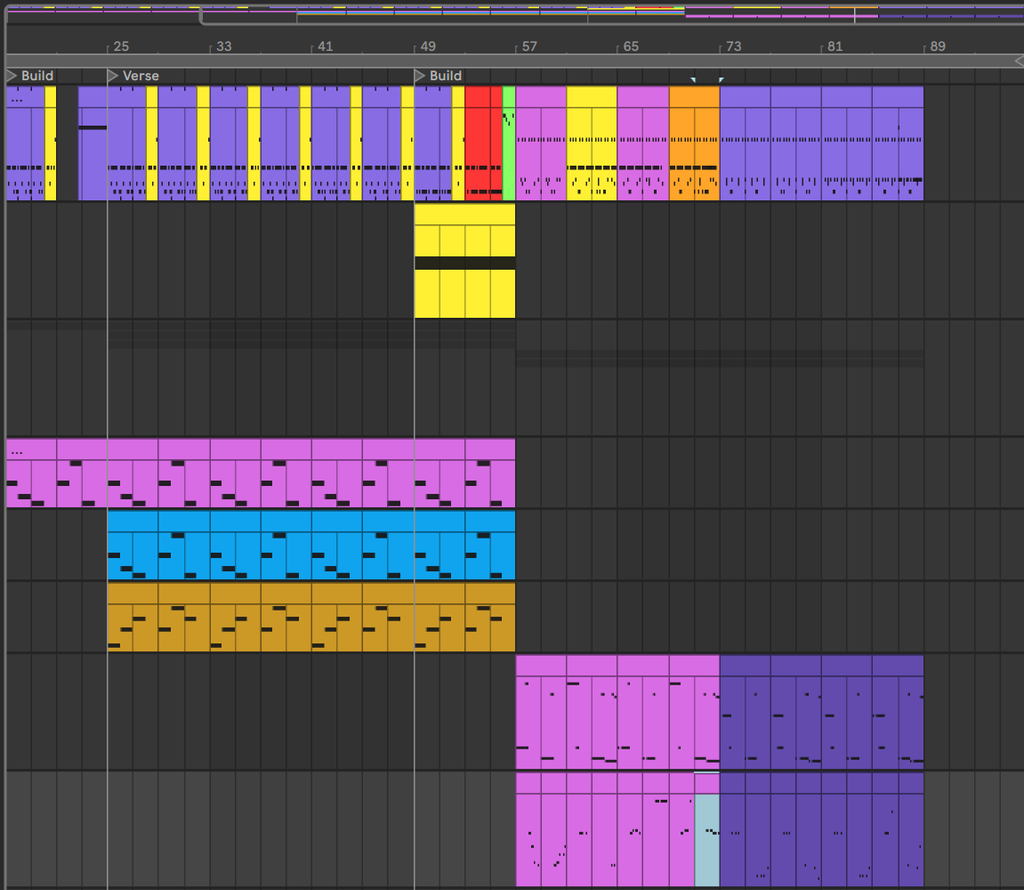
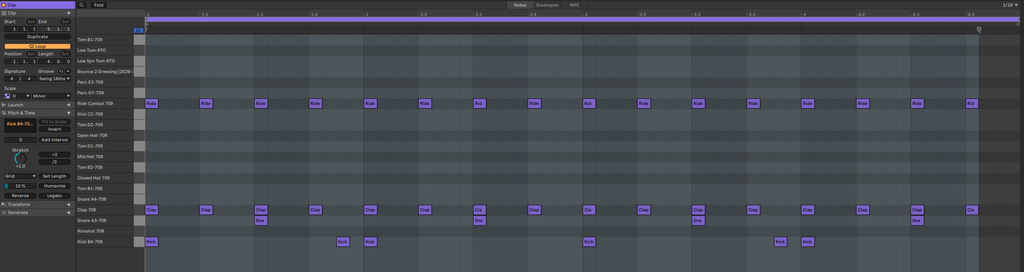
I started on my revisions to the second part of the drop with the drums. I decided that this section will have claps. So for the first 16 bars, we’ll try out whole note, half note, and quarter bar claps – I ended up starting with just one clap per bar:

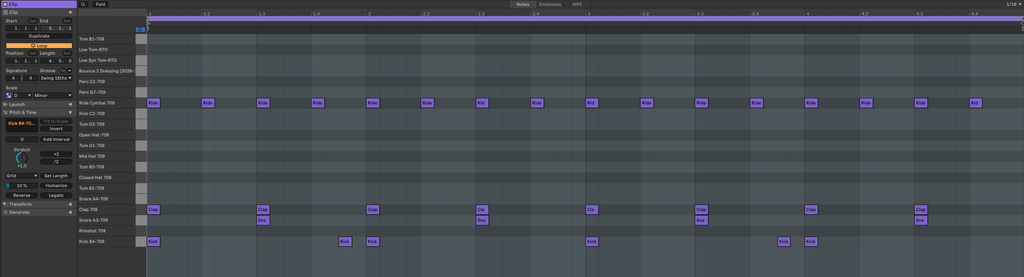
Then we’ll double-time the claps in the second half of this drop part to give a bit of a crescendo at the end of the drop and finish releasing the tension from the drop buildup:

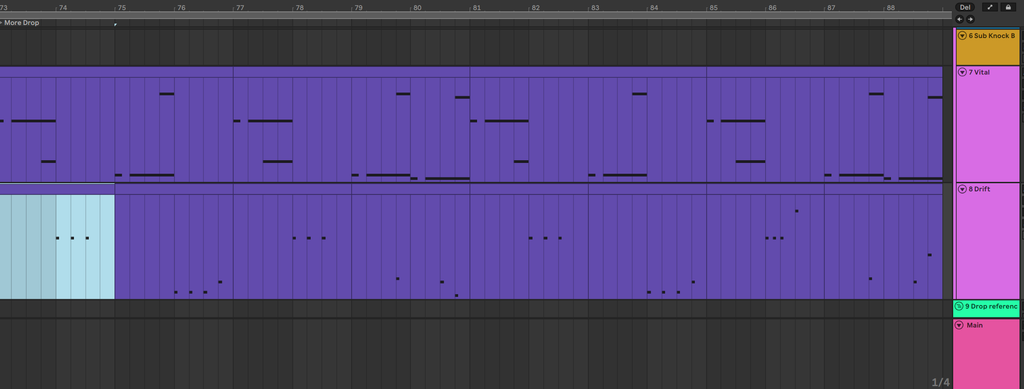
I decided to make the Drift patch’s “response” sound clips to have fewer notes in this second half for more contrast:

At the end of the second section, let’s again build a downlifter by coping the riser clip and reversing the automation and pitch for the riser in track 2:

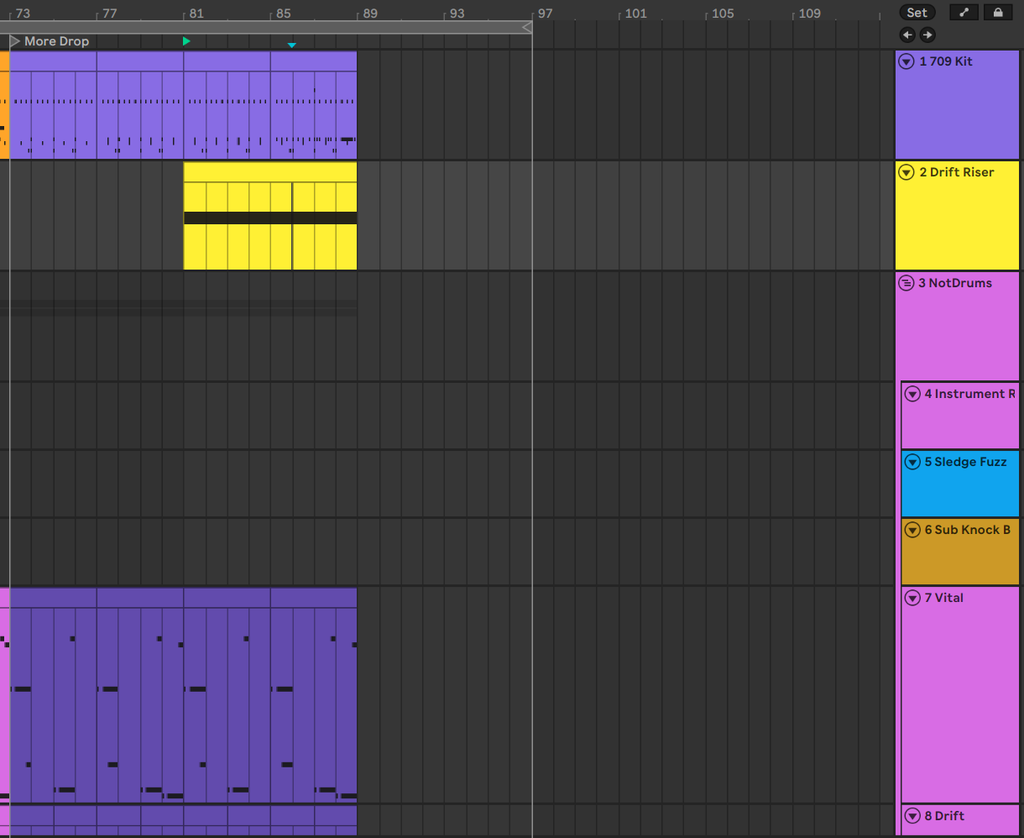

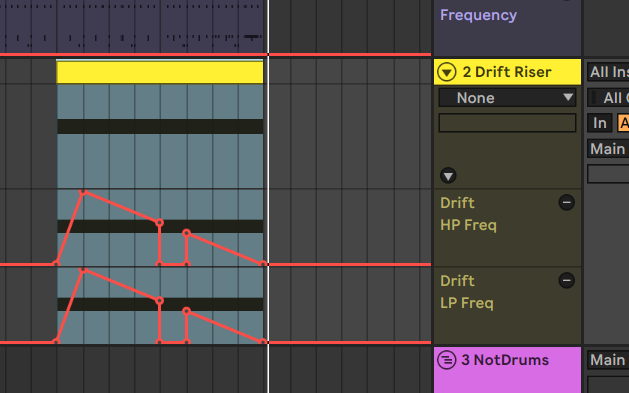


this creates a nice descending tone at the end of the drop section.
There’s some sub-bass range missing so let’s go ahead and pile a drift on top of the vital patch:


Select the devices view on Track 7 which should be the Vital instance – press shift+tab if you are on MIDI and need to see devices. It should look like this:

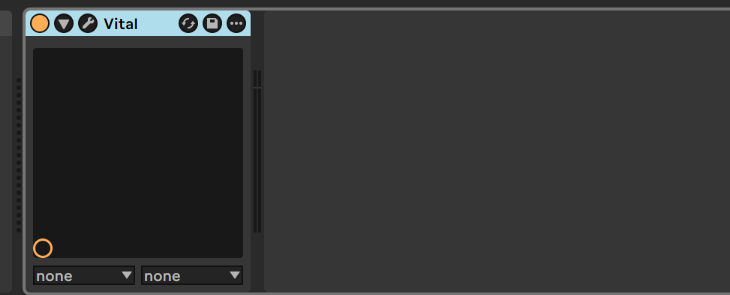
Press Control+G to group the Vital into an instrument group.

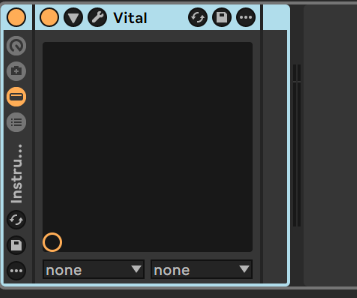
Click show/hide Chain list:

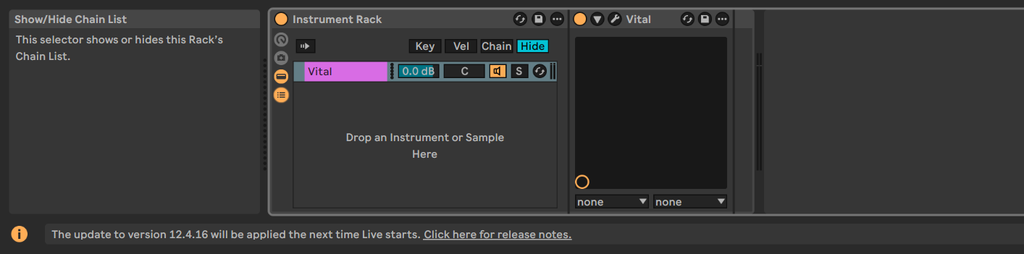
Now drag a Drift onto the instrument rack and set both of its oscillators to sine without detune:


Set mode to MONO:


Glide to 280ms:

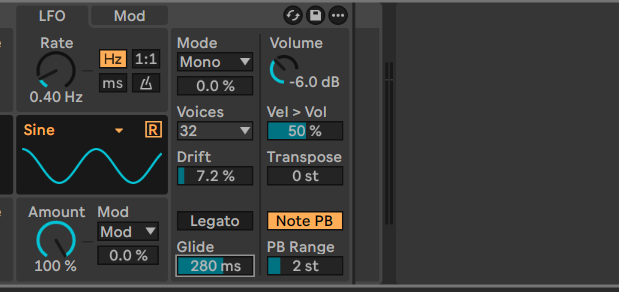
Now you can solo / unsolo the instrument in the group by pressing ‘s’ or clicking the S icon:

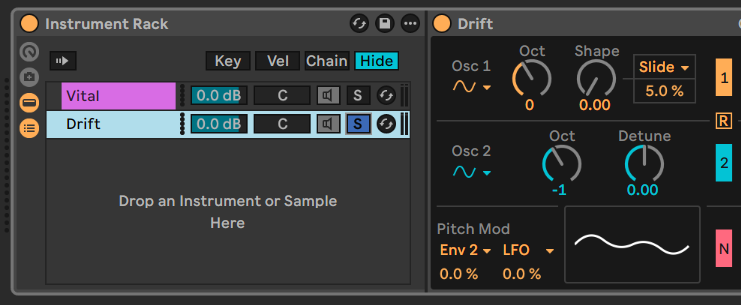
Because we now have a clean sine sub, we can EQ out the low lows from the Vital instrument and maybe try driving these instruments through some parallel chain effects.

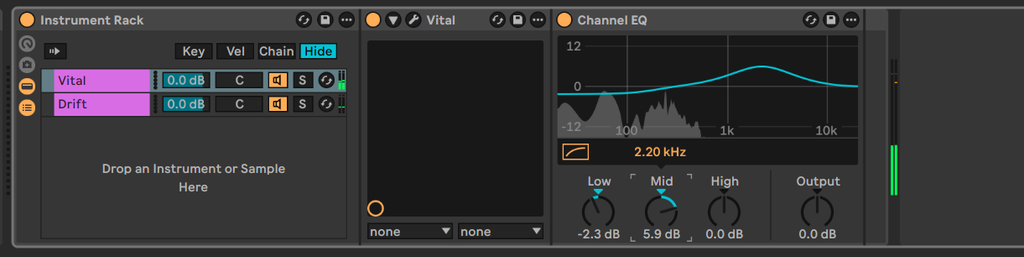
We have the combined sub coming through and tried to isolate it from the mix with an EQ but now we also compress because we’re combining signals with some potential crossover.
Now that there’s some group processing, I said what the heck and put another drift similar to the sub but another octave above it with different glide length:


Now the transition is what needs love, listen:
Fix the transition between verse and drop sections
Let’s fix the transition a bit. Currently, it’s just too abrupt and jarring to go from what we have in the verse versus where the drop is.
First, add 8 bars to the arrangement at bar 56-57 :

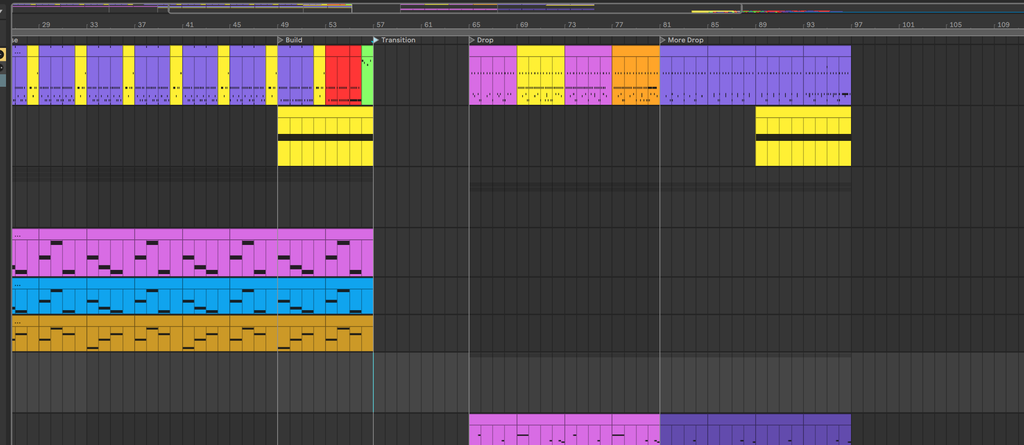
Add a set marker for the transition part and let’s try some tricks:
Record audio from track 8 to audio by setting the input on the top of the group section (8-Instrumen in the following picture):

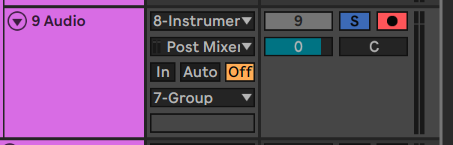
When you record with the track armed (red record icon) it will output audio, press r to reverse it or sections of it.

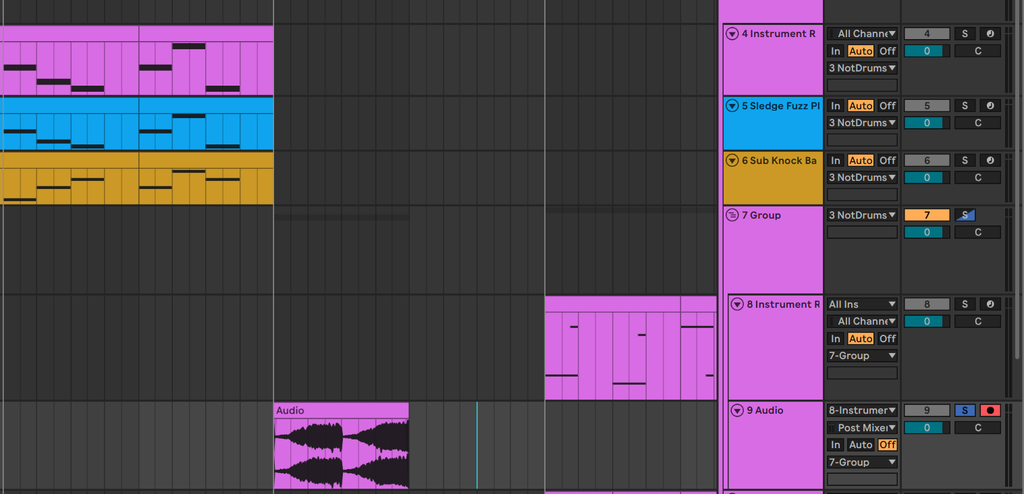
Next process the output with an effect like reverb using bounce (ctrl+b).

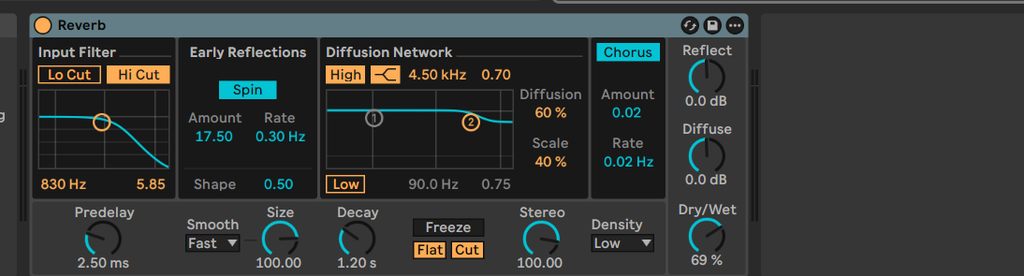
Now we have a nice effect from our sound that we can use to build a bridge. After some chopping you may end up with something like this:

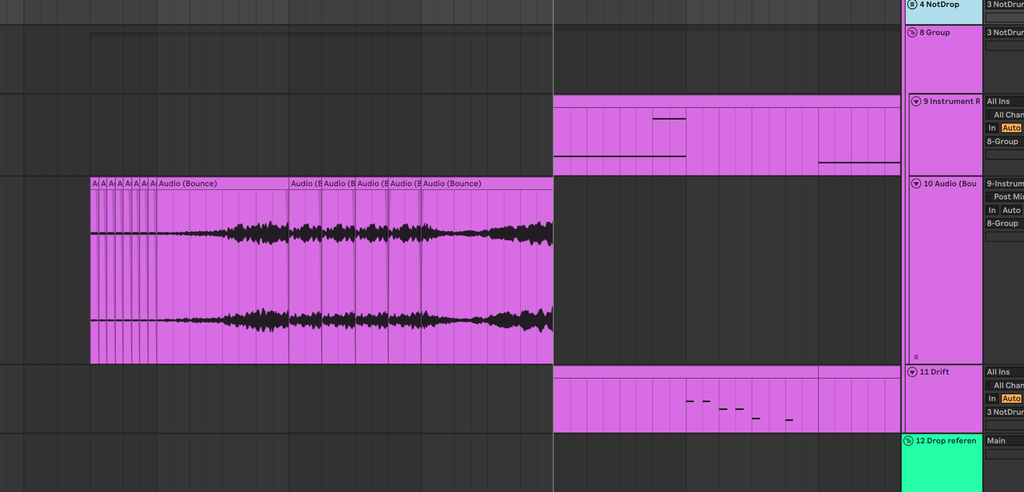
That sounds like this:
We’re getting there, just need something to come out of the previous section:
I put the notdrop sounds into a group and then rendered them to audio:
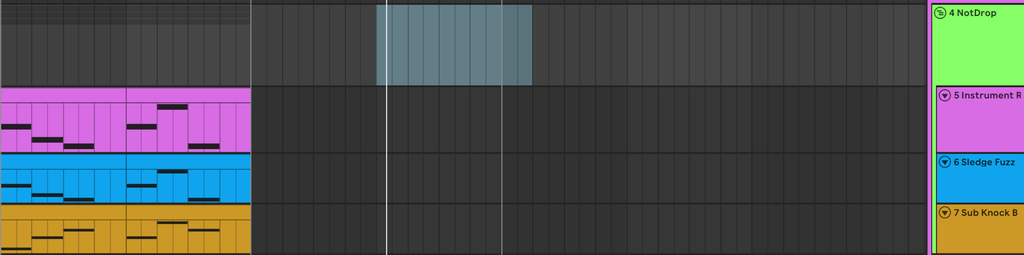
Then took the rendered audio and ran it through some reverbs and stretched the output to get this:

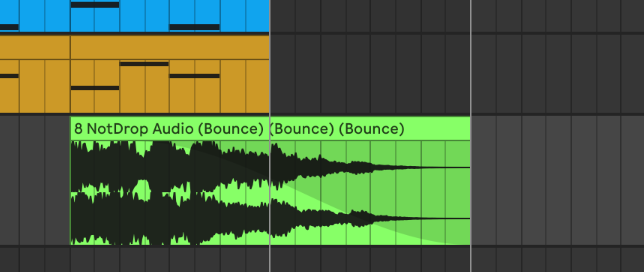
I then faded it into the sound from before to get this transition sound:
We had written two completely different sections in two days so they were not going to just blend together so we had to find ways to stitch them. We tried some effects and got them to match with some tricks like stretching and warping with texture mode.
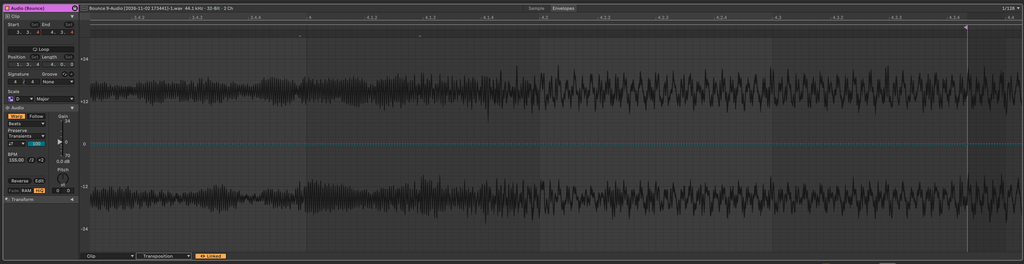
We’ll now transpose the clip a bit and tweak the warp mode – for a scratch sound we can use transpose and pro:

After these adjustments, we may want to reset the grid at the drop by right-clicking the timeline and inserting a time signature change (4/4) – transitions can mess up phrasing a bit so do as I say not as I do (this would need more work before releasing because the phrasing would be hard to DJ):

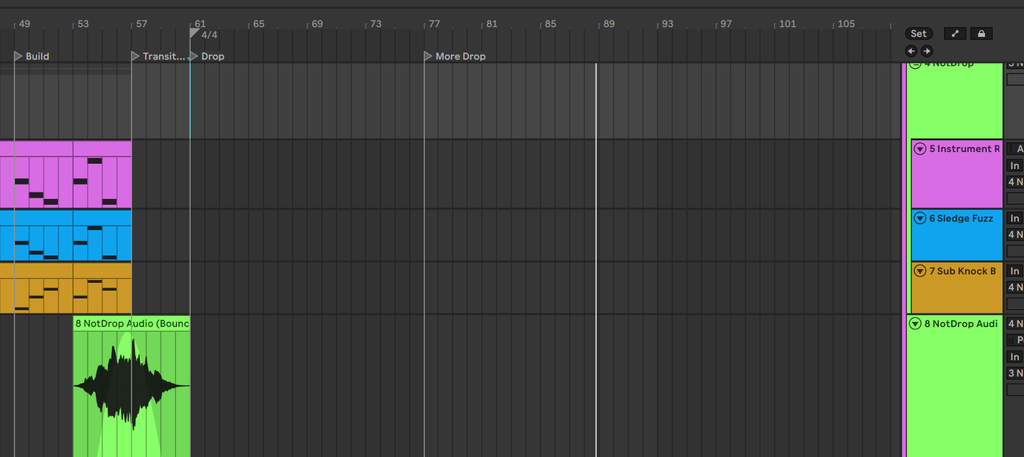

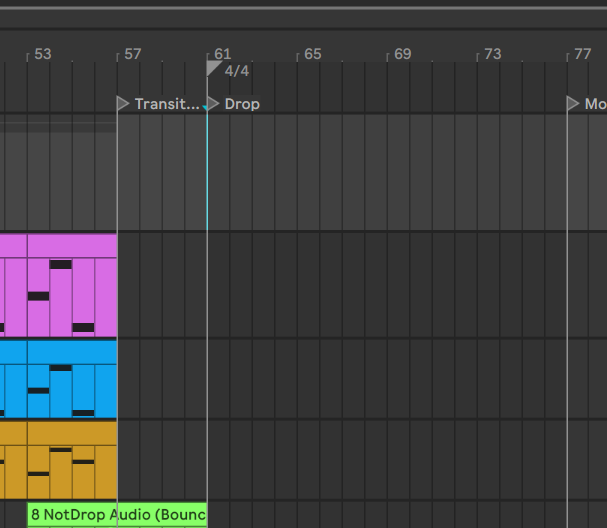
Now, we’ll adjust the fades a bit and do gain management on the two clips in the transition:

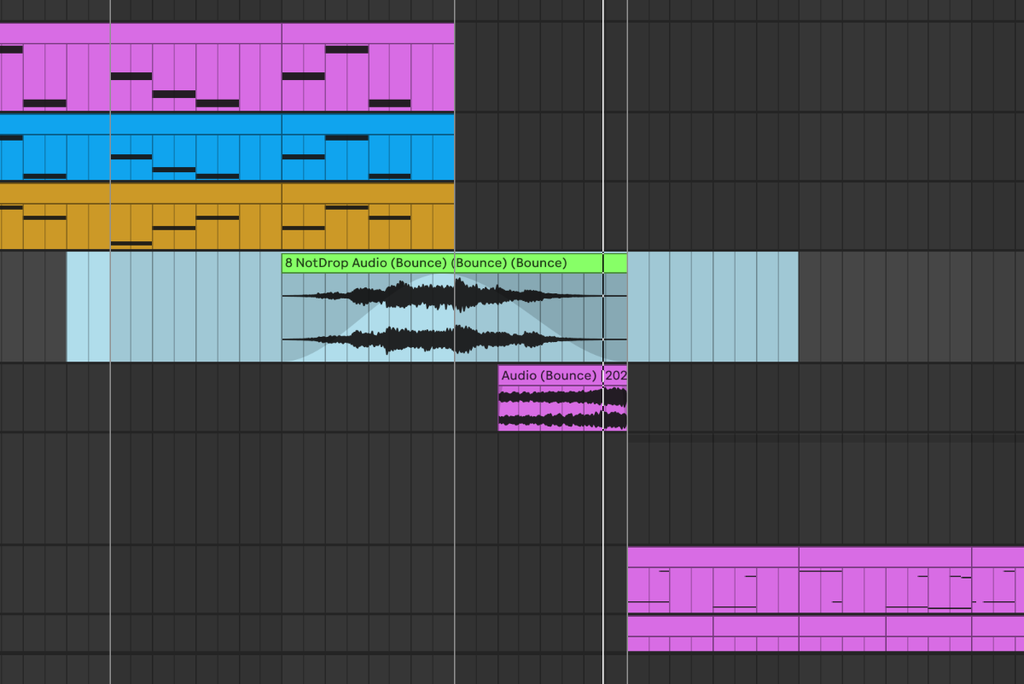
Now the transition feels good enough to stop working on for now.
All we have left is a few finishing touches on the mix at this point and we’ll have gone through the basics of Ableton Live Intro stock devices.
Some finishing touches and mixdown
Currently, the bass sound coming out of vital is hanging around in the mix a bit longer than we’d like so it’s time to see if we there’s a reverb or something in its effect chain causing issues.
First, I’ll open Vital in the Bass instrument rack by selecting the track and then clicking the Gear icon in the Vital box:

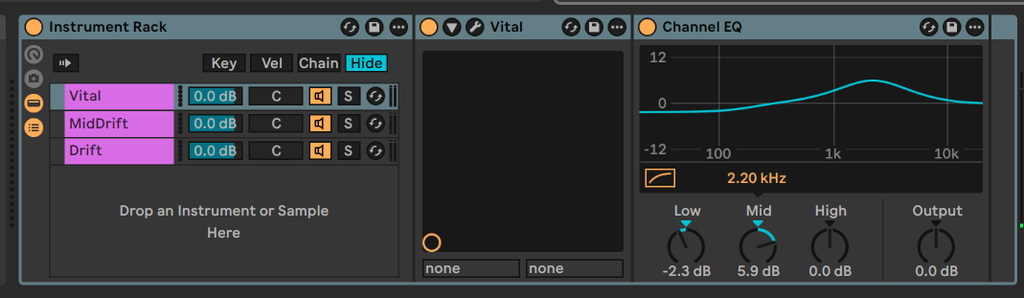
If the Reverb was on, I’ll try turning it off:

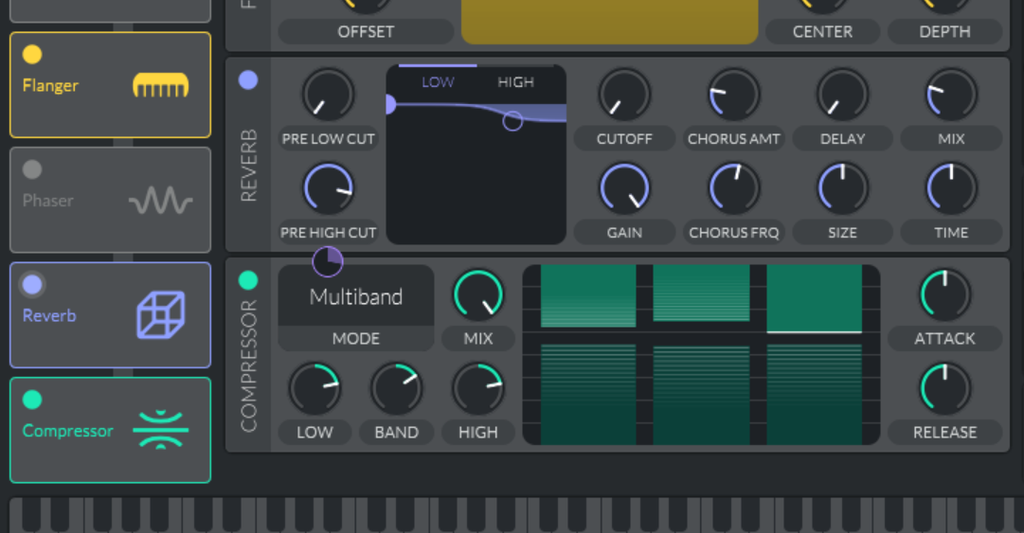

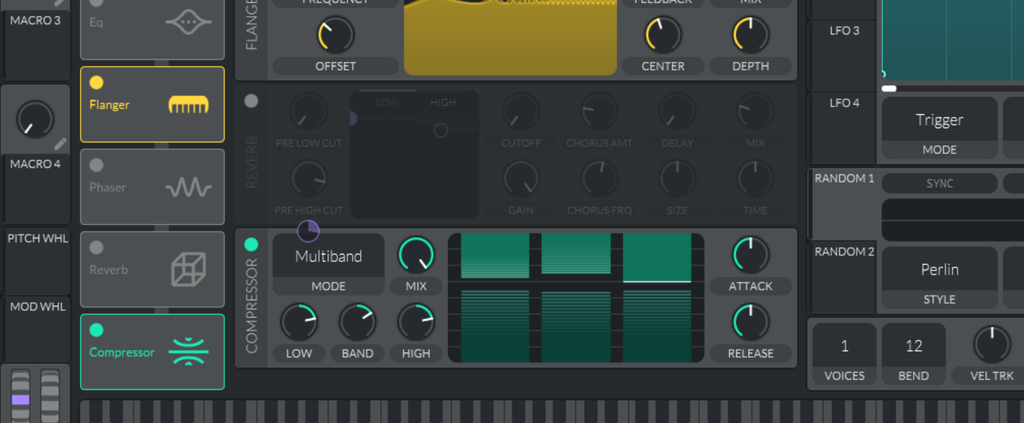
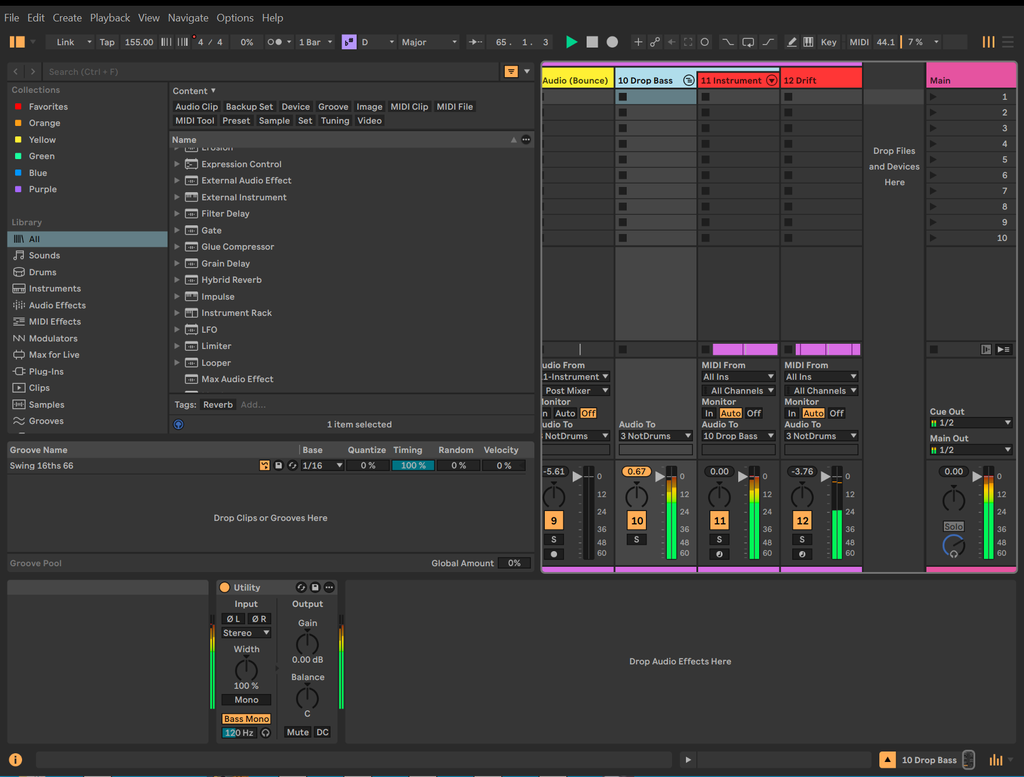
Now the fuzzy bass sound won’t linger in the mix. There could be some stereo information in the sub frequencies still so I’m going to select the group of Drop bass sounds and add a Utility device with Bass Mono enabled:

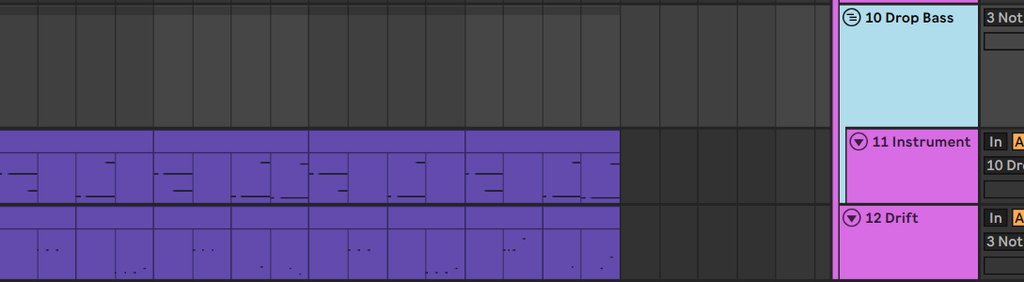

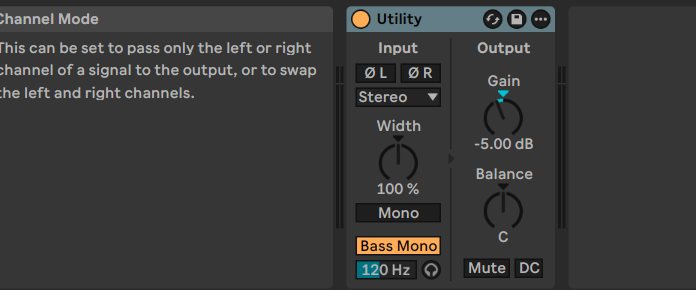
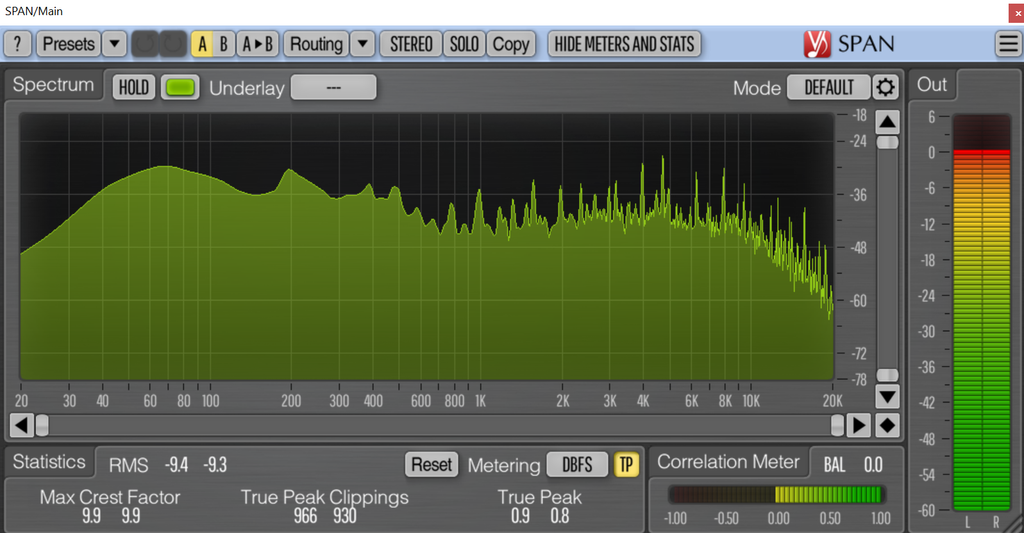
Next, I’ll check out the mix in Span to visually compare the drop and non-drop sections:
Pre-drop:
Drop:

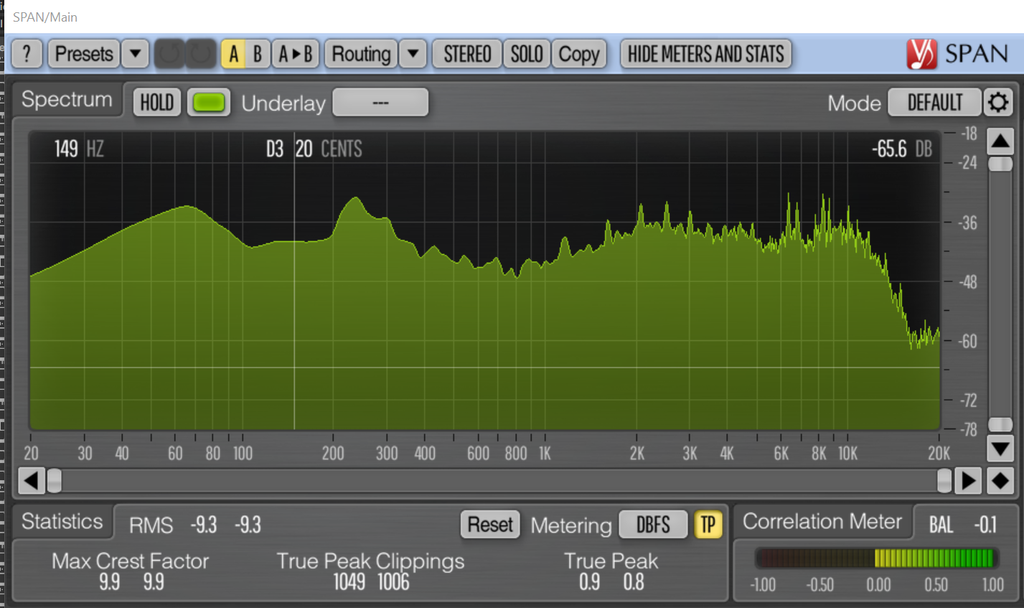
We can visually see that the drop now has more emphasis on the lows and less mid-range sound than the rest of the mix. It’s not correct either way but I feel that the contrast between the drop and the rest of the mix is healthy where it’s at.
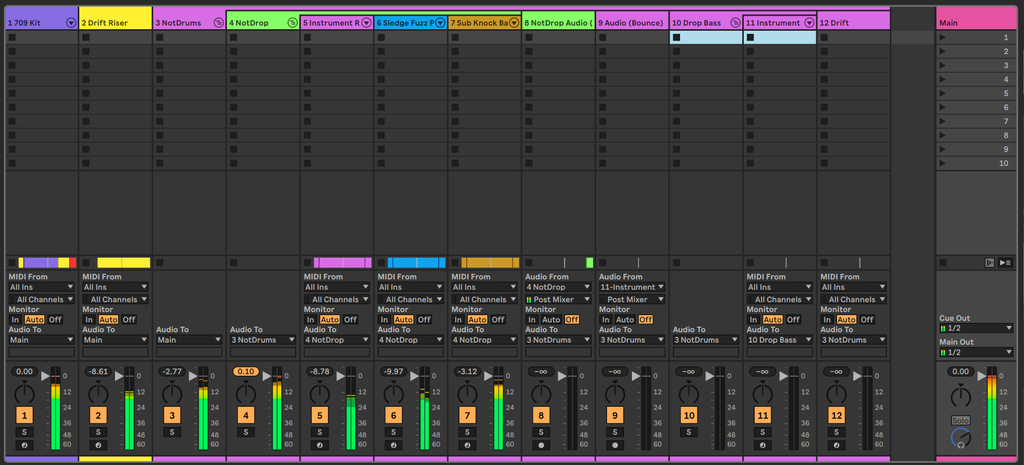
Next, I’m going to listen through the track in and check the meters in session view to make sure that we’re not clipping into master:
Pre-drop meters:

Meters while the drop happens:

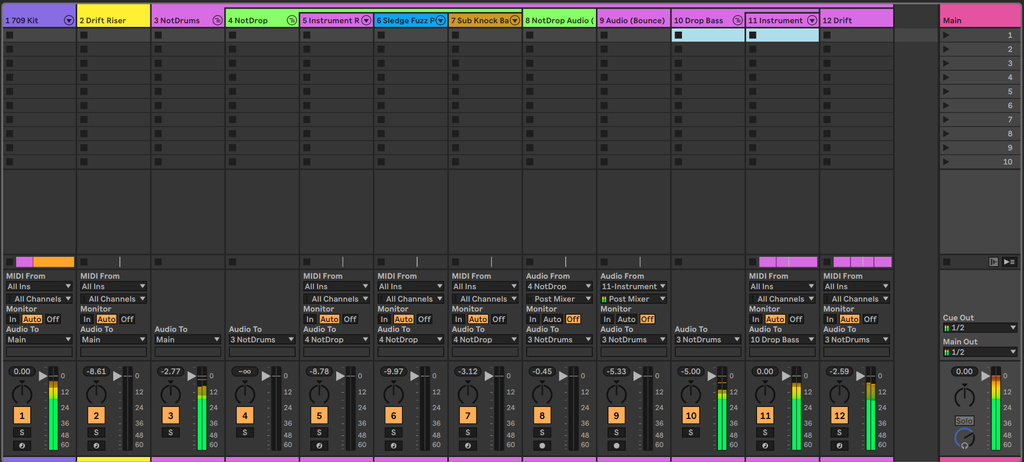
I noticed that the drop section has about 2db less of volume hitting the NotDrums group, so I will remove the gain reduction that I was doing in the Utility we added and just make sure it’s not distorting while I do so. I ended up just removing the gain reduction all together because the limiter and clipper on the NotDrums group is managing the gain reduction.

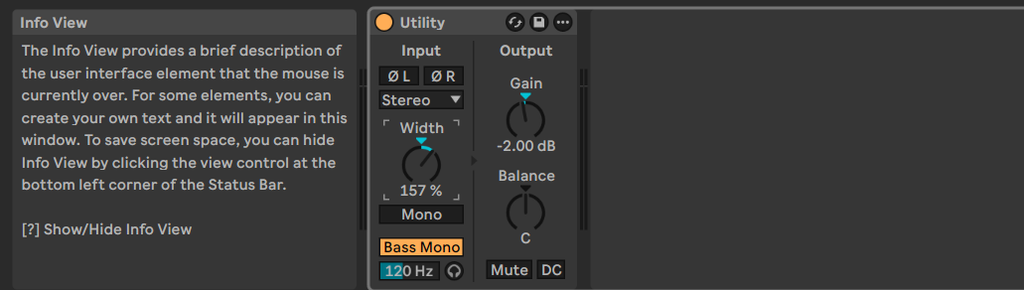
I want some additional width on the Basses as well, so I went ahead and turned up width in Utility:

This also made me curious about adding some width to the response sound as well, so I added a utility and a reverb. To isolate the reverb to just the high sounds, I used a channel EQ in a parallel chain by grouping the reverb (ctrl+g) and then adding a second through/dry channel:


Because the parallel chain is adding some gain, I went ahead and turned down the Utility to make the sound fit better in the mix:


After making these changes, I’m feeling good about the mix on my studio speakers but it’s a good time to listen on some different sources. I now printed the audio to WAV for listening on headphones and my iPhone speaker:
While I’m listening on my iPhone and in airpods I’m listening for opportunities for making transitions better, parts of the mix that stand out that don’t feel right, and making sure the drums are audible over the other sounds. It’s important to listen at both high and low volumes in this phase. You listen at low volume by slowly turning the volume down and listening for the last thing you hear – if it’s not your kick, you might want to consider changing your mix so the drums punch through. When you listen at high volume, focus on whether there are piercing sounds in the highs – on a loud system, these sounds can be really abrasive.
For this listen I’m not noticing anything too bad in the low frequency sounds but the response sound in the drop section is a little piercing to my ear. I’ll go back and make one more change to reduce the volume a little bit so the sounds are not too piercing.


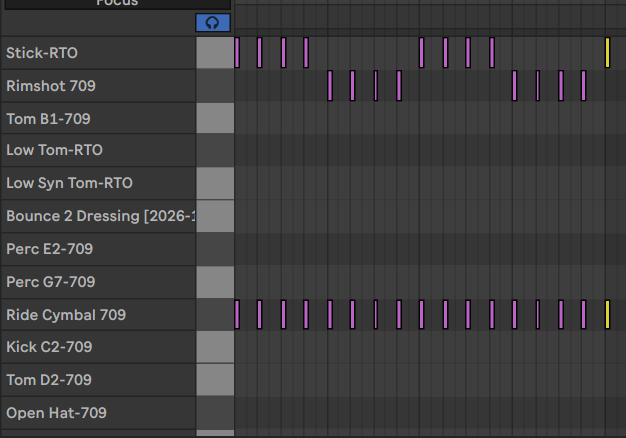
I’m also noticing that there could still be some fun utility sounds to add in the drop section at the end of phrases, so I’ll go back through the Vibrations and Singluarities packs we used earlier for some inspiration. I liked these rim and stick sounds so I sprinkled them on the drums following the call / response patterns:

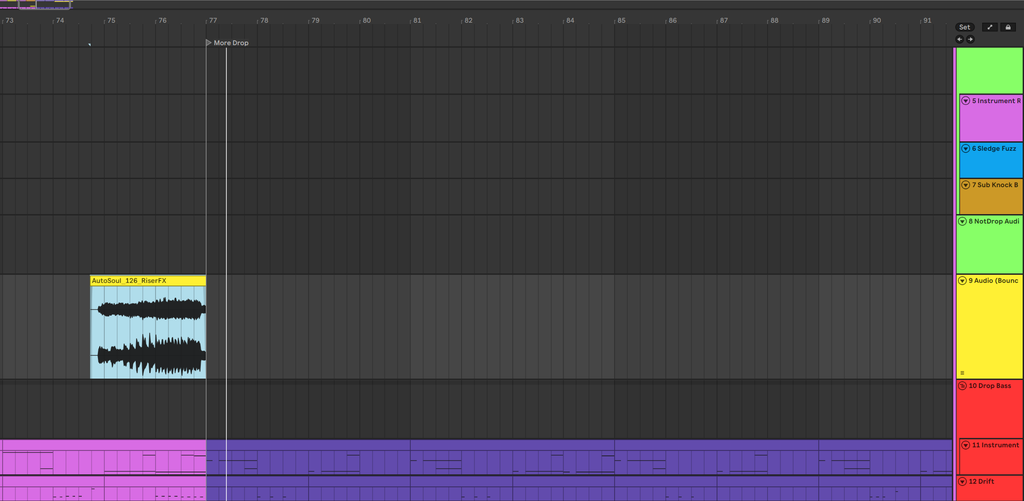
I also liked the sound of this riser from the vibrations pack and added it as a turn around sound for the split between the first and second halves of the drop:

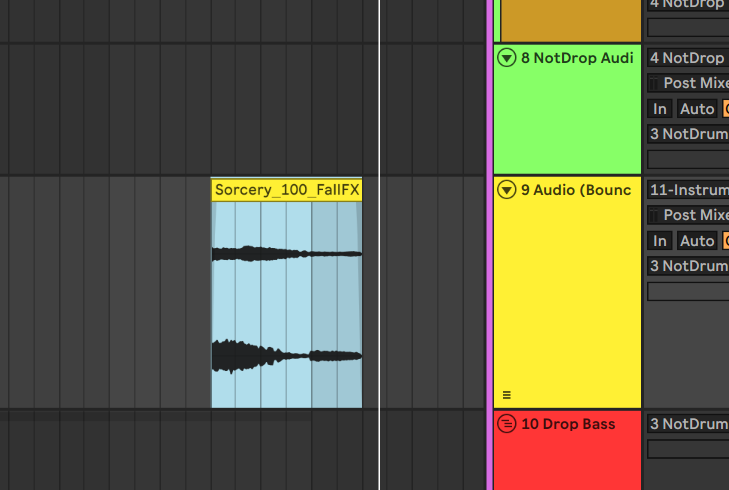
And I found another downlifter sample to use for the end of the drop phrase:

I’ll stop at this point because I could do this all day! Finding little FX sounds and placing them in your drop is what can really add some groove, movement, and finishing touches to polish your track from almost done to completely finished. With the changes we added today, the track now sounds like this:
I have uploaded my project so you can look in more detail into the sections we’ve gone through today – an errata, I had to join together the transition sections so they would open in Ableton Live Intro, sorry about that. But it’s a great bridge to next steps given we hit the limit on Ableton Live Intro!
Conclusions, exercises, and what’s next
First off, congratulations for making it this far! If you’ve followed along on every step, you have now taken a full tour of Ableton Live Intro and have an idea on what goes into producing tracks. You’re probably also pushing the boundaries of what is achievable with Ableton Live Intro and are considering upgrading to Ableton Live Standard or Suite because in your own tracks, you have exhausted the sound design limits of what you can do with 8 tracks and want better devices for mixdowns (Channel EQ and EQ3 can only be so surgical).
If you’re committed to Ableton Live, I recommend jumping past standard and going with the full suite and wait to upgrade until right after Ableton releases a major version, which as of this writing will be Ableton Live 13. The Operator instrument, Amp, Roar, and all the spectral devices are really nice to have. If you go the upgrade path, I recommend finding a way to join an educational program to get support from educators while you learn the rest of what Ableton Live has to offer. I’ve plugged a few programs that I’ve benefited from in my own journey and they made a massive difference for my learning trajectory. You’ll also get a discount on your upgrade if you find a program backed by Ableton.
I’m aware that we didn’t finish some of the tracks we started. This is part of production for me: I like to work a track until I run out of ideas and then let them sit for a while if I lose inspiration. This approach can be challenging for many people who want to have everything resolved all the time but that’s not the only way to make music. Some programs emphasize finishing, I just enjoy the process of making something. Maybe I’ll pick up the track we started here and will work it further using the full suite of tools in Ableton in the future but I enjoyed the exercise of creating something using the constraints of Ableton Live Intro.
If you’re looking for exercises to continue working on this track and your other tracks:
- Keep doing mixdowns and edits and revisions on tracks. The path of finishing tracks involves coming back to the track through many, many revisions. The track that we worked on today is not even halfway done relative to other tracks that I have finished and I always feel like I could put more work into every track I work on. The process of creating something that you’re proud of is different for everybody but it generally involves a lot of polish and then taking a break and then polishing some more.
- Explore sound design further. I recommend picking a virtual synthesizer that is popular and watching YouTube tutorials for creating specific patches. For example, you could get Serum or Serum 2 and watch bass design tutorials on YouTube from people like Virtual Riot or could stick with Vital and check out what Bunting has shared. It can be really rewarding to learn how to synthesize a few specific sounds such as percussion sounds, Reese sounds, plucks, lasers, watery sounds, and to learn how the different basic shapes (triangle, square, sine) sound when you process them with distortion, phasers, and other effects.
- Do arrangement exercises and try to reproduce music from your favorite artists. This is always an exercise that I revisit while trying to learn more. The key part is breaking down a track and understanding why you like it. This part of your music producer journey will transform how you listen to music and how you find your own sound.
Although this is the conclusion of my Ableton Live Intro series, I’ll keep putting out resources that I wished existed when I started learning. I have been sitting on a blog post covering a bunch of intermediate and advanced nuance to Ableton Live that I’ll post in about two weeks.
References and resources
I learned all of this from my teachers and can not take credit for what I’m teaching. If you want to learn from the people who taught me, please check out the following masters curricula (in chronological order of when I discovered them):
For more learning resources, you can check out the Patreon pages for some folks I follow (in alphabetical order):
I’m presently unavailable for lessons, but you can try the Producer Dojo, Encanti, or Gravitas Create for facilitated options and my friend Cryptochronica is also providing lessons. If you know me, and I’m forgetting you’re offering lessons, let me know so I can add you.
The lessons: