
Rolling Sampler is an inexpensive plug-in from Birdthings that is the gift that keeps giving for me. The existence of this amazing little utility was brought to my attention by Mr. Bill and I find myself filling a lot of little workflow gaps with it over time. There are plenty of alternatives to using Rolling Sampler (e.g. the
In this post, I’ll share a few Ableton-Live-specific tricks that I have picked up while playing with Rolling Sampler.
How Rolling Sampler works
Rolling sampler is a VST device that you add to any track that will create an ongoing recording in a temporary file on your computer. Simply add the plugin to a track:

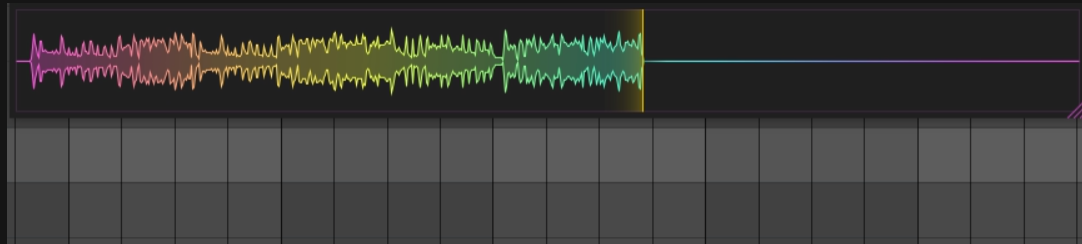
Open the VST window, and you will see the audio getting recorded when audio comes through on that track:
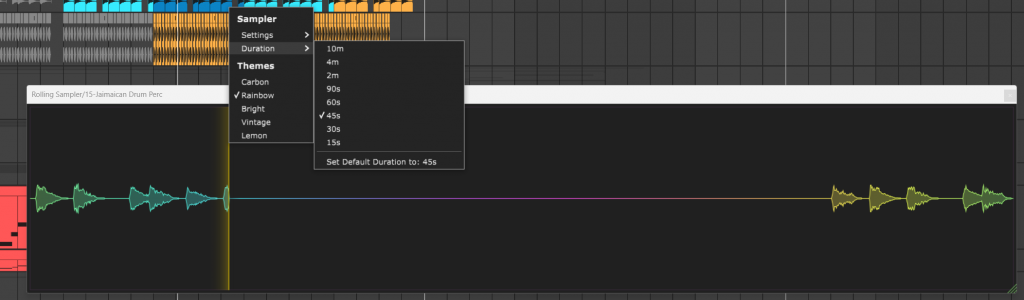
Right-clicking on the plugin window will let you configure things like the duration of the recording.
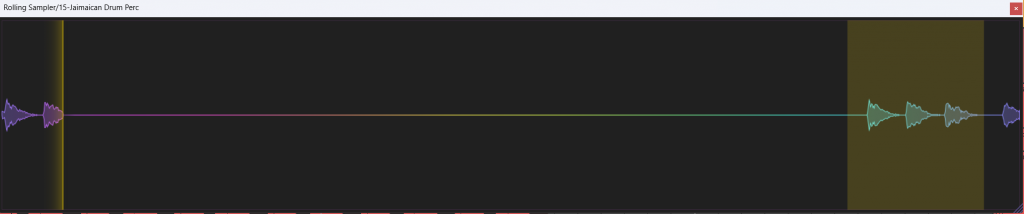
When you highlight a portion of the audio being recorded into Rolling Sampler and drag that portion to an audio track, the sample will be copied as a new sample.
It’s extremely basic but that is really be beauty of the plugin. With that in mind, let’s talk about ways this utility is really helpful in my workflow.
Trick #1 Rolling Sampler as an oscilloscope
This is almost not even a trick it’s so obvious but because Rolling Sampler is always showing you a visual representation of the sound being recorded, you can use it to do things like analyze the shape of sounds you are designing. I find it especially useful for looking at the shapes of synthesized percussion (Kicks look like a Doritos chip, Snares look like a sideways Christmas tree, Carrot, Coke Bottle, ornament, gnome, etc).
I find myself reach for Rolling Sampler instead of s(m)exoscope these days while doing sound design.
Trick #2 Rolling Sampler as a share utility
Ableton Live has this pesky behavior where it creates exclusive locks of all of the files that are being used in a Live set while you have the set open so sharing a sample out of the set over chat on things like Meta Messenger, Signal, and so on can fail with a message like “this file is in use”. You can instead just toss a rolling sampler on your master and drag out / share your song previews to a collaborator or teacher for feedback.
Trick #3 Rolling sampler as a mudpie capture tool
Instead of resampling your mudpies and then slicing them up in an audio track, you can take rolling sampler, set it to a long duration, make your mudpie, and then extract only the slices that you want from the recording.
You can even get bonus points for using session / clips as your sound board of the slices that you save for later.
Trick #4 Rolling sampler as an effect variation capture tool
I like to take Rolling Sampler, add it to a loop with a snare or other sound and then add plug-ins to the chain and get variations of the sample. This can be especially useful with time-based effects such as delays. Similarly to making mudpies, you can add your favorite delay plugin (for me, this is Minimal Cluster Delay) and flip through presets or design sounds while rolling sampler captures them for you.
Trick #5 Rolling Sampler as a de-128 machine
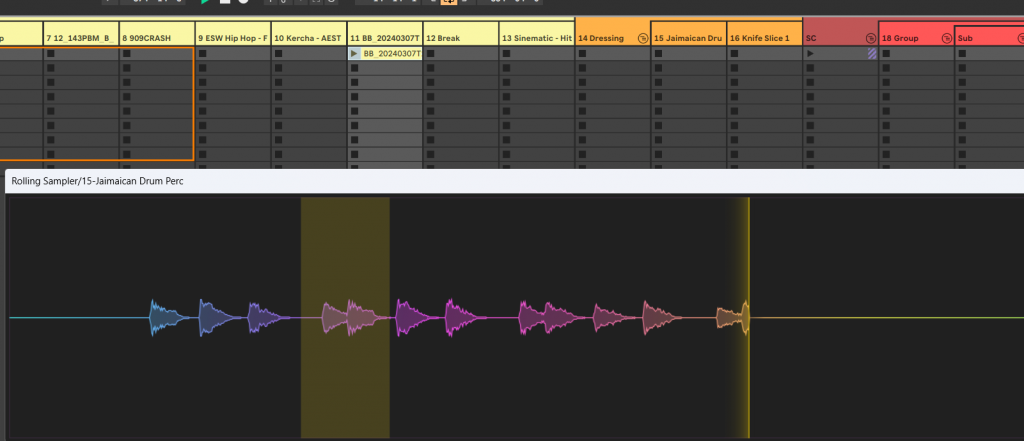
Lots of producers use multisamplers to quickly browse and explore drum variations in their tracks (this technique, aka 128s, was popularized by Ill.Gates). However, sometimes you wanna clean things up and doing something like “extract chain” and so forth is really tedious and confusing when you just want to quickly simplify a drum rack. I like to take Rolling Sampler toss it on my drum rack, then play all the selected samples, and then drag back the clips onto the sampler to replace the multisampler racks with single samples.
Trick #6 Rolling Sampler as a Room Recorder
Sometimes while you’re working on a track there’s a neat sound that is made either by ambient room noise or that someone says aloud while producing. You can continuously capture the sounds of the room by setting up a track with the mic audio input enabled (Ext In > IN in the right column next to the track in arrangement view) and rolling sampler on the track.
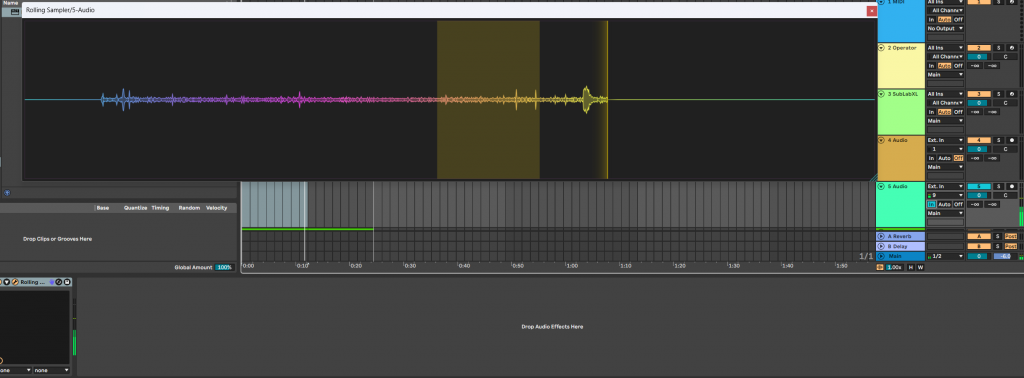
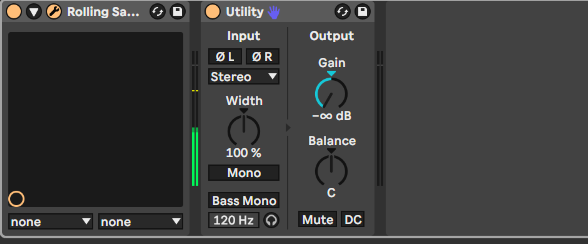
Now when there’s a cool sound made while you’re producing in your room, you have the audio capture ready to be saved in your project! If you have a lot of inputs, you can even put mics in various locations in your room and capture audio from different locations. You can also add a Utility after the rolling sampler device to mute the monitoring output and avoid feedback.
Closing thoughts
I feel like I’ve just scraped the surface of how you can work faster / more simply with Rolling Sampler but hopefully these tips will help you understand how you can make use of having a quick and easy way to resample and visualize your audio in your DAW!
Stay inspired, keep going, and most importantly have fun!