


If you’ve been following along with Part 1, you should now have a general idea of how to:
- Switch between session and arrangement view
- Set the track BPM and key
- Create drum patterns with the Live drum rack instrument
- Add synthesizers to a track and use instruments from Ableton Packs
- Save and export projects
We’ll keep going with what I feel is the next thing you should learn: working in Audio. When you’re working in audio, it’s different from working with MIDI because:
- You are constrained in the pitch and timing of the samples you are working with
- You can visually see the waveform which makes aligning beats easier and Ableton Live visualizes how loud parts are
- You can manipulate the audio and do things like reverse parts, create glitch edits, and stretch or shrink sounds to taste
The lesson plan is as follows:
- Part 2: Learn how to build tracks incorporating audio
- Audio tracks and warping
- Learn how to use the simpler (sampler)
- Tuner and EQ3 for analyzing and managing parts of samples
You might have noticed that a lot of the things that we’re planning on talking about today don’t specifically refer to working in audio – EQs and Tuners – these tools are to help you analyze and control sounds when you’re working in audio. It’s important to learn these things at the same time that you learn general audio workflow so that you can understand how to prevent common problems when working in audio.
For today’s exercise, we’ll need some audio to start from so I’m going to provide my instrumental track that is a cover of the “Everything in the right place” Radiohead song. I’ll also be providing a vocal that I extracted from my M.I.A. Paper Planes CD and used a stem separator like UVR on. I’m providing these for educational purposes, please refrain from distributing works derived from these materials but download them so you can follow along.
At the end of the lesson, you should have something like my example in week2.zip.
Instrumental
Vocal for mashup
Audio Workflow in Live with Audio tracks and Warping
Let’s start with the fun stuff! Put Ableton into arrangement view and set the project BPM to the BPM for the Instrumental – 172 – and set the key to C Phrygian.

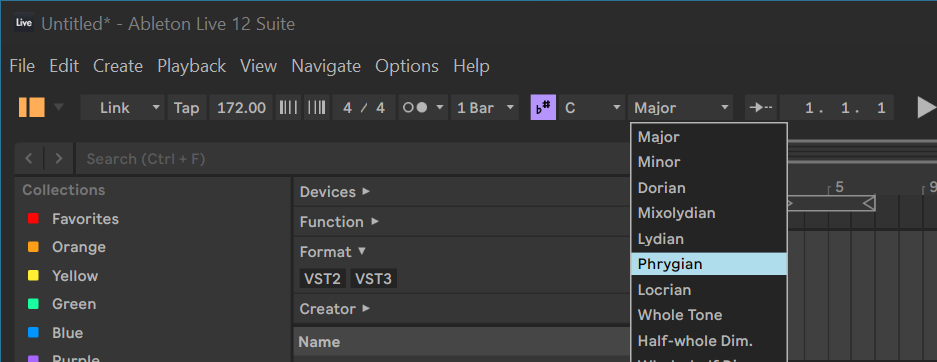
Note the BPM is setup in the panel on the top left below the menu and next to the Tap button. If you are using the default configuration for Ableton Live, it will initialize the track BPM to 120; setting the BPM when working in Audio is an important step to do first because Ableton Live will try and automatically handle Audio in the best way it can when you drag audio files into it to produce clips.
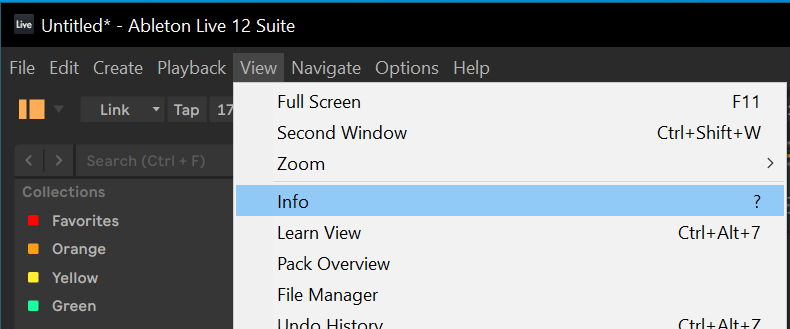
This is a good time for me to tell you about the Info pane – if you go to View > Info or press ? in Ableton live, it will turn on the Info pane on the bottom of your screen which tells you about the thing that you’re hovering over:

For example, if I hover over the BPM menu, the Info pane will give me informaton on the bottom of the screen about it:

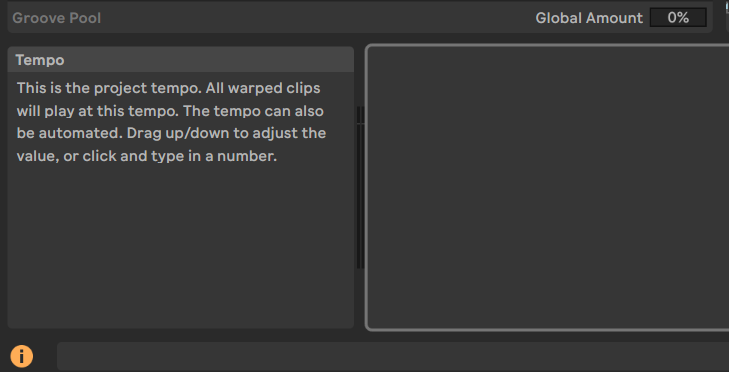
And would you look at that! Ableton calls it the project Tempo – I’ve been calling it the wrong thing all along – learn something new every day!
Moving along – if you are using the default Ableton project settings, you will have two midi and two audio tracks. We’ll leave the midi alone for now and will drag the instrumental track onto one of the available Audio tracks. Your project will now look something like the following:

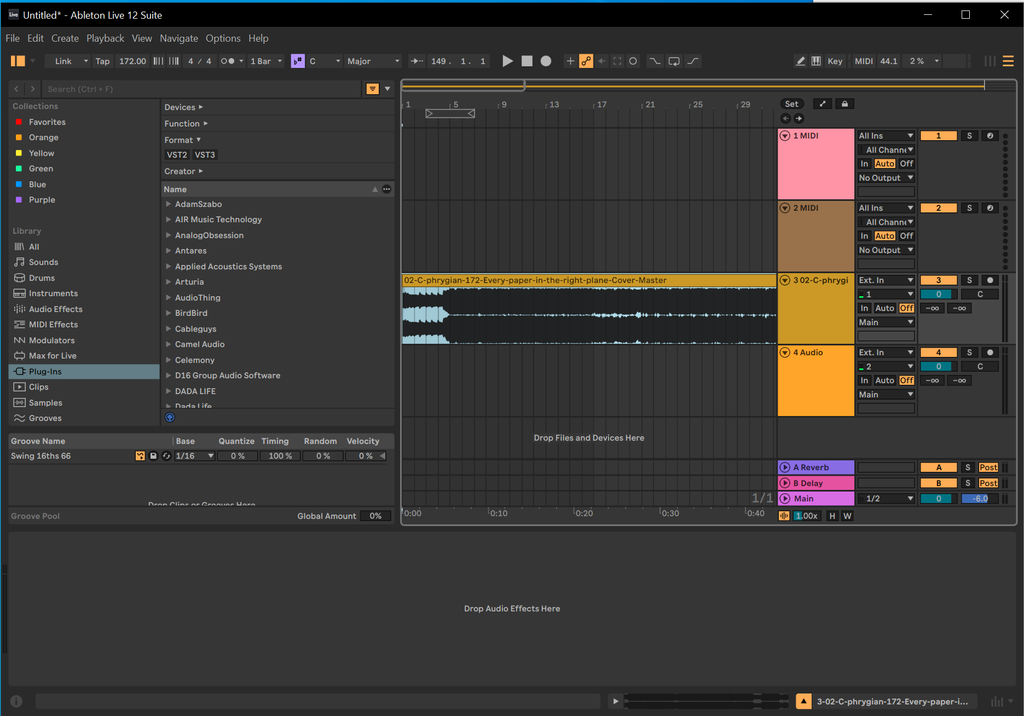
If you press spacebar or click the play icon, you’ll hear my instrumental cover play back on your Live instance. Let’s inspect the audio clip and learn about the controls that are available to you when looking at Audio – double-click the box on the top of the audio in the arrangement and the device panel will populate with the audio clip information:

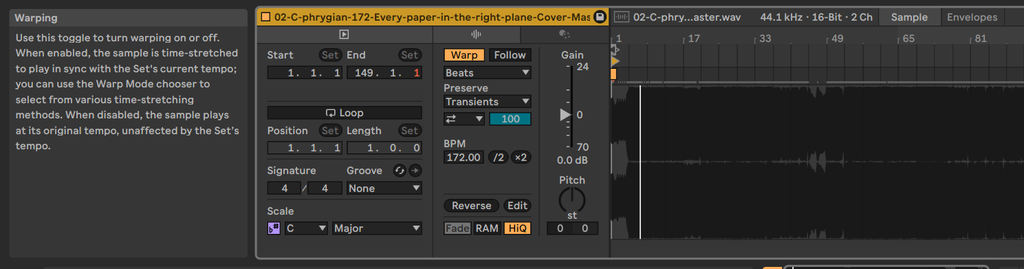
If you turned on the info pane, you can explore the functions of the Audio clip viewer notably we can see that the clip was imported to be 172 BPM and that the clip is in WARP mode. Warp mode is a special thing that Live does to make things that are in different pitches and time stay in time of your project and at the source clip’s pitch. If you click the Warp button, the pitch and time of the clip will go to its unprocessed state. A helpful thing to do when working with clips that Live has imported is to disable Warp and make sure that nothing has changed that you don’t want changed. Try turning off Warp and auditioning the clip to listen for differences.
Next, select the dropdown below the Warp button, and look at the different warp modes:

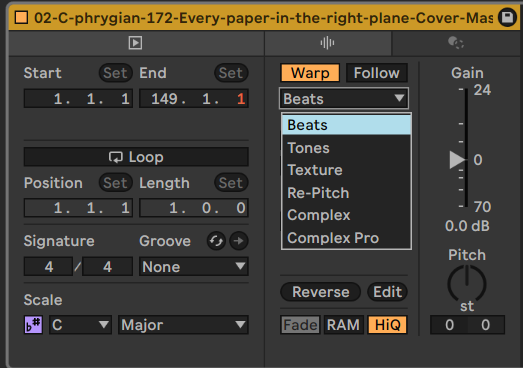
Live has a few different ways of negotiating between the pitch and timing of clips. These different Warp modes are useful at different times and for different styles of processing:
- Beats – keeps the track close to the source material and manipulates time by working with slices of the source audio
- Tones – keeps the pitch close to the original source by using a mapping of tones from the source audio
- Texture – uses granular synthesis to overlap sounds for negotiating between pitch and time
- Re-pitch – keeps the pitch of sounds from the source audio the same but speeds up and slows down playback of audio to maintain the source audio through resampling
- Complex – uses an algorithm involving frequency-domain (FFT) analysis of the song and gives you a grain size slider for controlling how Live chunks its pieces
- Complex Pro – similar to complex but with finer-grained control of the algorithm, uses more computational resources than Complex
When trying to find the “correct” Warping mode, most experienced producers just audition the clip in the different modes and I recommend you do this too. Every different Warping mode has its place and guidance such as “use this for drums or use this for vocals” will not give you better results than simply listening to what you’re working on in the different modes.
Next, add the mashup vocal to the next audio track and try to line it up so that the empty beginning of the vocal matches the start of the instrumental:

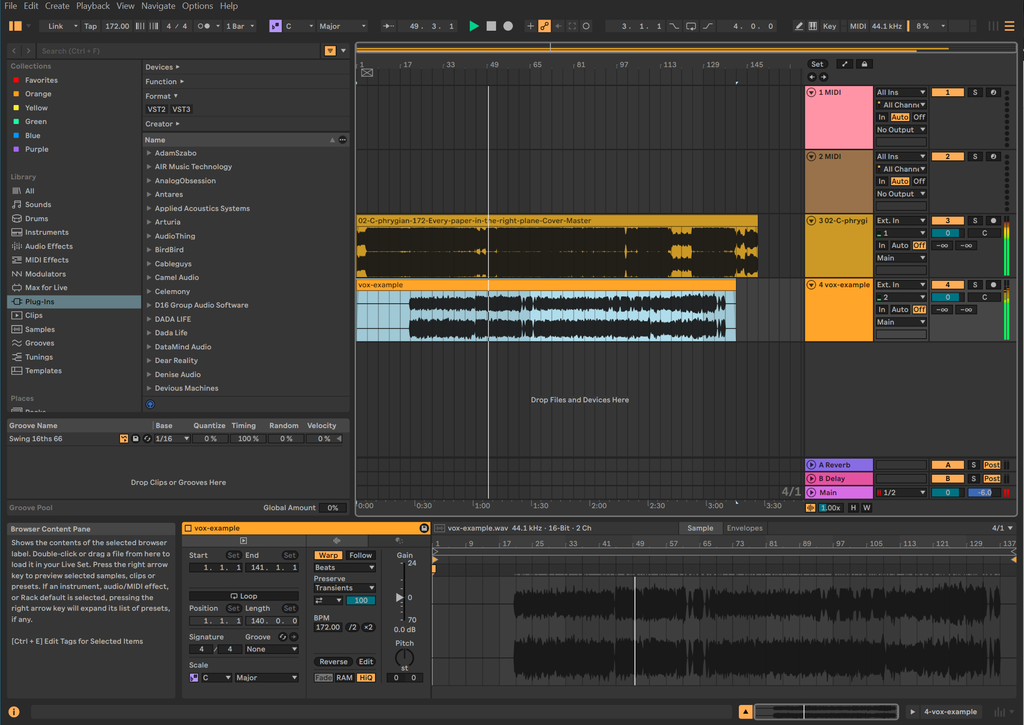
With no further changes your track should sound like the following example, we’ll call it Every Paper in the Right Plane:
Mashups are quite easy in Ableton when the key and BPM of the vocals match up well. However, things still need some work! For the next part, we’ll turn on the metronome by clicking the icon with two circles near the BPM icon:
Metronome OFF:


Metronome ON:

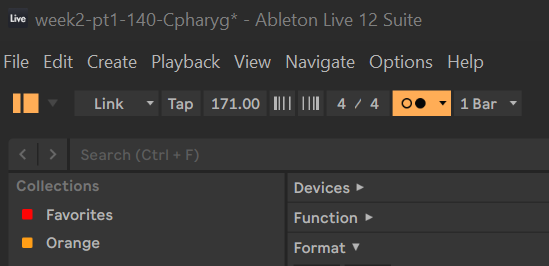
When you turn on the metronome, you will hear a beeping sound on every beat that helps you align audio to the Ableton Live grid. Here is what I hear with how I have lined up my tracks (correct):
The metronome sound is nicely landing on where it should land with how I want the track to sound. What I’m trying to avoid is the beats not matching up to the sound of the metronome – if the track sounds like this, then I will need to adjust the track (incorrect):
If you are a DJ or a drummer, the difference is obvious but if you have limited rhythm experience it can be difficult to understand when things are correctly lined up – if you need training in this, there are better places to get that training than from me – I recommend Melodics. Anyways, if your audio is not lining up, I’m going to show some different ways that you can do this in Ableton.
Before we proceed with the nitty gritty of adjusting audio – it’s a great time to point out how you can move around in arrangement:
- Ctrl + Mouse wheel – Zoom In and Out

- If you push the mouse button 3 + drag around – Pan
- You can also do this by holding CTRL+ALT and then dragging around
- Hold Ctrl+Alt + Mouse Wheel – Increase Track height in Arrangement to really get in there and see the parts of the audio files
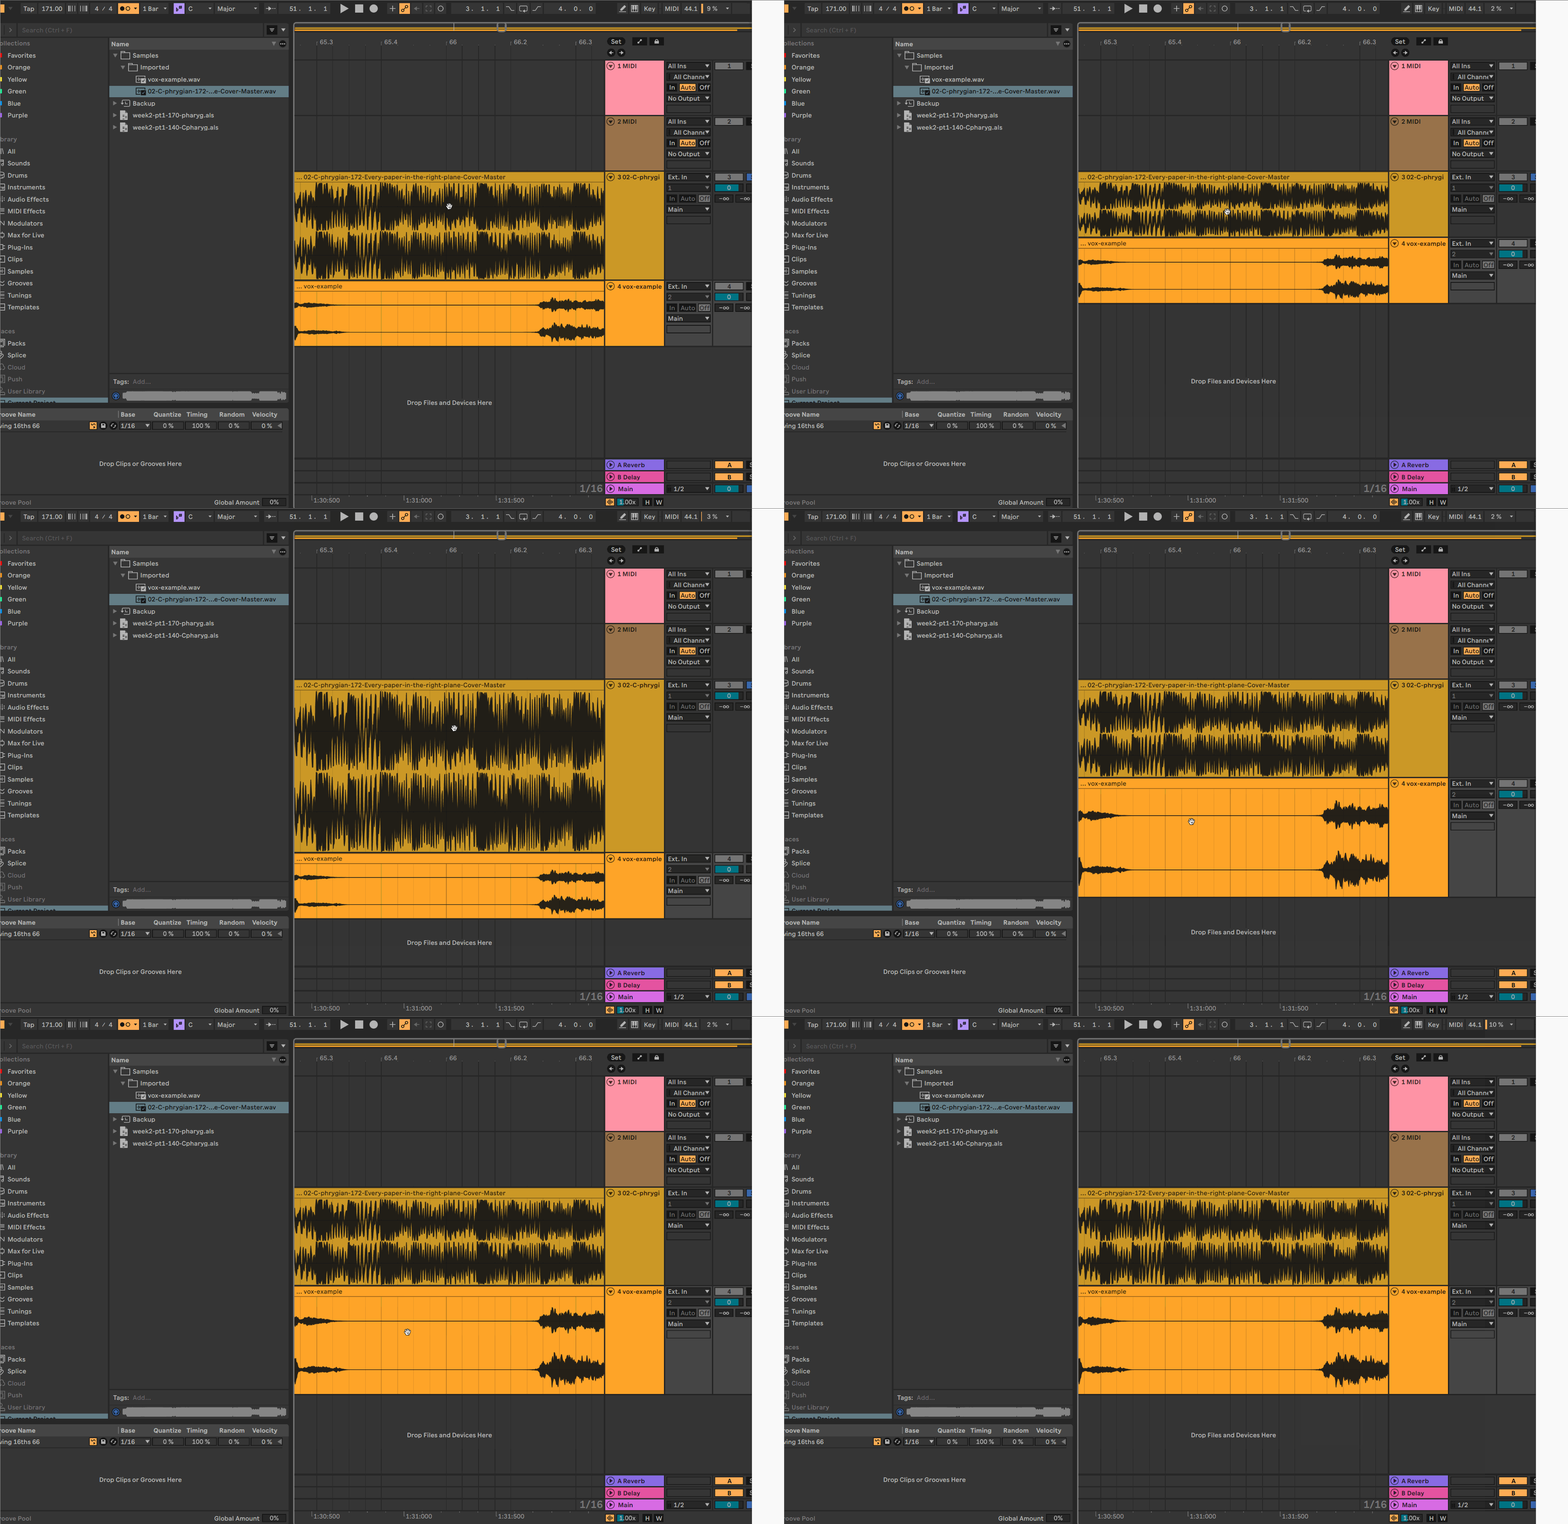
Practice using the controls for a moment to get the hang of how you can move around before continuing.
Now that we understand how to move around in the Arrangement view, let’s look at our first way of getting audio lined up. The most basic way is to drag the entire clip around in the arrangement. If the clip were out of alignment like this:

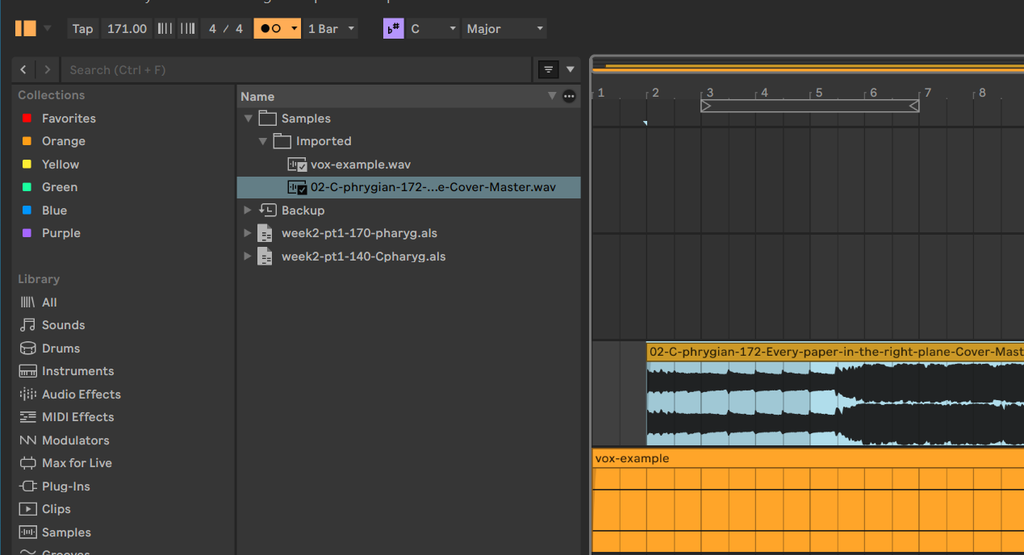
You can move the clip to where it should be by just dragging it in arrangement:

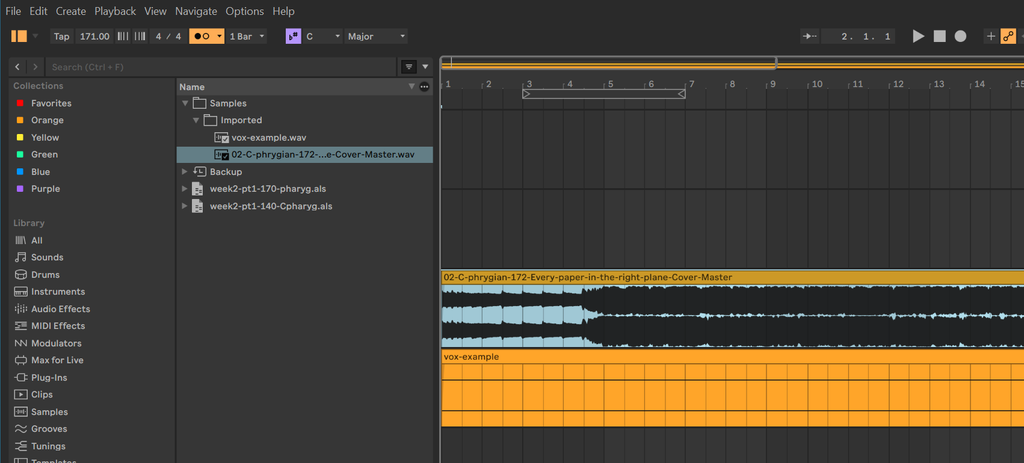
The next way to do this is to change the clip start marker in the audio clip editing view.

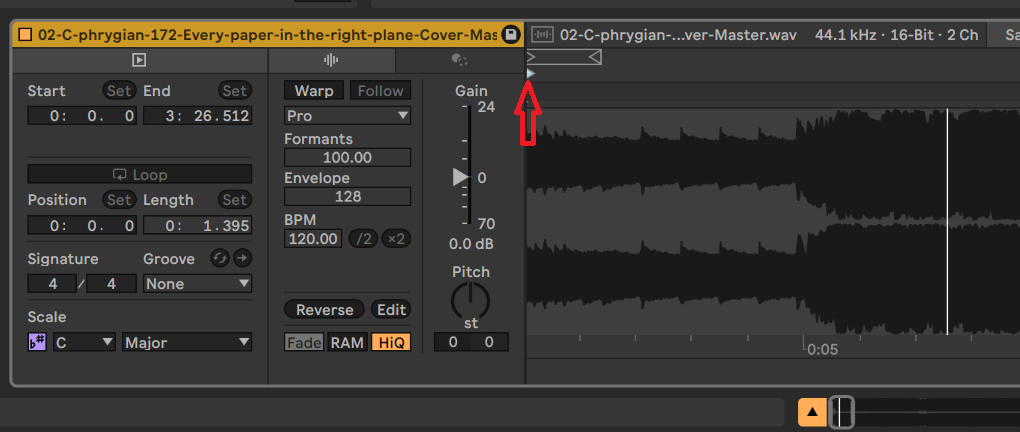
The top little section is the loop marker, the bottom is the clip start. When you drag this marker, it will change where the audio clip will start playing from in the arrangement. It can be a bit overwhelming at first but this is an essential technique for audio editing in Ableton Live. Here’s what you’ll see when you move the marker:

The third way, which is the way that I almost always modify and align audio in Ableton, is to hold down ctrl+alt+shift and then drag the audio in the arrangement view. Note: in order to do this, the clip usually should have warp mode enabled – make sure you have it turned on before you align the clip in this manner – if warp is off, the clip needs to be a smaller section of a larger audio file.

If you haven’t gotten the clip aligned correctly with the metronome, use one of the methods provided to align it so the beats are falling down appropriately to where you want them to be in your arrangement. Again in my example it sounds like this:
Next, let’s go to the vox-example track and check its alignment to the metronome. Click on the clip outside of the box on the top of the clip near where the sound clip gets thick with black – this is where the vocal will be coming in.

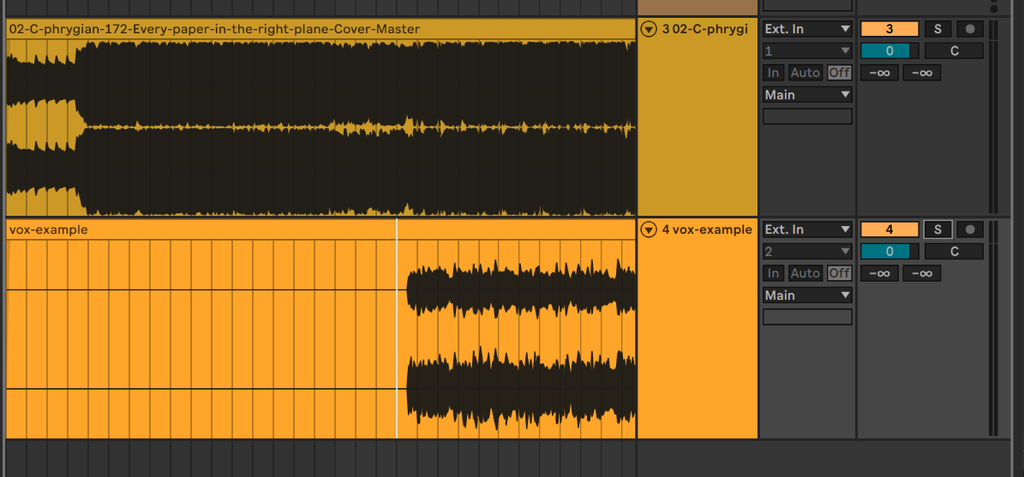
Press spacebar on your keyboard or click the play icon on the top of Ableton. This will start playback and you will hear everything all at once, the vocal, the instrumental and the metronome. It’s so busy when you listen to all the sounds together like this so next, you’ll learn about Soloing a track. Click the S on the track to solo it or with the track highlighted, press s on your keyboard. The S indicator on the track will turn blue indicating that it is set for Soloing:

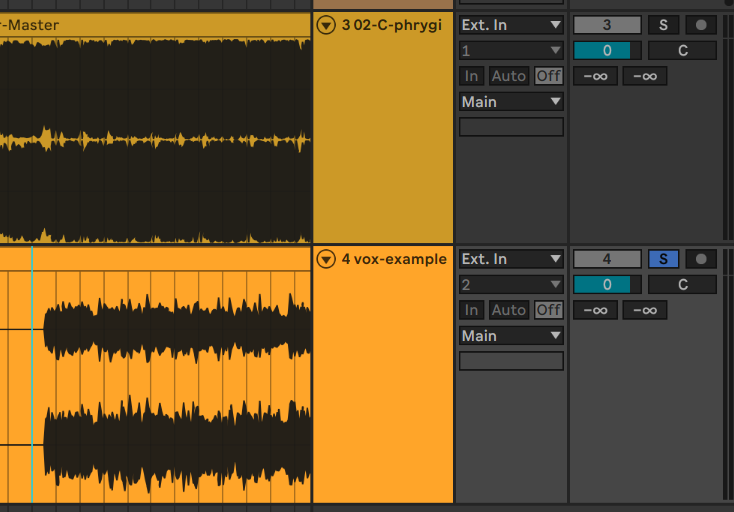
Press spacebar or click the play icon to listen now – you should hear just the metronome and the vocal:
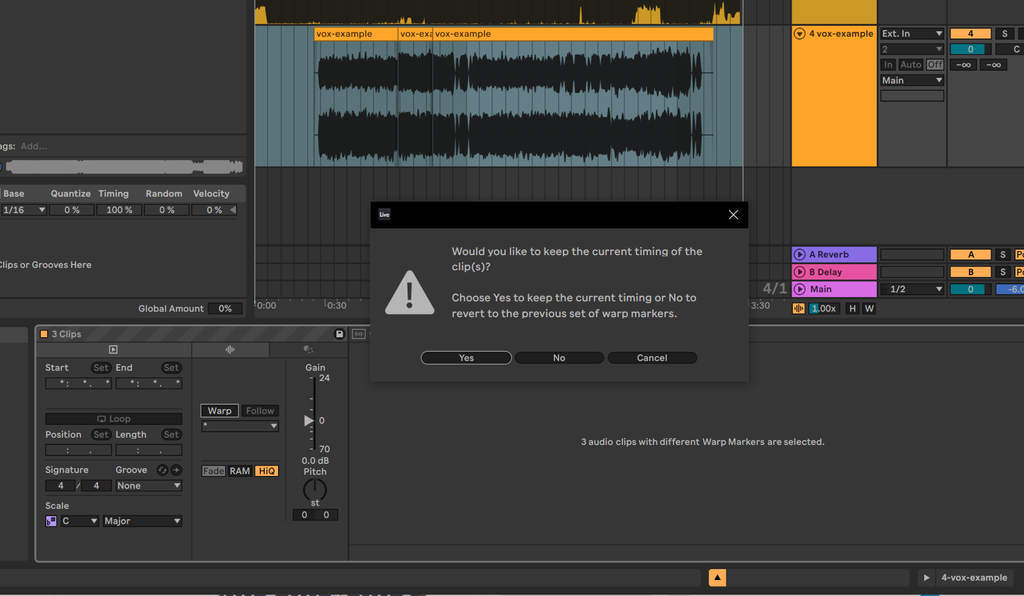
To my ear, this is not aligned, so I’ll turn on warping on the track and will adjust where the beats land to make it more “in the pocket” with the metronome. Note that sometimes when you do this, you’ll be prompted for keeping the timing:

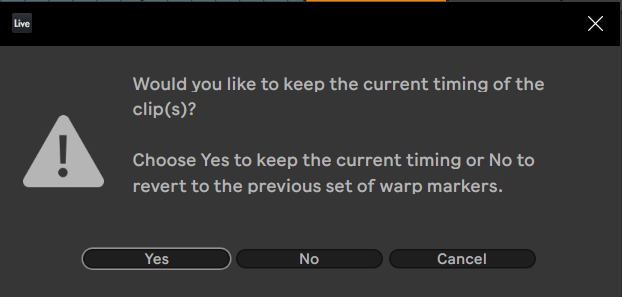
I generally say yes when this happens. After adjusting using the ctrl+alt+shift and dragging the clip, I end up with an alignment that sounds like the following:
Now with the vocal aligned, it’s a great time to unsolo the track by clicking the solo button we had toggled before or pressing s on the keyboard to toggle solo. When we play back the track with the instrumental and the vocal aligned it sounds like this:
To my ear, this sounds close enough to work from but you might hear things differently and can get the track to where it sounds good to you. I’ll be the first to admit that I’m not the best at this aspect of music production so if you’re an experienced DJ or drummer you may have a better ear than I do for how you want things aligned.
For the next part of this exercise, listen forward to a part of the song where you don’t like the alignment of the vocals. I find that around bar 45 (the bar markers are on the top of the arrangement section) the vocal doesn’t quite hit at the exact same time as the instrumental:

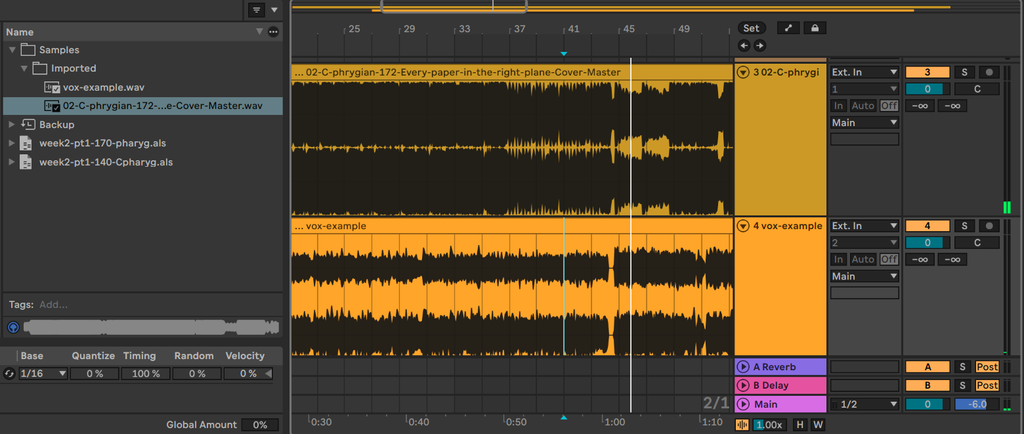
If we zoom in (control + mouse wheel), we can get a closer look at what’s goin on there:

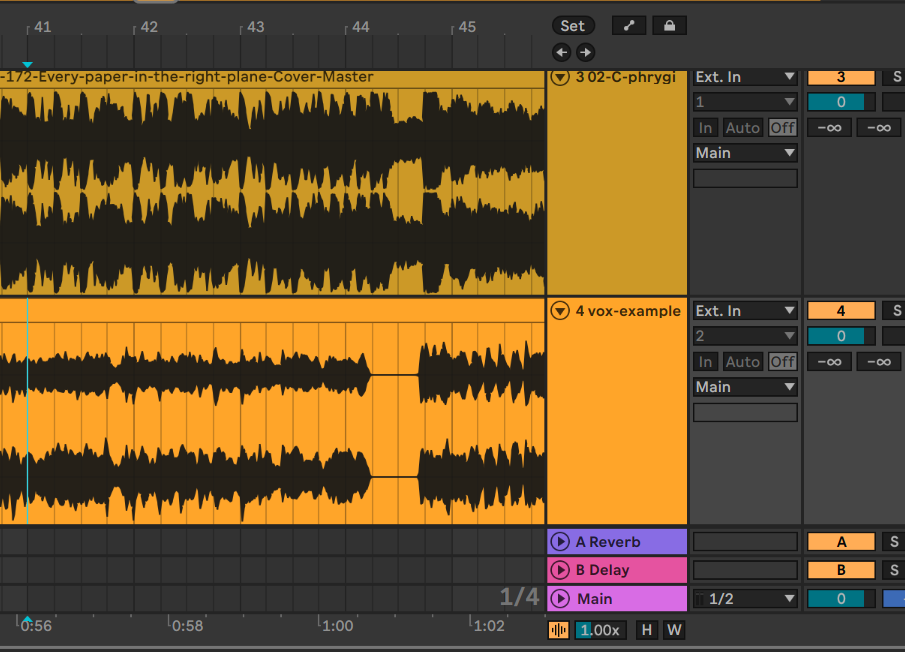
We’ll split the vocal track close to this region by clicking on the waveform part of the track (anywhere outside of the top box) and press control+e or can right-click the track and select split:

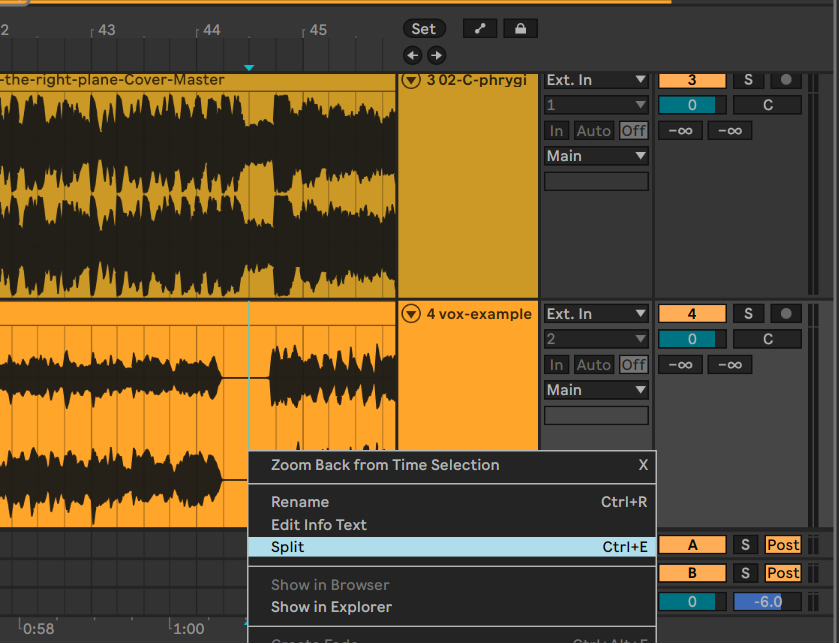
After you split the track, you will see a visible boundary between the two clips:

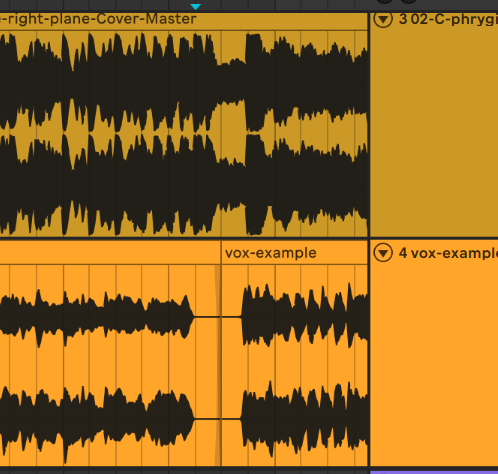
Now you can move around the clip to get it lined up how you want using the techniques we showed you before. I’m going to adjust the clip start marker in my version:

Now the drop section will hit with a little more tightness:
Next, I’m hearing an opportunity for some fun variations in the drop. What if around bars 55-56 we want to add some pitch changes in the “do do do do” section? Let’s highlight that section:

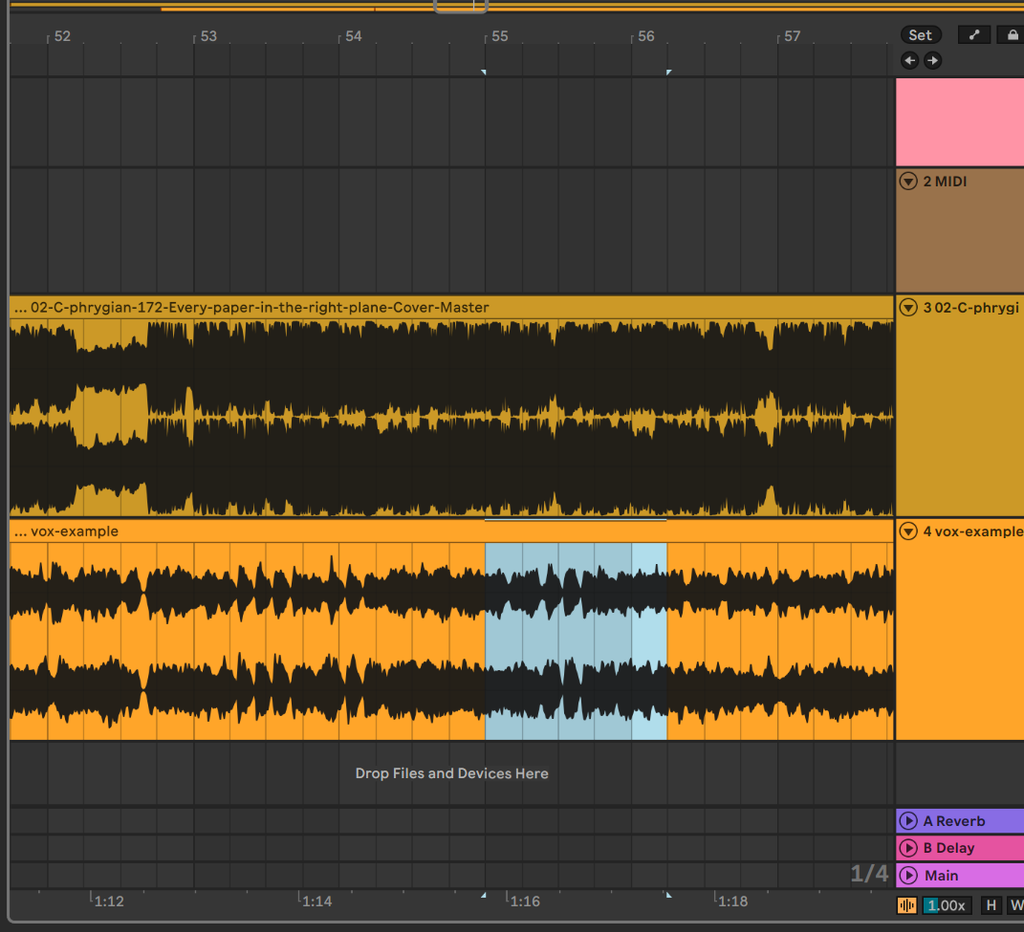
Then press 0 twice on the keyboard to mute / unmute the section. When you do this, it will create a new clip in the middle that we can manipulate:
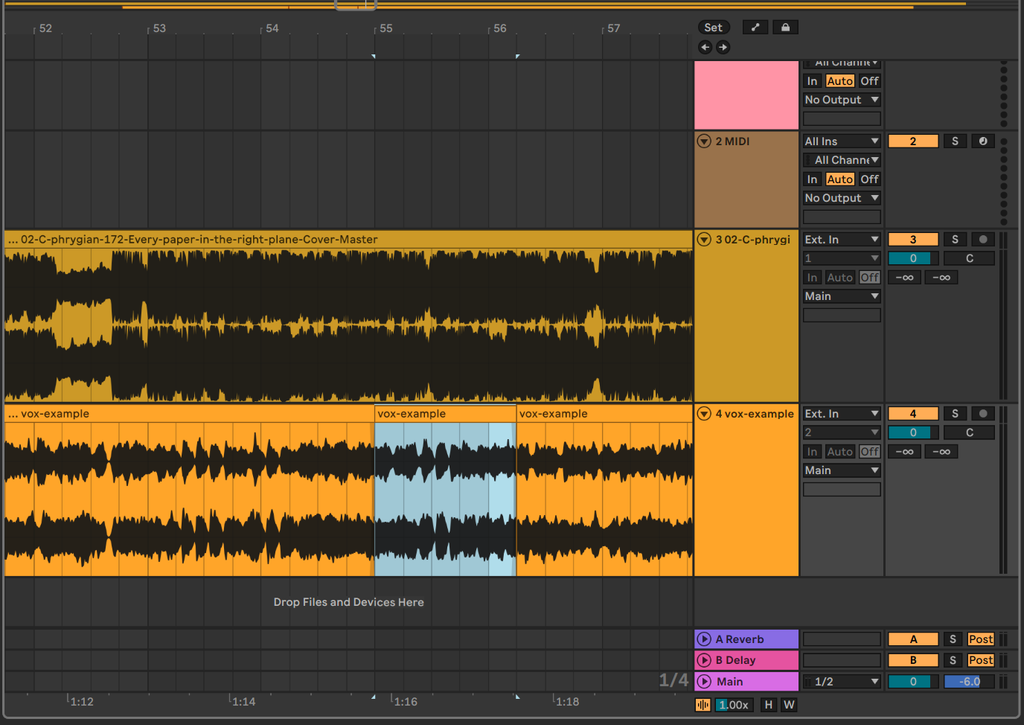
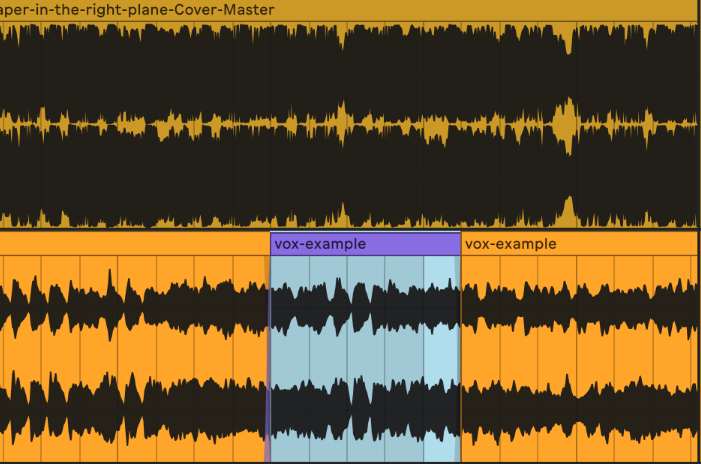
I’ll change the clip color (right click then select a color) so it’s easier for me to see the section with the edit later on if I end up not liking it:

The opportunity I’m hearing here is for changing the pitch. There are a few ways we can change the pitch in Live but for today, we’ll just do it by editing down our clip into a bunch of little clips by using the ctrl+e or 0-0 (zero zero) shortcuts. After making a few more clips, I have a section that looks like the following:

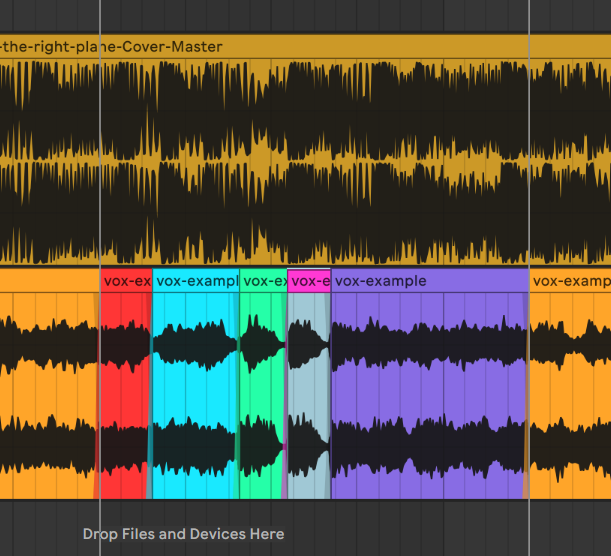
I’m going to individually adjust the pitch of these clips. First, I’ll select the blue clip and turn on warp (if it wasn’t already on) and then move the pitch around until I find a spot I like playing with different warp modes and settings:

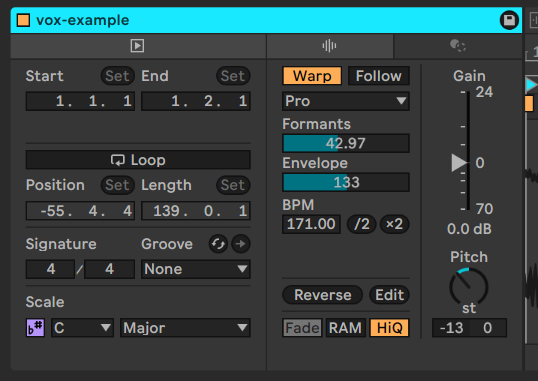
Then the green one:

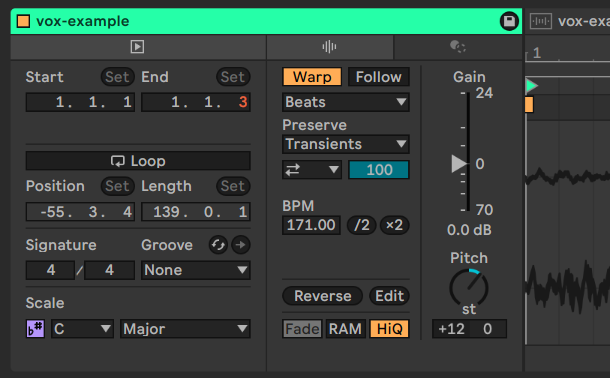
Then magenta:

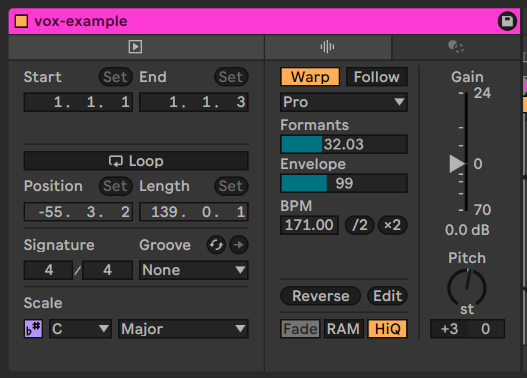
For the purple clip, we’re gonna do something wild and add an envelope in the clip that winds down the pitch:

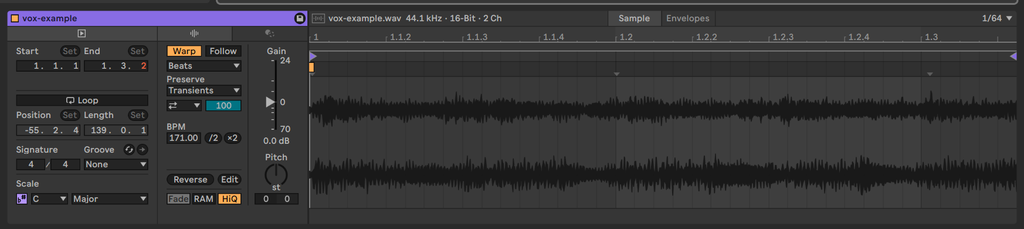
After selecting the clip, press Ctrl+J to join the clip which will remove the extra parts surrounding it. Then double click the clip to open it in audio and click the Envelopes button:

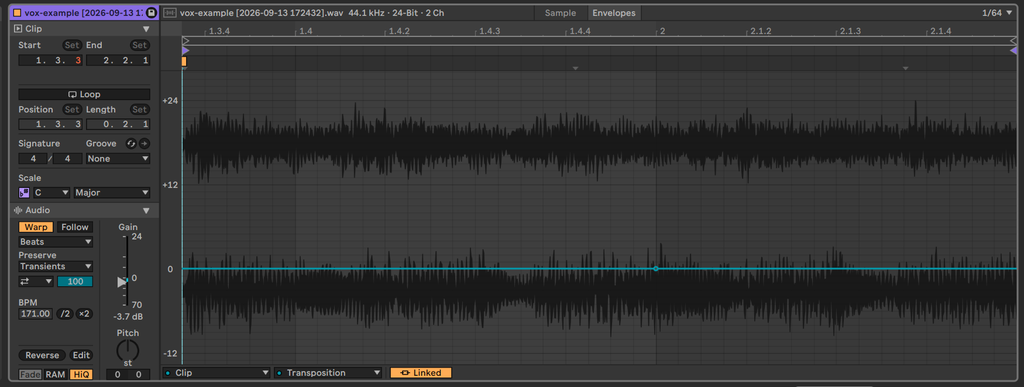
Clip envelopes allow you to transform audio over time, we’ll be using transposition – which is set in the bottom of the screen:

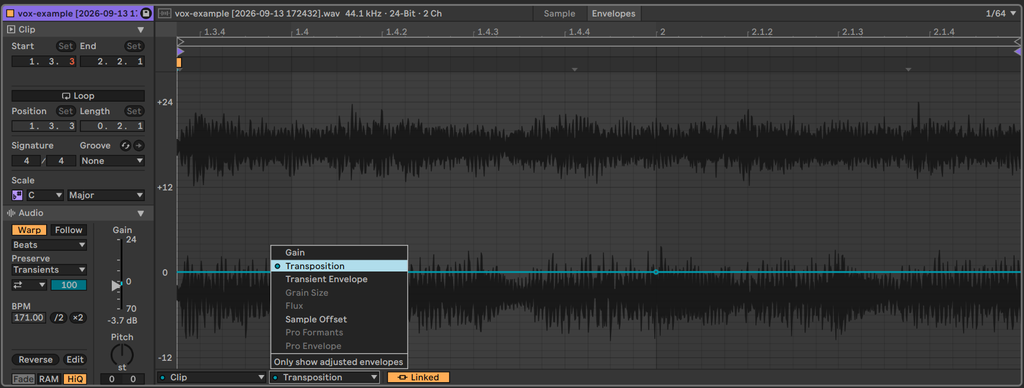
And we’ll draw an envelope that will transpose (change the pitch of) the clip:

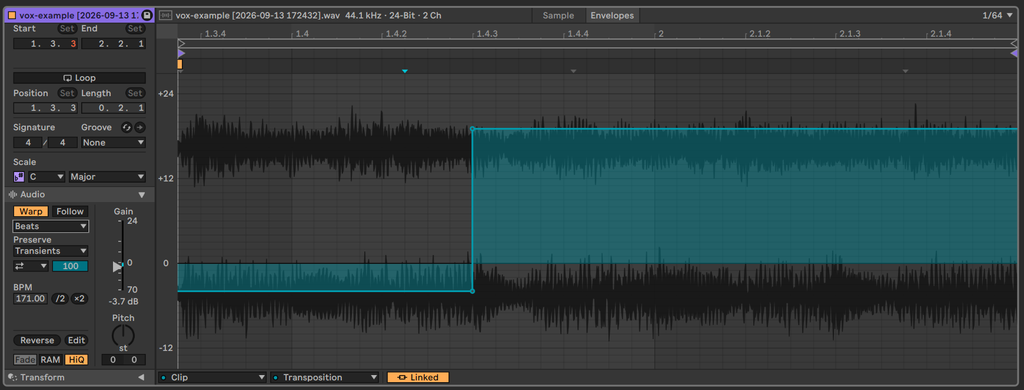
Changing the warp mode can help with the pitch effect, I’m somewhat happy with how it sounds using a ramp like this with Complex Pro:

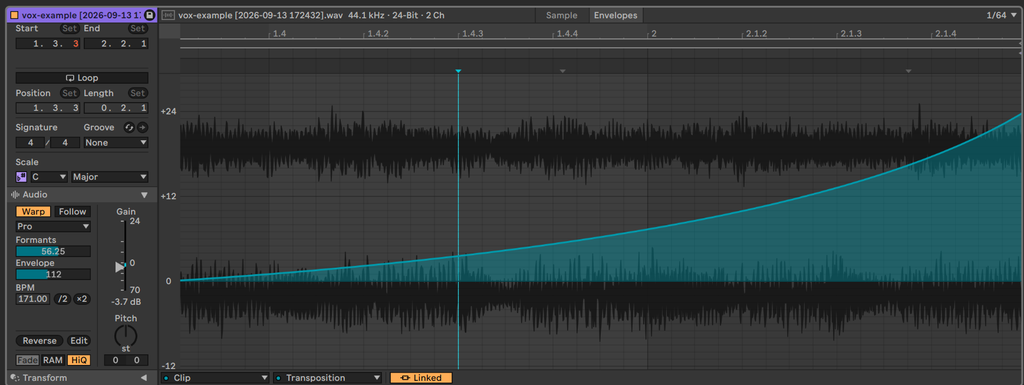
These edits I’ve done sound horrible at this point, maybe you can find a better expression of the idea, but for me this is a case where I don’t like how it’s turning out.
Because I don’t like it, I’m going to return to audio and will remove the edits I added by dragging the orange clip over the part I just edited:

There’s an important lesson here: if you don’t like where an idea is going, you should let it go. I do this all the time when I’m working on projects – I try experiment with something to see if it works and also quickly take it away if it’s not working.
This is probably a good time to save your project because we’re about to make some significant changes to it. I’ll save my project as week2-pt1-171-Cpharyg – it can be helpful to save the BPM and key in your project name for other people when they open rendered versions of your tracks.

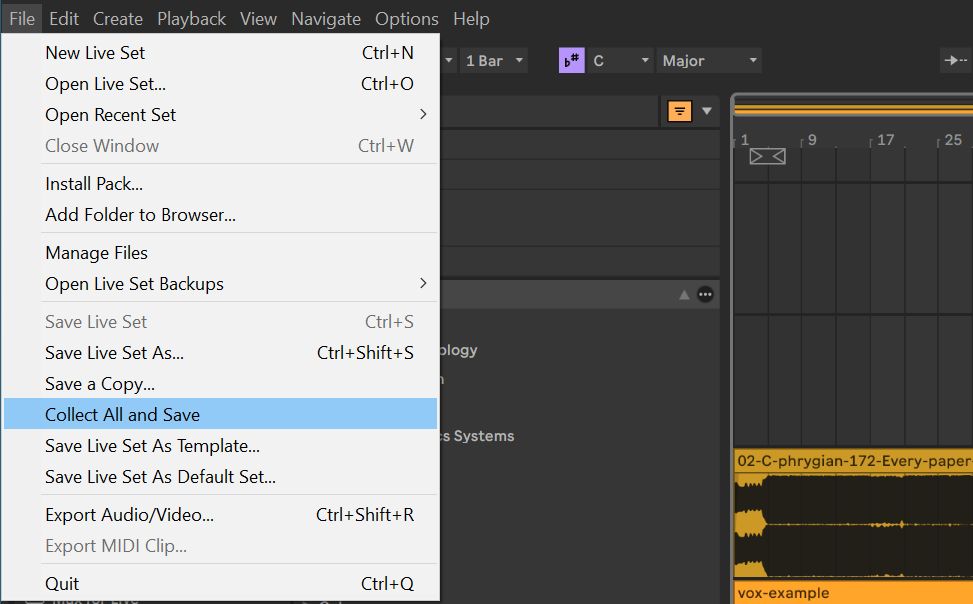
You should also perform a “collect all and save” operation in this moment to take all of the project audio dependencies (the sounds used in it and devices) and put them inside of the project folder. This uses a little more space on your hard disk but is really important for if you move the files around or change the folders that contain the files in the project. Put another way, if the wav files for the instrumental and VOX parts of this track are only in your computer’s Download folder and you delete them from there, the project will no longer open correctly.
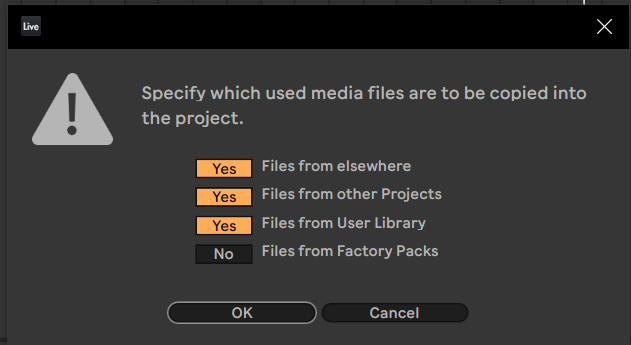
When the collect all and save dialog pops up, I usually just check the following options and click OK:

We’re going to explore ways that we can manipulate the song now that it’s lined up and working well at the original BPM. Before proceeding, we’ll save another version of the project as week2-pt1-140-Cpharyg – that we’ll work with from here. I oftentimes save compulsively while working on projects so this step, changing the project name, can save me accidentally saving over a version that I want to be able to come back to later.
Now with the new project file all set, let’s make sure that we have set the clips to WARP mode. Highlight all of the clips in the VOX track, then click Warp, we’ll save the timing like we did before.

Do the same for the instrumental part, just make sure the clips have Warp enabled.
Now that we have all of the audio in warp mode, try turning down the tempo to see what happens. Set the tempo down to 140 BPM and give the track a listen. On my version, it sounds workable but the vocals are choppy. This is because some of the clips are in beats mode – select all the vox clips and change the warp mode to pro and then try adjusting the formants and envelope by double clicking the sliders first then dragging them:

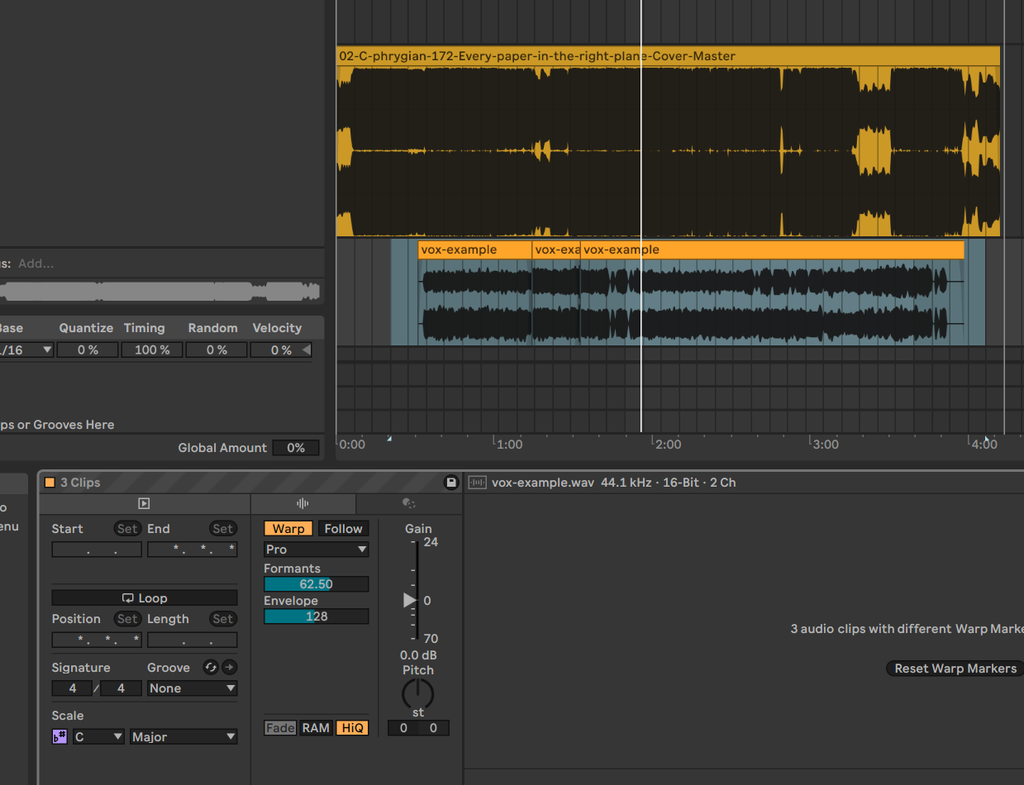
I find that the vocal sounds mostly correct when formants are around 60 and the envelope is near the middle.
It will sound something like this now:
Because this is now in a totally different BPM, the drums will sound very out of place. Let’s pull in some different drums. I am providing a short dubstep style 140 drum beat that I didn’t spend much time on for now:
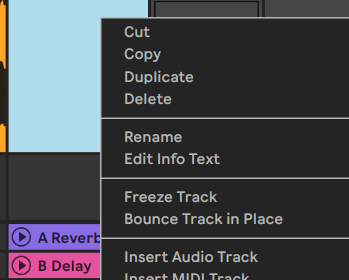
Delete the two midi tracks and add the drums on their own new audio channel (press control+t or right click on the section of the arrangement view on the right with tracks and click > insert audio track):

For my organizational purposes, I put the drums on the top because they’re the loudest part of the song – we’ll talk about that another time when we discuss mixing.

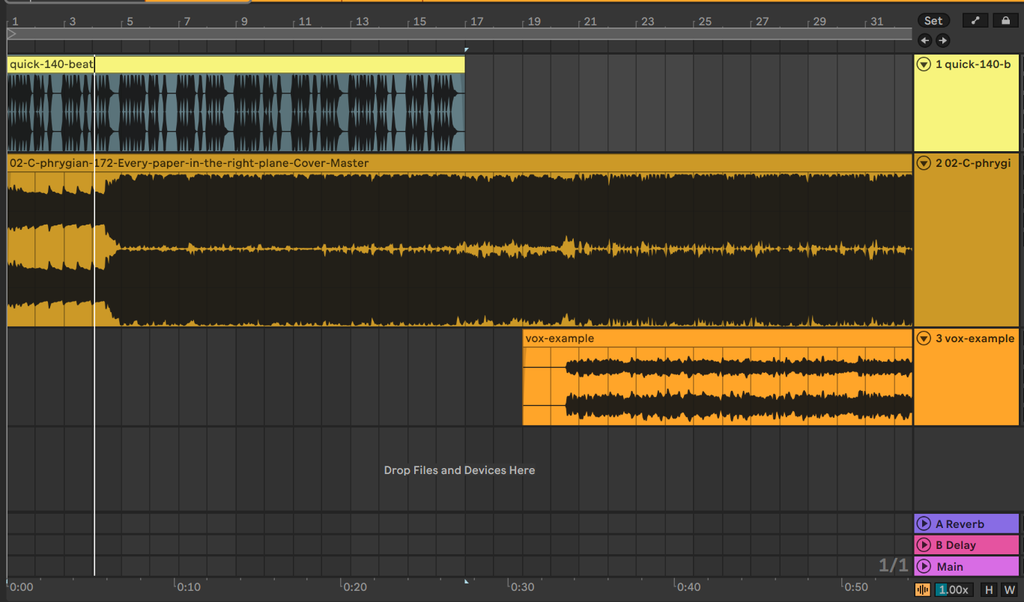
Now we have some more fitting drums for 140BPM. We can slice some of the existing instrumental track up to build a new beat from the original instrumental. First, highlight the first two bars in the instrumental track and press Ctrl+D to duplicate them and have a little loop. Pull the vocal back so that it starts around bar 8, and get them lined up so we have a little starting point for a new song:

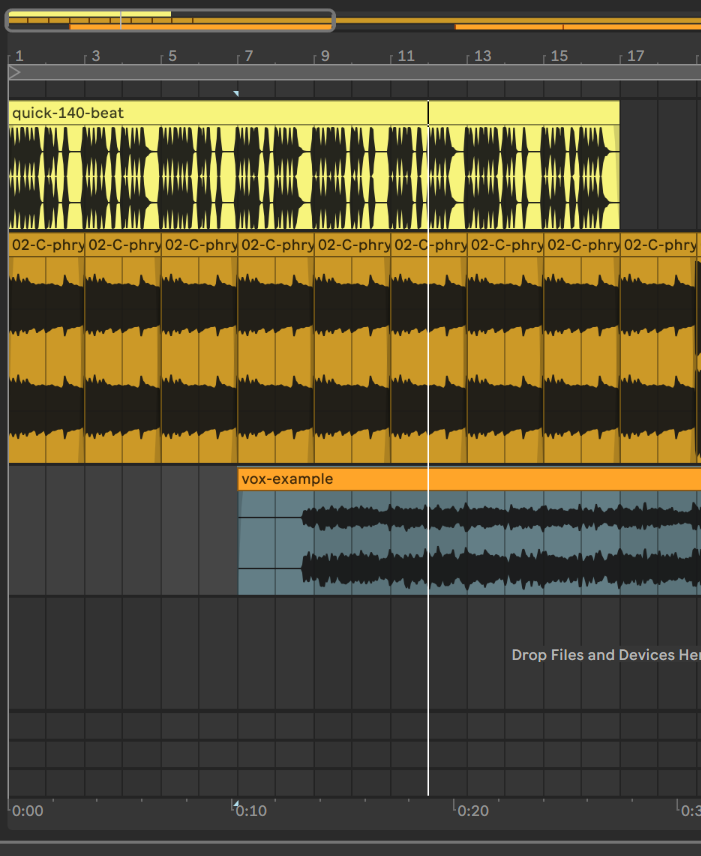
Highlight the first four bars of the drums and instrumental again and duplicate them again to now have about 16 bars of drums and our sample:

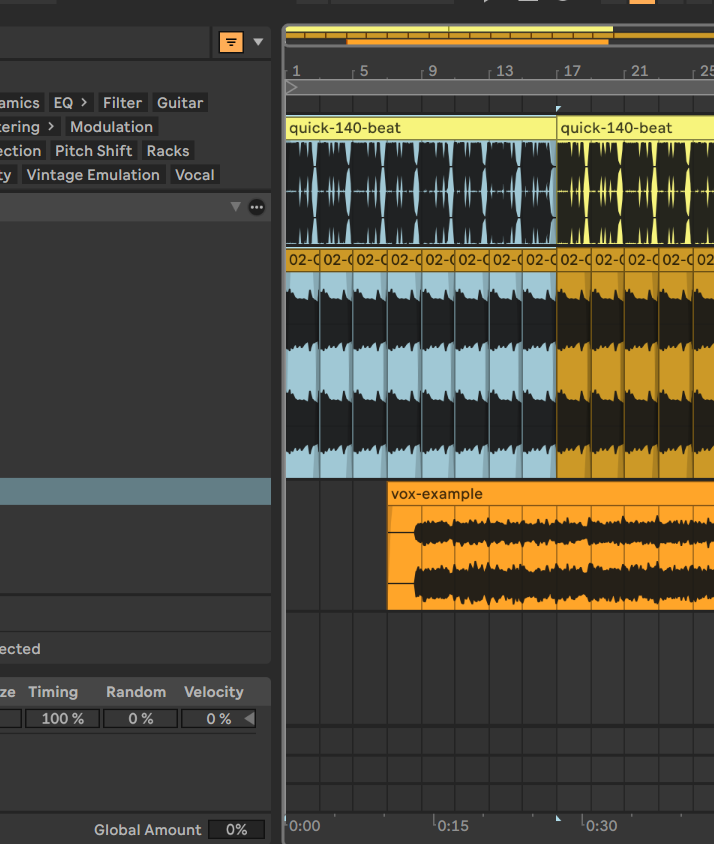
Now you’ll have a basic 140 beat with drums, some instruments going on, and a vocal.
Because we have slowed down the track a lot, there are more noticeable differences in the vocal timing and pocket. Let’s clean up these as we did before. First, listen for a moment when the vocal gets out of the pocket, then highlight the waveform on the vocal as we did before, press Ctrl+e to split the clip, then ctrl+alt+shift drag and slide the section to be in pocket. Keep listening and repeating this further until you have 16 bars of matched vocals, drums, and instruments. I have done this in my project and changed the colors of the clips to make it clear where I made the changes:

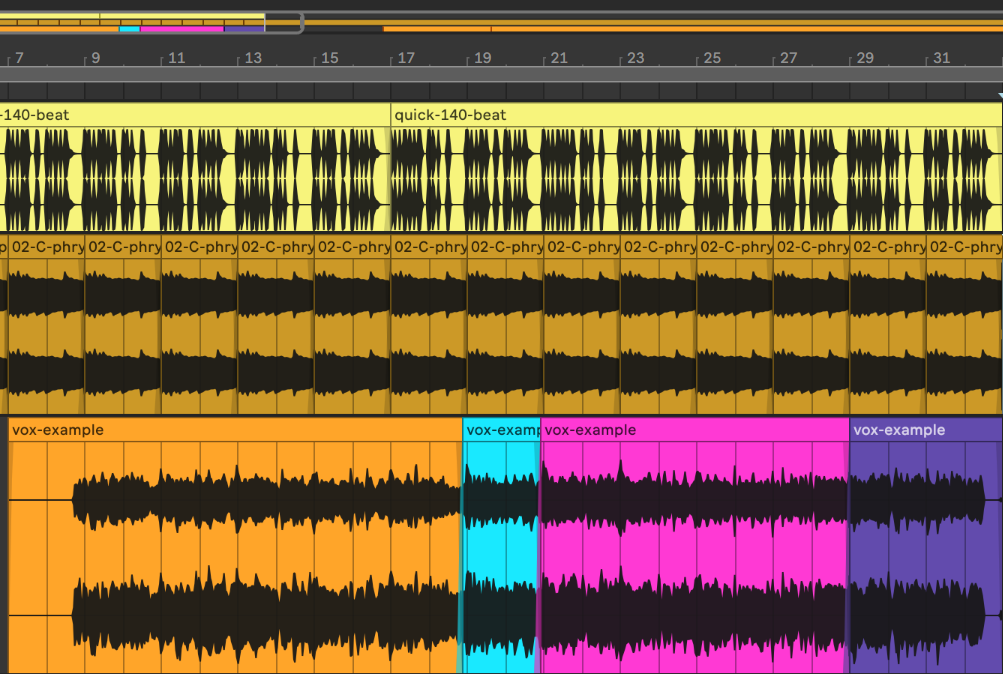
For the purposes of this section, we’ll just be working on improving these 32 bars at 140 bpm.
We’ll finish up today by exploring this idea further with the EQ3 device and finding another sound to resample using the simpler and the tuner.
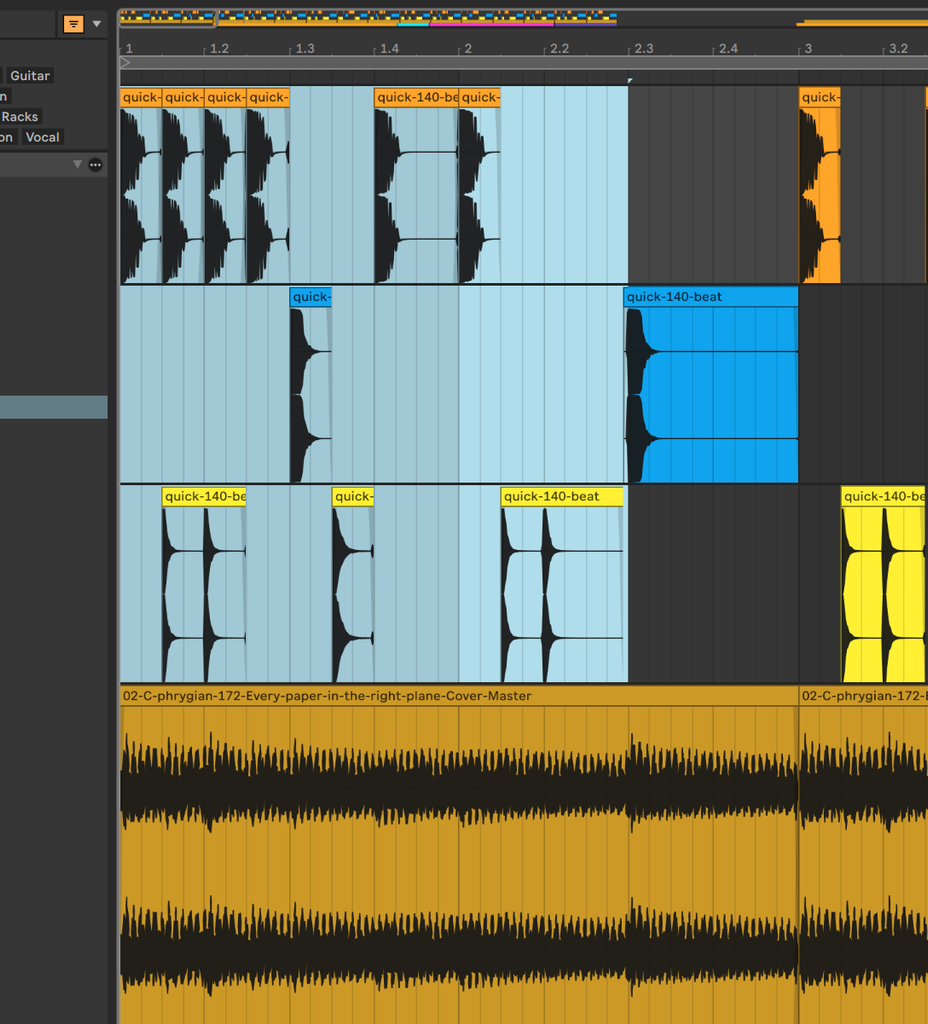
Before we go further, let’s try splitting up the drums into their separate Kick / Snare / not kick snare parts. First, I’ll highlight the track with the drum loop and will press ctrl+t twice to insert two new audio tracks for splitting up the drums and I’ll give the tracks better names – K for Kick – S for Snare – and T for Tops. Next, I’ll zoom into the drum loop and find the parts with the kick, the snare, and not the kick and snare (tops) and I’ll put them into separate tracks:

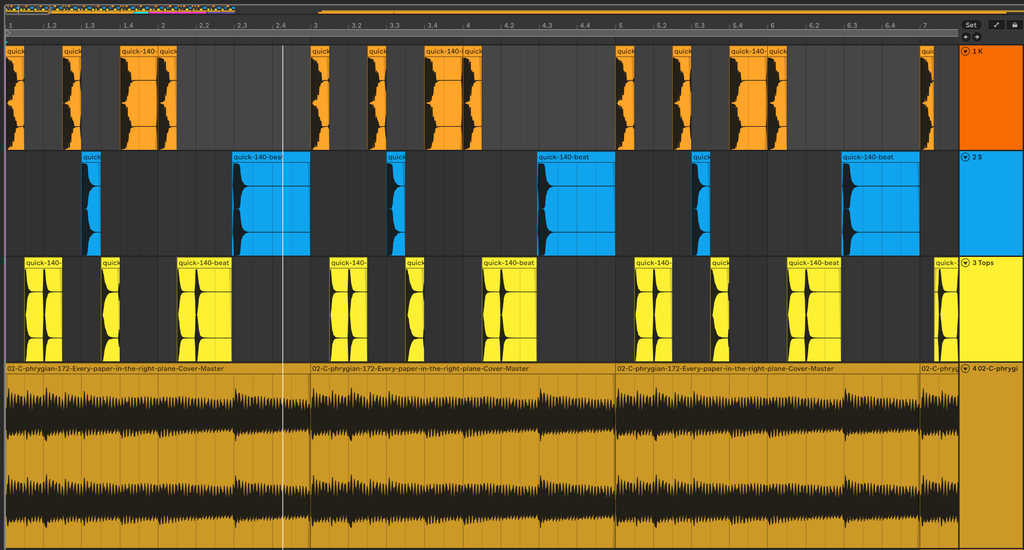
To make this process easier and less frustrating, just do the first 4 bars before going on. After doing 4 bars, check your work by soloing the tracks (right click solo on the track section like we did before or press s on the keyboard) and make sure you didn’t miss a sound or categorize them wrong. After checking the sounds are correct, duplicate twice (control+d) the part you have finished (the first 12 bars are built from the same 4 bar sections) and then do the last 4 bars like you did the first 4. Put another way – these highlighted drums are the same every bar – the section ending after 8 is different.

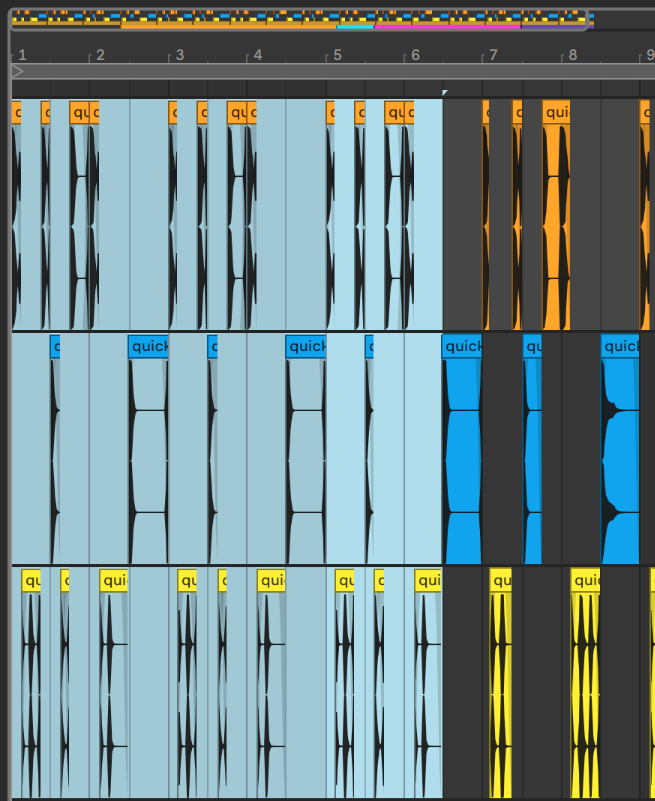
After you have done the 16-bar section, check that section (using solo again) and then duplicate it until have produced 32 bars of separated drums in just a few minutes.
(Take your time and get this first part right, then duplicate it to get the full 32 bars) manually do this:

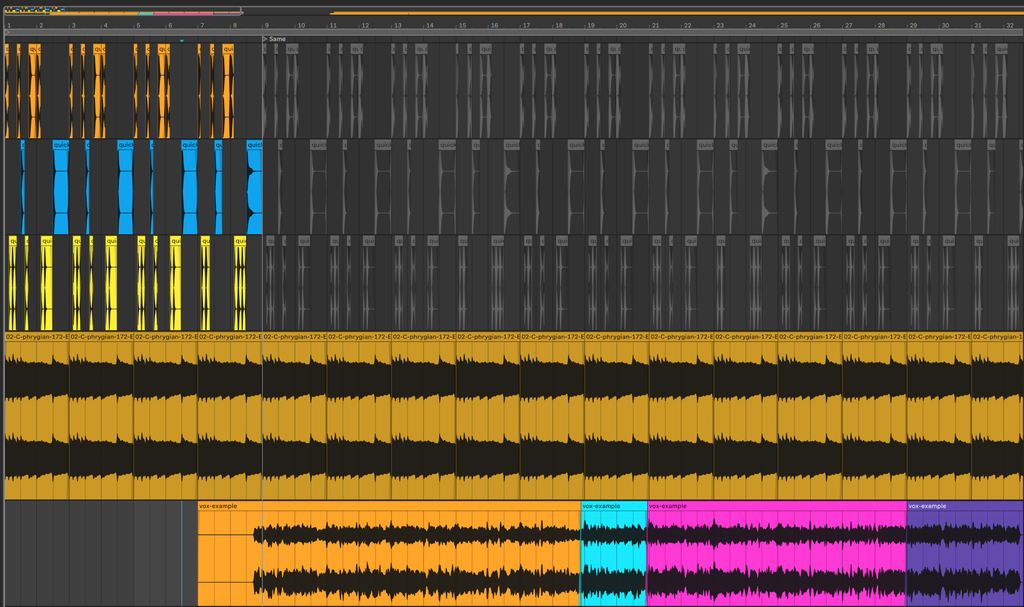
And duplicate that section (control+d) to this:


Now when you listen to the drums they should sound the same as when we started. I almost always do this when working with drum loops in audio – split the kick / snare / tops. This is helpful for later on when you need to mix and want to adjust the different drum parts without adjusting all of the drum parts. This is also a great way to learn different drum patterns. I recommend that you dissect drum kits from splice or sample packs to learn the different rhythms for your own music, paying attention to where the kicks, snares, and top parts are and how this affects the “groove” of beats.
Note that you can also achieve the same thing with the drum kit instrument – I’m showing you this way so that you can understand both approaches (Audio vs Midi) and can understand their strengths and weaknesses. As you become more experienced, you will have a preference, I prefer doing it in MIDI, many amazing producers like to work this way in Audio.
This is also a great moment to experiment with the audio samples: you could see how it sounds if we had 4 kicks when the song starts by duplicating (control+d) the first kick:

You can also experiment with moving around the drums a bit. I won’t delve into that for now as that is something you should be able to do on your own at this point. So now we have a song that is really naked, just some drums and a small repeating sample, let’s find another part to remix back in from the track that will not require much work to fit in.
I like this other bare part from around bar 121:

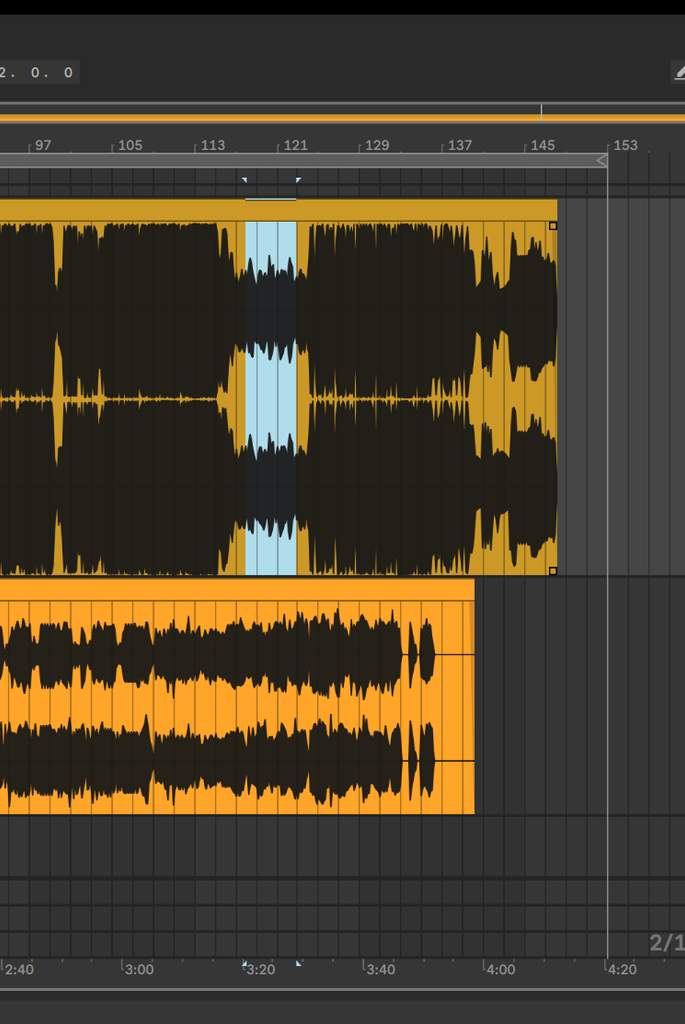
Let’s create a new audio track (control+t) and copy that part into the new audio track. After putting it into a new track, move it back to join the other sounds around bar 9:

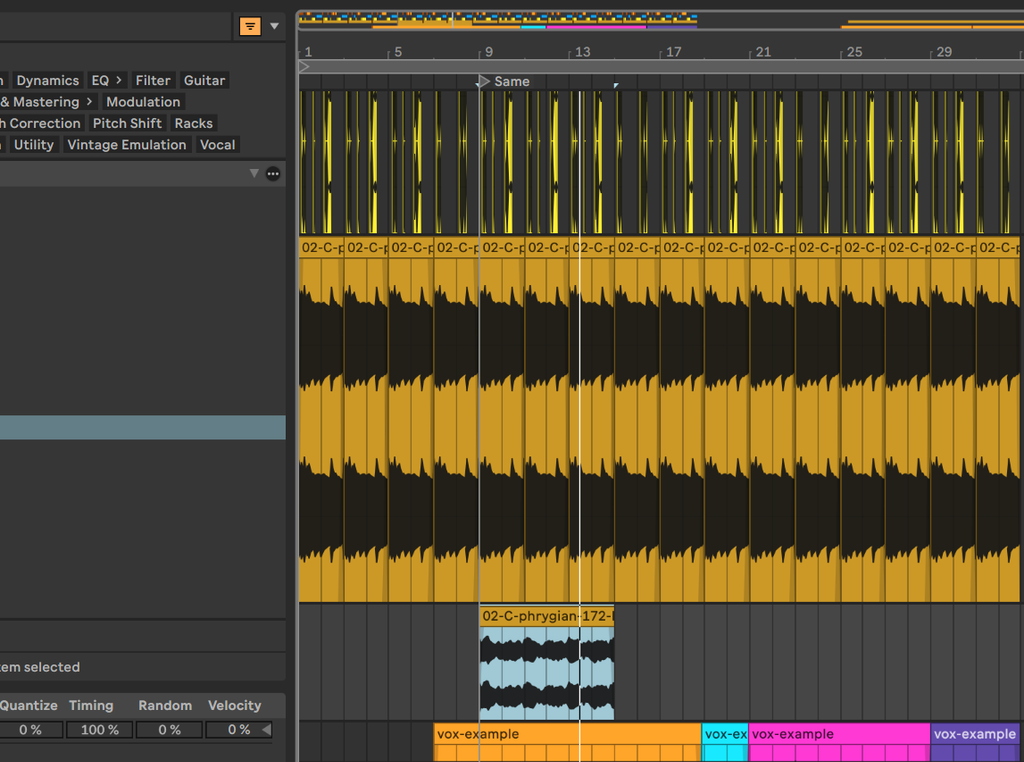
As we did before, press control+alt+shift and drag around on the waveform to align it to where it needs to be for your ear. In my version the parts together sounds like this now:
Although this is cool the sounds are occupying the same frequencies (tonal space) so we need to figure out a way to make this new part stand out from the part that it’s playing over. We’ll achieve this by pitching up the sample we added:
Double-click the top of the clip to open it in the audio panel:

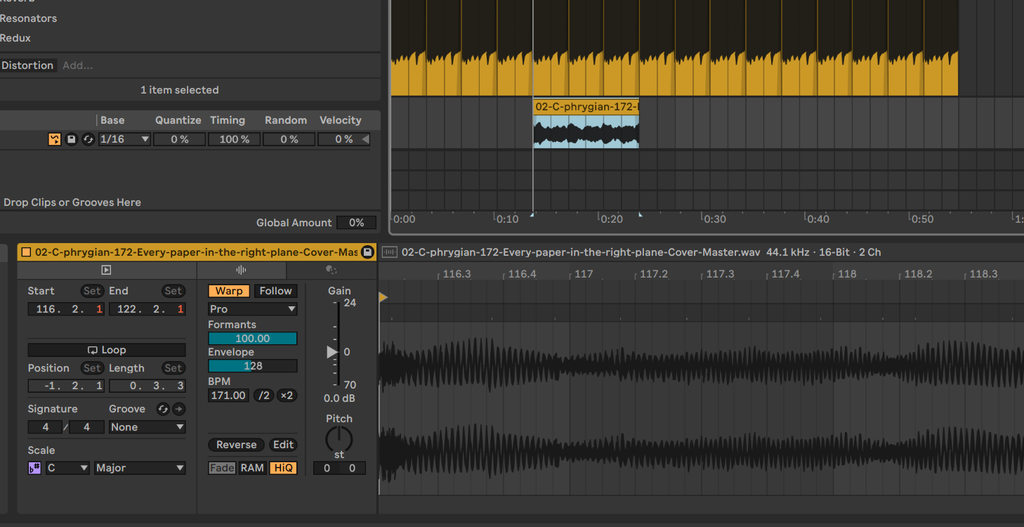
Now we can see the controls on the left and the audio on the right – if you don’t see the audio, press shift+tab to switch from device to clip view.
With the audio in Pro warp mode, let’s try pitching the sound up an octave by clicking the pitch knob, holding shift, and pressing up:

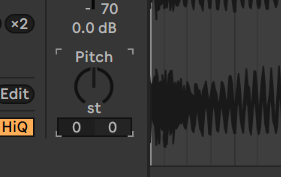
The astute reader would note that it’s 12, why 12? That is because there are 12 semitones in an octave – the white keys on a keyboard are notes, the white keys + the black keys are the notes with semitones:

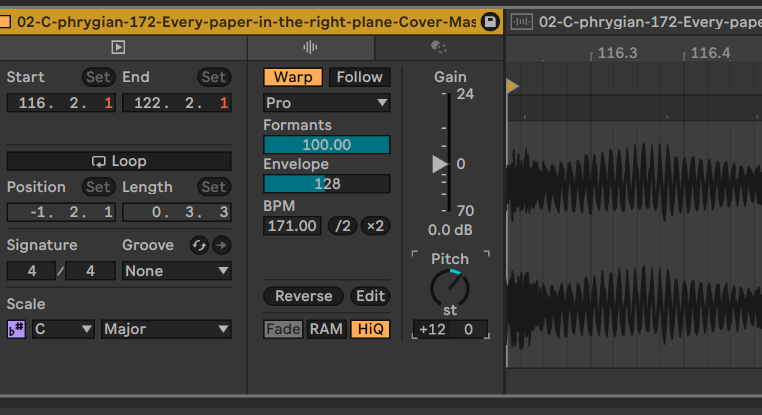
You might want to change the color of the track to make it easier to look at and then duplicate it to have an 8-bar section (phrase) for this additional part:

Now let’s give the track a listen with the pitch-shifted part added in:
OK, now we have something a little more substantial to work with! Let’s duplicate the pitched up section one more time and remove the little end bit for some extra drama:


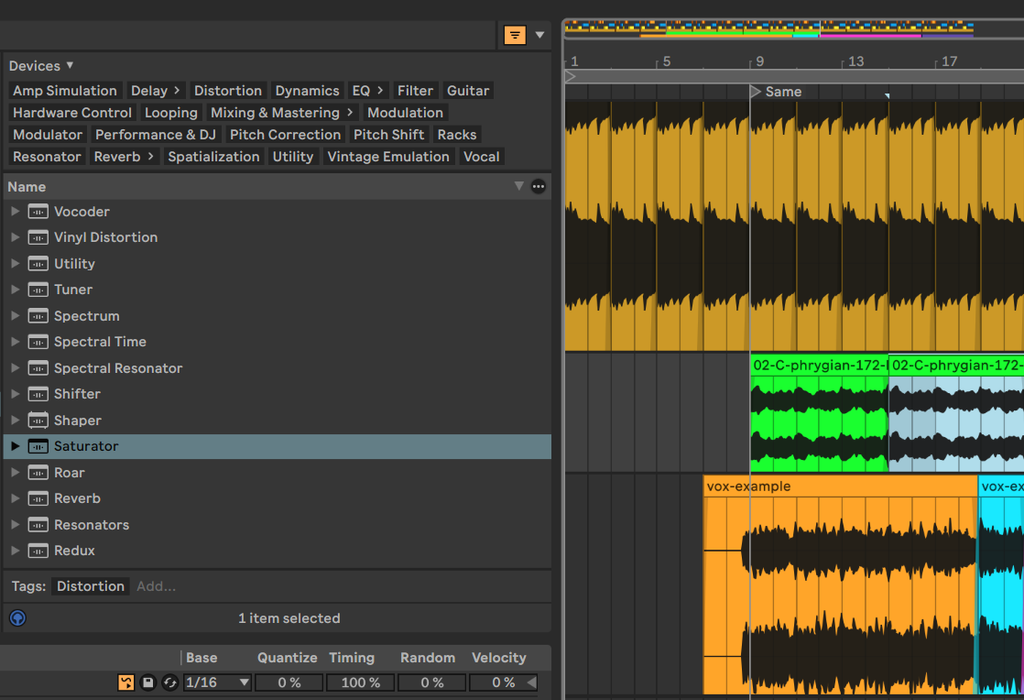
Now what do we do? That section of instrument we just added has this really neat sparkly sound in the beginning. How can we turn that into an instrument? The answer is simple, we use a simpler!
Add a midi track (control+shift+t) and drag the simpler instrument into it:

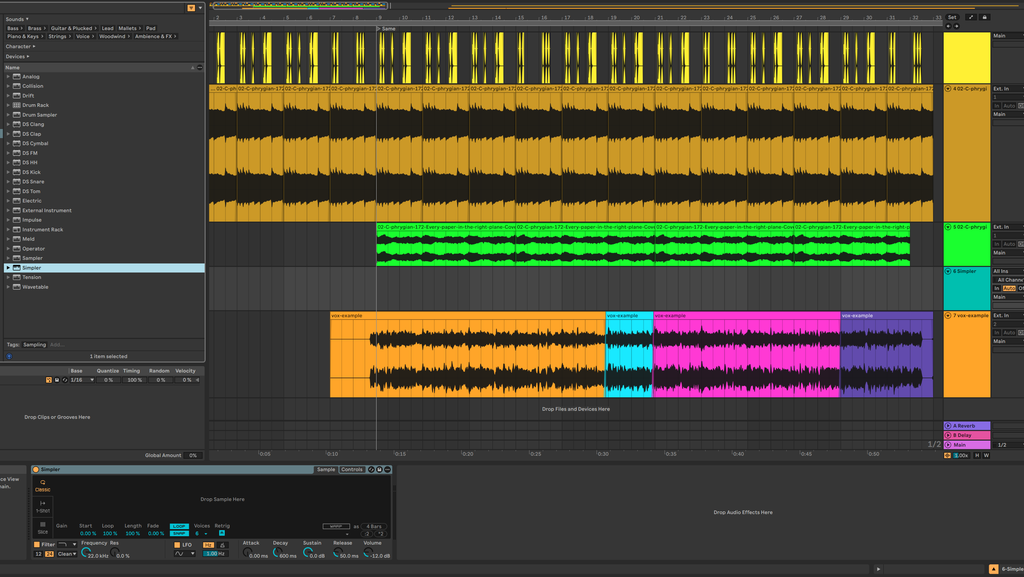
The simpler is the Intro version of the Live sampler and lets you take small clips of audio and use them as an instrument. Highlight the first little bit of audio in the green instrument sample (on my project) and press zero zero on the keyboard to make a clip of the first little bit – I’ll change the split section to red so you can see better:

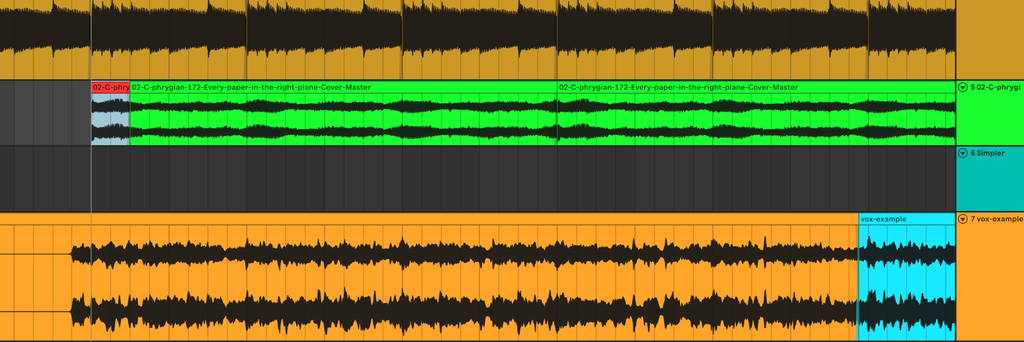
Next, select the simpler track and drag the red (in my version) snippet into the simpler:

After you have done that, the simpler will be armed with the sample. You can turn on the midi keyboard (press m on the keyboard) and test out the Simpler. Make sure to arm the track for midi if you’re trying this out (it’s the red indicator on the right region of the track in my screenshot):

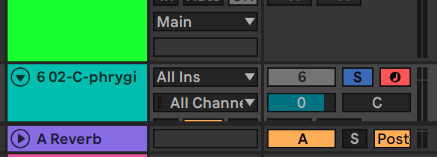
As a reminder, you change the octave up and down with x and z on the keyboard and send notes by pressing the keys asdfgwr and so on.
Currently, we don’t really know if the sampler is playing the right notes, so we’ll tune it using the tuner device. Add a tuner from the audio effects to the track:

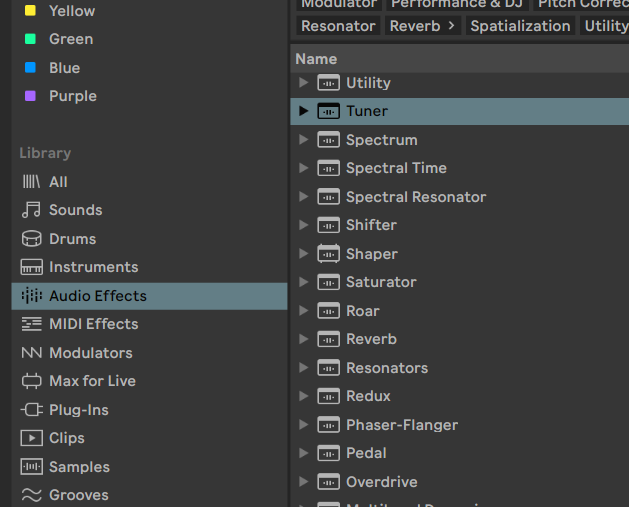
The tuner with the simpler:

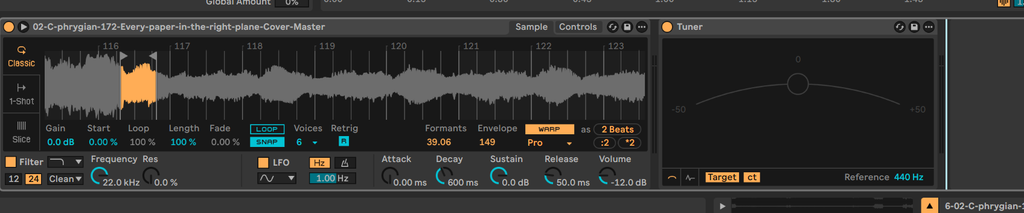
Now send a C note by pressing a using the keyboard with midi and arming the track. You’ll note that we got lucky and the simpler is already in key!


In other cases, you would want to click the controls section of the simpler shell (the tabs on the top) and would transpose the simpler until the C midi trigger sends a c note.

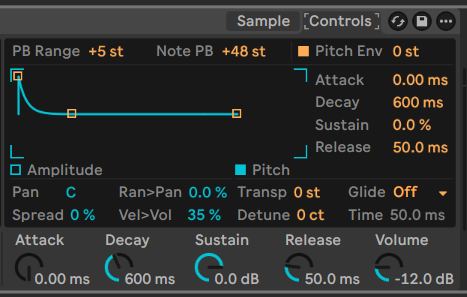
The simpler is a very powerful instrument that I’m still learning details about after years of using Ableton. For today, we’ll play around with it a little bit and will sculpt our sampled sound a bit to make the sound more interesting.
Let’s start out by putting some midi notes into a clip – highlight four bars on the simpler’s track and press control+shift+m to insert a midi clip. We’ll drag the loop marker like we did with midi before to create a two bar loop this time:


Click somewhere not on the midi clip (a gray area in arrangement) then click the top of the clip to see the looped region of the clip in MIDI and add a few C notes on the first bar:

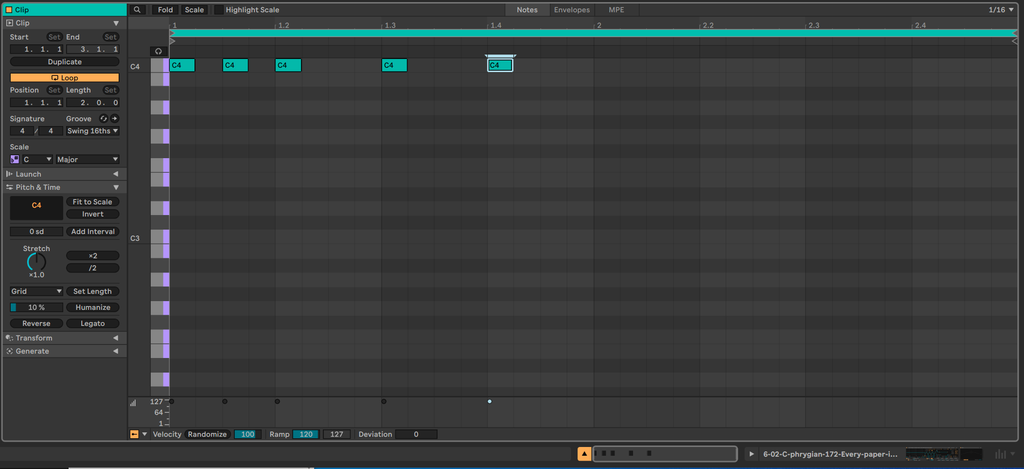
Next, press shift tab to return to the device, go to the controls and alter the volume to be -6 instead of -12 making the simpler louder.

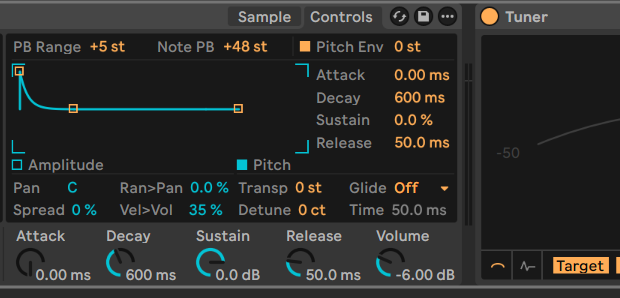
Now press space and give the track a listen – we have these punchy little bits that stab in when the simpler triggers, nice! Duplicate the midi and alter the notes on the duplicated clip to be lower by clicking in the midi clip, pressing ctrl+a in the clip and then shift+down to move the notes down an octave:

Now hold down control, select the first clip, and drag it to copy it to have the final 4 bar section have the higher notes again:

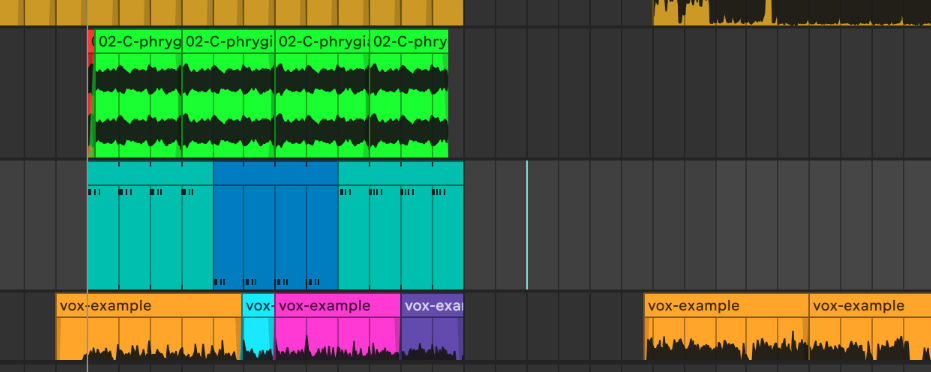
Now we have another part with some high then lower then high notes again using the simpler. Let’s play a little more with the controls in the simpler to see if we can juice up this sound a bit. A great way to add juice to sounds is with the filter. From the controls shell on the simpler, turn up the resonance, adjust the filter move the filter around until you hear a sound that you like. I found this to be a nice moment:

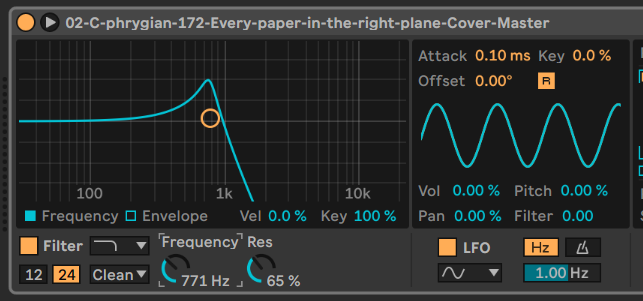
That sounds pretty cool. How about adjusting the LFO to modulate the filter? Turn the filter value on the LFO section so that it’s not 0.00:

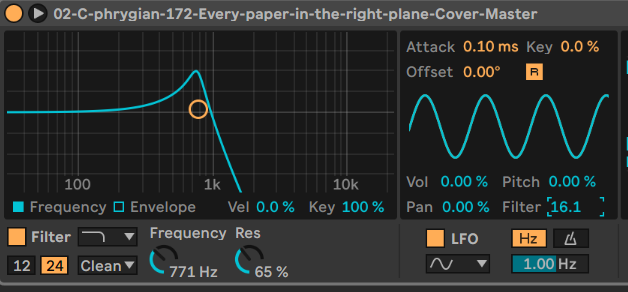
This is sounding pretty cool now, but there’s still some cluttering going on between the sampled instruments. Let’s see if we can clean that up with a little finishing touch using the EQ3. Take an EQ3 and add it onto the green track with the second added sample and EQ down the mids and tops a bit to leave more space for the simpler that we have taking up that tonal space. I tried this out and ended up with the following setting:

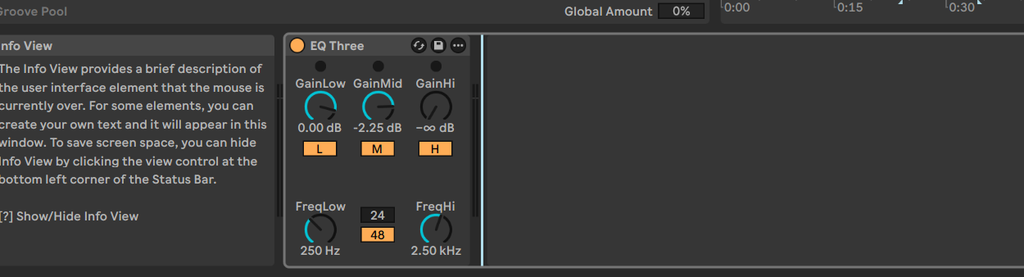
Now if you listen to it all together, you’ll have a nice little rework piece of the mashup we made earlier:
Exercises and wrap-up
This little exploration of audio may have opened your eyes and ears to the possibilities of what you can do with what is included in the box in Ableton Live Intro. With just a few of the included devices that come with Live Intro we’ve got the starts of compelling flips of existing tracks and we only touched a couple of the levers that are there. We didn’t even mess around with reversing audio, cutting and pitching audio (well, we tried but it didn’t work out in this example) and we only tried modulating the filter parameter with the Simpler.
Exercise #1 – Explore simpler
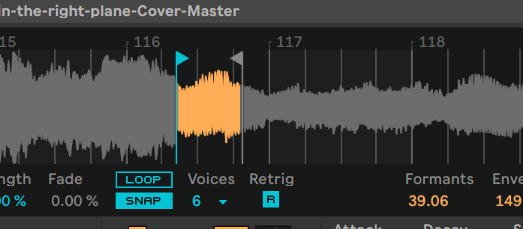
As we’re just scraping the surface of what you can do with simpler, I strongly recommend you play around with adjusting the sample by dragging these markers around:

and also adjusting the modulations with different LFO shapes besides the sine wave, and assigning the modulations to other destinations besides the filter:

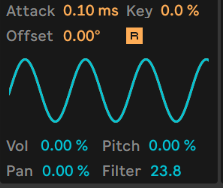

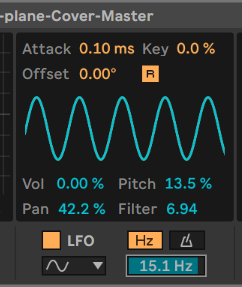
You can also try putting different samples into simpler – we’ll get into some really basic synthesis in this intro which can later be resampled again with the simpler or sampler. The effort you put into mastering the simpler pays dividends over time because it can add layers of complexity to things that already sound cool!
Exercise #2 – Break down some drum beats
Do the exact same thing we did when breaking down my basic drum beat into kick, snare, and tops except with premium drum loops from splice or sound packs. This is something that will make your music much more danceable over time. Add a bass sound to the drum breakdown and play with building basses on top of drums like we did in part 1. I strongly recommend you regularly break down some sample packs into their parts to listen to the different bits and pieces and mechanics of rhythms that you find interesting and exciting.
Break down some loops in different genres (don’t forget to set your project BPM when doing this) and pay attention to where in the parts of the beat go. Later, if you are creating your own drum beats using midi having some memorized drum patterns will help you immensely to get going quickly.
Exercise #3 – Make some mash ups and edits
Try making some mash ups on your own by taking instrumentals, vocals, and drum packs and integrating them just like we did for for the first part of the lesson today. You will have an easier time if the vocal and instrumental are in the same key and are close in BPM but don’t be discouraged from trying something crazy – sometimes you can find a really interesting pocket when things don’t fit right away.
Some extra encouragement
You’ll note that I didn’t necessarily make the sickest beat today but that is a part of practice. You don’t make something awesome every time you open the DAW. You are going to make a bunch of terrible sounding beats when you start out. If you keep at it and do these exercises consistently, over time you will get good and will eventually be producing songs and beats that you are getting excited about.
I wrote this tutorial in just a few hours and the songs that you hear that I’ve released were produced over weeks and months of time. The first session on a track just a part of the process; over time, you will learn how to really start good tracks by working on them for longer than just 2-3 hours. Those all-day sessions usually are the ones that end up being the music you are proud to release. Don’t give up if you’re not happy with your results the first couple times you do this, it takes a lot of effort, practice, and consistency.
References and resources
I learned all of this from my teachers and can not take credit for what I’m teaching. If you want to learn from the people who taught me, please check out the following masters curricula (in chronological order of when I discovered them):
For more learning resources, you can check out the Patreon pages for some folks I follow (in alphabetical order):
I’m presently unavailable for lessons, but you can try the Producer Dojo, Encanti, or Gravitas Create for facilitated options and my friend Cryptochronica is also providing lessons. If you know me, and I’m forgetting you’re offering lessons, let me know so I can add you.
For those following along, check back for the part 3 exercise.
The lessons so far: