


We have created a simple PowerShell script to automate the rendering of Ableton projects. You can check it out on the Ableton-renderoor GitHub project page.
This very basic script will find all .als files in the subdirectories of the folder where the script runs, will open each project in Ableton, will then press Ctrl+Shift+R to render the project, will accept the prompts and then will wait until rendering is completed and then move on to the next file.
The script is extremely naive and has the following caveats, it:
- Only works on Windows (because it uses PowerShell) but we may create a Mac automator script in the future
- Has zero logic for filtering files, simply renders all als files including clips and backups
- Has no logic for output folder, the last folder you rendered to will always be used
- Minimizing Ableton will cause the script to fail, unexpected dialogs and prompts in Ableton will cause the script to fail
- Has fixed logic for how long it waits to render the projects
- TLDR; lower your expectations for now.
With those limitations in mind, I’ll give you a quick overview of how to use the script.
Usage
Before running the script, open Ableton and render a project to the folder you want the script to output to. You do this because the script does not currently have logic to set the base path that it will output to.
- Download the PowerShell script and place it in a folder with Ableton project files
- Open PowerShell
- If you haven’t before, call
Set-ExecutionPolicy RemoteSignedfrom within PowerShell to enable script execution
- If you haven’t before, call
- Run the script
ableton-renderoor.ps1
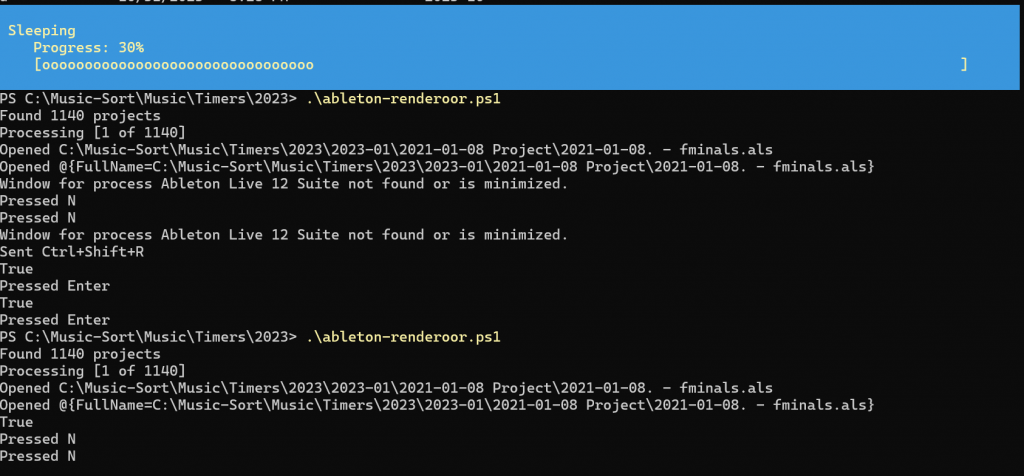
When the script runs, it will tell you what it’s doing and will present some information relevant to how far along the script is processing.
At the start of each file render, it tells you how many files it found and how far along through the files the script has processed:
Found 1140 projects
Processing [1 of 1140]
While the script is waiting for a process to complete, it will present a progress bar on the top of the window indicating waiting time between automation steps.

Notes / Modifying the script
If you’re interested in modifying the script to just use a specific set of files, replace line 28 with the following:
$files = @(
"C:\path\to\project.als",
"C:\path\to\project2.als",
"C:\path\to\project3.als",
)
and replace line 40 with the following:
$name = $fileThis will let you just render a specific set of files. You can find the files in your current folder in a format that works with the script with the following command:
Get-ChildItem -Path '.' -Filter '*.als' -Recurse -File | Select-Object FullNameAfter getting the list of files, you can manually edit the output or can pipe the output to a text file for easier editing:
Get-ChildItem -Path '.' -Filter '*.als' -Recurse -File | Select-Object FullName > projects.txt